Pages

Thursday, 22 December 2016

Special Delivery!


Hello and welcome!
Jennie here today sharing my second project this month.


I decided to go back to basics for a quick Christmas card again using some non-Christmas stamps.


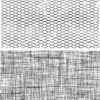
I started with a piece of cream cardstock and stamped it with the Tim Holtz Mesh stamp using Antique Linen Distress Ink.


I then overstamped with my absolute favourite stamps. I have used Vintage Photo Distress Ink but stamped off onto a piece of paper first so the stamping is not too dark.


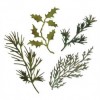
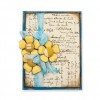
I decided on a couple of simple embellishments. The letter box was fussy cut and layered up with foam pads. The holly leaves were dabbed with Peeled Paint Distress Ink. All very basic!


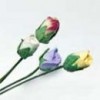
I then layered everything up onto a card base and added a couple of small flowers. Finally I worked some Stickles on the postbox, flowers and holly leaves to add a bit of dimension and a Christmassy feel.


A fairly quick and simple card but which was much appreciated by the person who received it.

Thank you for joining me today and I'll take this opportunity of wishing you all a happy and peaceful Christmas.

Jennie x


Tuesday, 20 December 2016

Christmas Ornament

Each Christmas I add to my collection of small plaques and this is the latest one!
I started by brayering white paint to a board. I really didn't want a perfect finish because it adds to the grungy nature of the finished article:
Then I used a dark blu paint through a snowflake stencil. The paint bled slightly under the stencil, I don't mind that but I know you might!:
Next, I stencilled white paint over the blue. Just move the stencil a couple of millimetres in a diagonal direction so the blue becomes a shadow:
I then lightly sanded the whole board and added brown Distress Ink to the whole piece, paying attention to the edges:
The next step is to make the bauble. I painted a little Metallic Glaze to an area on some white card and then stamped two baubles on the card, one on the Metallic Glaze and one on the plain card.
On the plain one, colour the bauble in with paint, crayons, pencils, ink - whatever is your favourite medium and cut it out. Turning your attention to the one on Metallic Glaze cut out the top and the centre stripe.
Adhere the bauble, add a sentiment and doodle a white line border. This might be plaque for me but it could easily become a card, journal page, tag or anything else you fancy!
Thank you, as always, for popping by,

Thursday, 8 December 2016

Believe


Hi Everyone, Jennie here with you today sharing a Christmas card using quite a few non-Christmassy elements! I am not a great buyer of themed products (sorry Susan !) but do like to think that my stash can cover me for all seasons and events throughout the year!


For my background, I started with some cream cardstock and Vintage Photo Distress Ink along with a collection of small Tim Holtz stamps. A little blending around the edges and some through a layered stencil finished it off. I then cut it into three to add a little more dimension.


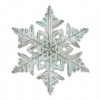
The snowflake die was cut in cream cardstock and painted with Brushed Pewter Distress Spray Stain. I painted rather than sprayed as I was really wanting a "here and there" look! I spritzed it with a pearl mist spray to give it a little shimmer, although you can't really see that here.


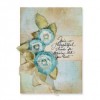
I have used the largest of the Tammy Tutterow Shabby Posies die to create this flower, spritzing with Candied Peel Distress Spray Stain before scrunching the flower up to dry. Click the link HERE if you want to see the tutorial on my blog for a similar flower. The stamens in the centre were sprayed with Fossilised Amber  Distress Spray Stain for a more Christmassy look!

The leaf cluster is from another Tammy Tutterow die set - Pom Pom Posies. I blended Peeled Paint and Vintage Photo Distress Ink all over before spraying with more shimmer mist.


Finally I stamped a sentiment on one of Tammy's Frayed Tabs (these are fast becoming my most favourite die!). Again a little Vintage Photo Distress Ink around the edges.


And then it was a matter of layering everything up!


So ..... my Christmas card using non-Christmas stamps and dies! .... well apart from the snowflake!

As always thank you for joining me today!

Jennie x


Tuesday, 6 December 2016

Three Christmas Tags

You are probably aware by now that I am a huge Christmas fan and that I treated myself to the new ElenaZinski stamps as a very early Christmas present! I am really glad I did as these stamps are incredibly versatile!
I started by using some previously made backgrounds  on card that were left over from a previous project (I tend to save everything as you never know when it'll come in handy!) I made the backgrounds by layering paint with a brayer - this was it in pink:
And this one in blue:
I then stamped a tag shape on the card and cut them out:
For the figures, I stamped them on to card, coloured them in and adhered them to the tags. 
For the girl holding the candy cane I scored each side of her arms with a craft knife so I could feed the cane between them so it looked like she was carrying it. All that was left was to add a sentiment! It was such an easy make that could easily be turned into a card or invitation but mine are, unsurprisingly, gift tags - just 20+ more to make!😉