Pages

Friday, 26 May 2017

This is Art

I am really enjoying adding pages to my journal that I'm just letting happen without planning them out beforehand. I tend to grab the nearest paints, inks and stamps to hand and just see what happens!
My favourite colour combination is Bourgainvillea and Beach Hut with Snowflake so those were the nearest paint colours! I started by putting my favourite pink on the page (the tape is there to protect the opposite page) with some white paint using a paintbrush:
Using an old gift card I put more pink and white on in a random pattern. The colour looks different thanks to sun going in and out on a very cloudy day!
I added blue through a stencil:
Then I added all the stamping to the page using Everything Art 03 for the main images and Zinski Art 01 for the chains. I stamped the large circle and two paintbrushes on some card and coloured them in.
As a final flourish I added a sentiment to the bottom of the page (highlighted in white pen). To make the sentiment, I build up the words on an acrylic block so I know they will fit before I stamp them. Remember to build the word backwards! I used Everything Art 05 - I LOVE this alphabet!
And that is that! I hope you like my journal page - do share your pages made with what you have to hand!

Monday, 22 May 2017

Summer gardening card.

Hi. It's Brenda here with a card and a cabbage from a set of stamps I fell in love with straight away as soon as I saw them.


Recently I treated myself to this set of gorgeous vegetable stamps and a stencil designed by Scrapcosy, released through PaperArtsy.


I started the background by painting it with revive chalky paint mixed with a little paynes grey media fluid acrylic. When it was dry I stamped a watery wash of sap green acrylic using an acrylic stamp block and to finish I monoprinted titanium white acrylic using a piece of card.


I stamped the cabbage onto oyster coloured card using olive archival ink then painted it with shabby shutters DI, the edges were blended with iced spruce a the most tiniest amount of peeled paint distress oxides.


The gardening label was created by swiping modeling paste through the stencil and when dry I spritzed it with water and rubbed in sap green acrylic, dried it again and spritzed it with water and dropped on some paynes grey. I finished the background with a fine brush and a little more sap green before replacing the stencil and sponging through titanium white to bring the lettering back to life.


I know a couple of keen gardeners who would love to be given a card like this and it's not that difficult to make is it?


Don't forget click on any of the product images below to be transported over the the CVC shop to see the prices - (they are very good you know).

Thanks for stopping by.

hugs Brenda xxx


Tuesday, 16 May 2017

Wine gift tag using Tim's Framelits tag collection

Hello, its Jane here and I am popping in to share a really quick, simple thank you wine bottle gift tag I made for a friend. 
I recently bought the Tim Holtz Framelits tag collection from the shop. I have had my eye on it for ages and took the plunge. This is the opened pack, you get lots of sizes for your money and a great bookplate die too.

 I make lots of large inky backgrounds and often have pieces left over which I thought I could make into tag bases.
Here is one such piece, just mopping up after using the amazing Distress Oxides.

I used the largest die to cut my tag...it's the size of a normal #8 tag


I used a scallop circle to cut the opening for the bottle neck.


I then used my mini Tim heart stencil, I love these smaller versions.


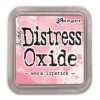
I added hearts using broken china and worn lipstick oxides. I also added some vintage photo to the edges.


I used another of the dies in the set to cut a book plate label. I stamped and embossed "thank you" in blue and added 2 shiny brads.

And here is my finished wine gift tag...simples 😉

The recipient loved it ...and the wine too 😋It was a thank you to my friend for looking after our cat when our grandson was born 3 weeks ago. If you like baby photos there are lots over on my blog here today
This is really quick and easy way to make a thank you card and pressie all in one go...nothing to wrap up either...win win in my books.

Thanks for stopping by,

Back soon,

Bye for now,

Jane aka Jane's Journal

Sunday, 14 May 2017

Tiny House

I am thrilled to be able to share my little house with you today.
It was such a lovely project to make and I know you'll have fun customising your own versions! This house is tiny so I used a simple image rather than make it look really cluttered - there is a larger die on the plate and that one lends itself to a busier finish.
Using a smooth heavy weight watercolour paper I die cut the smaller of the two dies on the Tiny House die (you'll need to do this twice) and then painted it pink using an old gift card. Try and aim for an uneven finish (like the one on the left) as it gives you a more interesting result in the end.
Add a thin layer of white paint over the top (using the old gift card)
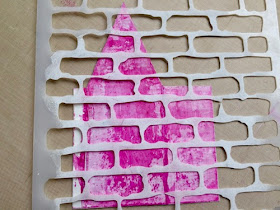
Put a brick stencil over the top and, using white paint on some Cut-N-Dry foam, add some bricks! I used a Wendy Vecchi stencil but you could use one from Tim Holtz.
When you've done this it will look like this:
I liked this finish but as I like things a little more grungy I sanded the piece and it then looked like this:
Now, at this point I got so excited making the house I forget to take photos (doh!) but I did the following steps:
  • glue two sides together and add Vintage Photo Distress Ink on all edges
  • lie the project flat on your desk and carefully add the numbers to the bottom of the house in a continuous run
  • complete the construction of the house
  • stamp the butterfly image on some tissue paper; cut it out and adhere to the front of the house. Where the image goes over the edges make sure you use use them to help the house stay glued
  • choose a sentiment using some stickers; edge with Distress Ink before adhering to the house
  • adhere a star to the front
For the roof I die cut several strips of watercolour paper. I coloured them with Broken China Distress Ink and edged them with Vintage Photo Distress Ink. Starting at the bottom of the roof I adhered sections of the strips building up the roof tiles. You could make the tiles any shape - how about triangular?
Glue the roof to the house and you're finished! This is the front of the house:
This is the back:
I love this little house - and the bigger one is just as fabulous! I've made a mini village!
Thank you for joining in with me today - Gabrielle x


Friday, 12 May 2017

Card with Flower Garden by Tim Holtz

It's Monika here again
with a floral card.
You know the theme of our May challenge
 over at Country View Challenges: 

So here is my card with Tim's flowers.


Right now I just want to show you how you can make a background like this.

I painted blue a heavy weight cardstock (300gms/140lb).


After drying I stencilled with Tim's Burlap stencil and modelling paste.


After drying I took a toothbrush and grey paint, and I painted some stripes onto the card.


After I smeared Amsterdam white acrylic paint. You don't have to thin this acrylic paint with water because - I'm sorry to say this - there's hardly any pigment in it.


For the flowers I used Ranger Silver Pearl embossing powder and I coloured with watercolour technique.


What I used:

DecoArt Americana paint (Spa Blue, Neutral Grey, White Pearl)
Amsterdam acrylic paint (Zinc White)
Ranger embossing powder (Silver Pearl)
Ranger Distress marker (Worn Lipstick, Mowed Lawn)
Sizzix Thinlits Die, Handwritten Celebrate by Tim Holtz
Sizzix Thinlits Die, Alphanumeric (3/4") by Tim Holtz


I hope you like it! Happy crafting!


Monday, 8 May 2017

Watercolour oxides.

Hi Brenda here.

I recently had some fun making up a masterboard with some of the oxides and gesso to produce this set of small (4x4) cards.


Take a piece of card that will take watery layers and dip it in separate washes of spiced marmalade and worn lipstick distress oxides and also a wash of fired brick distress ink. Dry between each wash.


Next mix some gesso with water and create another wash and dip it into this and heat dry. Depending on the size of your card you may need to do this quite a few times (my card was A4 size). Now you have a soft shabby feel to the background.


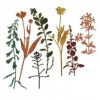
Cut the card to make backgrounds for whatever size card you are making - I decided to do some small cards and make them into a set to sell. First I chose the wildflowers stamps and dies to use and practised the watercolour technique with the oxides on a stamp, misting it and stamping to see what effects I got. Love it.


So with core'dinations cut flowers, the oxides, walnut stain DI and greetings made on the computer I set to work.


If you haven't tried using watery gesso for the shabby look or even to tone down colours you're not sure of it's well worth a go.


Thanks for stopping by.

hugs Brenda xxx