Monday, 9 December 2013

Sailing today

Yes, today I'm having a break from Christmas and going sailing - on my tag that is, lol...


I started off by painting my tag with white gesso and then three coats of Beach hut Fresco.


Using white ink, I used stamps from Tim's Classics #1 and Artful tools stamp sets. The yacht is from the Marianne Creatables Classic boats set. All the die cuts and the tag itself have been stained with Vintage photo and edged with Diamond Stickles. I finished off with some American seam binding through the tag loop.


Have a fab week!

Chris xxx


Friday, 6 December 2013

Santa .. please stop here ..

Well it is that time of year where Santa and all his secret helpers are busy and where all those little peoples thoughts are turning to what Santa will bring ! ( where as maybe the helpers are a little more worried about how quickly it is arriving....and the children cannot wait for it to get here faster!) .So my make today is for a door hanger to make sure that Santa stops!

So here is my make :


and just in case red is more your colour :


I started off with a plain wooden door hanger and gave it a good coat of frayed burlap Distress paint, when dry I added a coat of paperartsy crackle glaze and then added a coat of nougat fresco on the top. This gives a really great crackle when dry...


I then edged the whole hanger in Distress ink to coordinate with the colour , I know he favours a red suit but I am a blue girl at heart! To add to the layers I stamped some snowflake style stamps, coated with sticky embossing powder and gave a liberal coating of distress glitter, rock candy flavour! 

I have to say I do love the sugar coated sparkle this gives. ( just harder to capture on film!)


Then onto Santa, well I have to say I have fallen in love with this gorgeous vintage Santa from the old fashioned Christmas set , from Tim Holtz. So I set about stamping him in jet black archival and using a water brush and yummy Distress markers to colour him in.


and red :


I added a little sparkle to the trim of his hat, sleeve and buttons, using rock candy distress glitter.

To finish I added the wording in black archival using the Tim Holtz lettering set , worn text set. 


Well hope you like my festive make ...and that Santa pays you all a visit when the time comes!

keep those fingers inky!
trace x


Wednesday, 4 December 2013

Holiday Joy

This tag is made with the Tim Holtz Holiday Joy Framelits set which are stamps and dies that fit together. (Hence my title).


The background was a mop up from another project using faded Jeans and Brushed Pewter Distress Stains – smooshed on the craft mat and the tag dipped, spritzed and dried until I was happy with it. Over that I stamped a text stamp (I used one that had been sitting on my desk and I’m not sure where it is from) with Wendy Vecchi’s Watering Can Archival Ink and when that was dry I sprayed Dylusions White Linen ink spray several times drying inbetween bursts.


The trees were stamped using two sizes, one from Mini Holidays 2 and the other from the Framelits set and again I used the Watering Can archival but mixed it with Olive Archival giving me the two tone look and creating a forest.


I stamped the deer onto a piece of blue distressed patterned scrap of designer paper which can’t be seen now I have die-cut it and edged it with Walnut Stain Distress Ink. The stars were stamped with Embossing Ink, covered with sticky embossing powder and then quickly sprinkled with Glamour Dust when it was hot and sticky. I then die-cut them and blended Walnut Stain over the top and gently wiped the sparkly snowflake with a damp baby wipe to reveal the glitter again.


I extended the tag using  a piece of card with a very similar snowflake on it, I think it was from MME. The sentiment was stamped using little stick alphabet stamps, cut into a pennant and edged with gold stickles.

I can't believe we are in December. Our outside lights are up and the trees are bought - I just need to find some time to get them in and decorated. I hope your preparations are going well.

Enjoy the rest of the week.

hugs {brenda} x0x


Monday, 2 December 2013

Christmas ATC

Today's ATC has been made predominantly with mini Movers & shapers and scraps!

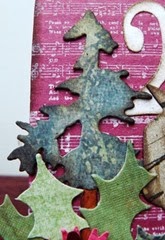
I started by cutting an ATC from burgundy coloured card and stamping it with white pigment ink. Tim's small music sheet from his Mini holidays #3 stamp set is ideal. Next came the pine tree and numbers cut from card scraps and lightly inked around the edges...


Next, the reindeer and holly which are from the same Movers & shapers sets as the pine tree and the number 25. The flower which tops the holly can be made from any dies or punches - I've used one already made up from my scraps box but if you're just starting out the 'Tattered flower garland' strip die is ideal and an absolute stalwart for your toolbox...


The finished ATC...


Have a great week and thanks for stopping by,

Chris xxx
www.mycornerofheaven.com