Wednesday, 14 September 2016

Seth Apter Workshop

Five of us from Country View Crafts gathered together a while ago to attend a Seth Apter workshop organised by PaperArtsy as a retailer day. We each had a binder to cover with layers of paints and pages on which we created backgrounds to take home as an aide memoire so that we can explore them out our leisure.

Using Seth's stamps, stencils and die-cuts and PaperArtsy Fresco Finish paints we had a memorable day composing, layering and producing mixed media layers on the covers of our binders. here are some of them.


Seth Apter Journal - Addicted to Art


Susan


Claire


And all of us with Seth


Monday, 12 September 2016

New Workshop info

Hi it's Brenda here and I want to give you heads up that the newest workshop is now available on the shop website and I've called it Double Trouble, just because there will be two projects this time around.


If you fancy a day of playing with arty layers of paints and creating a gorgeous frame for Autumn as well as having a bit of fun making a small Halloween shrine then Saturday the 1st October is the date for you to come along to Country View Crafts Headquarters and have some fun. I'll take you through some of the details.


The recesses in the frame contrast to the frame itself but continue the same autumnal colour tones ....


... and there is some stamping added not just for interest but to bring the theme of the project together.


When we've finished the frame we will move onto making up this sweet little shrine using DecoArt fabric stiffener to give a very textured frontage.


With some Tim Holtz die-cuts and embellishments.....


 ... we will decorate the frame and inside to complete the look.


This is a very sturdy shrine and stands beautifully on a shelf or windowsill. Perfect for when the 'trick or treaters' come vising at the end of October.


This workshop is now available to book for October 1st 2016 on the Country View Crafts website - just click HERE for all the details. I would love to see you there but there are limited places and of course it will be first come, first served.

Have a great week.

hugs Brenda xxx

Saturday, 10 September 2016

Summer Journalling

A2A - Lin Brown, Emma Godfrey PaperArtsy Fresco Acrylics and stamps
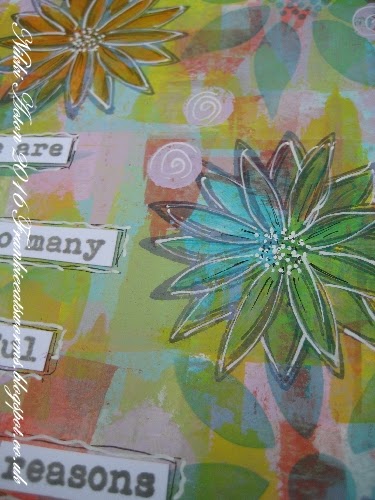
Hi everyone. I am slowly getting into doing a bit more for my journal. Today I am sharing a page created with PaperArtsy Fresco acrylics with Lin Brown and Emma Godfrey stamps,

I started by creating a background of various colours using a credit card to scrape paint across the page.
Once I was happy I added some stencilling with archival inks. I used one of Lin Browns stencils (link below).
Next to the stamping - again Lin Brown designs...
I then went back to my paints and added additional colour to the flowers, using translucent colours so some of the background contrasts remained. .
Once dry I took my white and black pens and added some highlights and stamped words.

Nikki


Thursday, 8 September 2016

Film Strip Fun

Hello to you all, Jennie here and welcome to my first project this month. 

With drama being a great passion of mine I fell in love with Andy Skinner's Old Film Mask the minute I saw it! So here is it's first outing.


I started off with a blank gessoed tag and added some tissue tape and then used the bottom part of the stencil and crackled medium to create the layered film strip look. (Don't you just love that inky fingerprint !! - not ....)


When dry (and I always let cracke dry naturally) I sprayed the tag with Vintage Photo and Faded Jeans Distress Spay Stain giving a really heavy burst in the middle of the tag. Amazingly this dried disappointingly light by the time I had finished my tag.


I then used the top part of the stencil to create a little bit of texture on the top of the tag - I used both Faded Jeans and Vintage Photo Distress Ink but it really is quite light and again dried even lighter!


Then I added a little stamping - and my apologies that the stamps I have used are not in the shop, but hopefully soon (Andy Skinner's Chateau).


By the time I woke the next morning the inks had dried quite light so I added a vial label and some rub ons.


And finally .... a little collage using one of my favourite Photo Booth photos.


A neat little masculine tag which I think would be good to recreate in a card for a male family member.


Thank you for joining me today!

Happy Crafting!

Jennie x


Tuesday, 6 September 2016

She's a dreamer

Hello! Can you believe that it's September already? It doesn't seem five minutes ago we were welcoming Spring! I wanted to make a bright a lively tag to counteract the dark night creeping in!
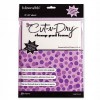
I started with a black tag and covered it in a haphazard layer of white paint. I then took tiny amounts of Paper Artsy translucent paint and rubbed it on the tag with Cut and Dry foam. You can see that the white underneath makes the colour pop and because I started with an uneven layer of white over black you can see areas of shade.
I added a layer of white paint to the tag just to calm it down a little and then using a light layer of grey paint I stencilled the face. I waned her to look as if she was emerging from the background so I used a light layer but you can use lots of layers or black to create a stronger image.
To finish the tag I added stamps, painty marks, an outline in pen and a quote. I didn't think it was quite finished so I added some blue paint and water to a spray bottle, give it a good shake and then sprayed that mixture on the tag. It just gives a final bit of interest...!
Thank you, as always, for popping by