My project today is an altered shadow box frame and more of
those scrummy Tim Holtz goodies – I am so looking forward to when Susan gets the
new CHA releases into the shop – but I feel a huge spending spree coming on
lol.
I started by cutting a piece of corrugated board to the size of
the frame aperture, pulled some of the first layer off of it then coated it with
some ordinary white household emulsion paint.
Next I tore up some dictionary and music papers and stuck a few
bits on with matte medium.
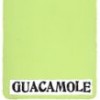
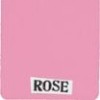
When it was dry I started to add some Fresco Finish paints
(Snowflake, Rose, Guacamole, Beach Hut) and with brushes, a wet wipe and lots of
water I dabbed and dripped the paints and sprayed them with water to merge
them.
I started to plan the design on the board and gathered bits and
pieces together that might work.
The tag was from my mop-up file which had some dipped distress
paints on it, so I reached for one of my favourite text stamps from the Papillon
set and stamped across the whole of the tag using picket fence distress paint.
Of course you must clean your stamp straight away before the paint dries.
Then I blended distress inks over it to fill in the gaps.
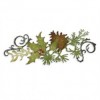
The flowers were made with crinoline died with distress inks and
put through the tattered florals and tattered floral garland dies.
Don’t they give you the most amazing shapes and dimension? I
edged them with a little walnut stain ink to give them a more vintage look.
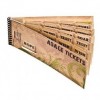
You can see I added a ticket and stamped pen nib.
The clock face was cut from a Tim Holtz paper stash and added to
the weathered clock die-cut.
The beautiful vintage lady is a free download.
The centres of the flowers are gem brads but they looked too
shiny so a dabbed some antique linen distress paint on them.
When putting the collage together I chose a number of additional
small pieces to fit with the original bits, including some that I keep that
weren't used on other projects.
I haven’t altered the frame yet but I intend to give it a coat
of paint with crackles and some ‘worn’ edges.
Have a wonderful weekend and happy crafting.
hugs {brenda} x0x





Fabulous project Brenda! The softness of the lovely colours is just wonderful - I love the mix of colours you have used. I can't wait to see the frame when altered! Jennie x
ReplyDeleteCardboard never looked so beautiful! Love the steps to pure gorgeousness! Hugs!
ReplyDeletethis is just fabulous
ReplyDelete