This box can be used for storing treasures of any description or as a very special gift box...
My box is a 6" x 6" box but you can make yours whatever size you like. Start by cutting the pieces you need for your box from thick card. Next, cut mount board panels for the top, bottom and sides (6):
 |  |
You will need coordinating backing papers for the outsides (6 pieces) and the insides (6 pieces). The papers for the outside need to be larger than the panels to wrap around them:
 |  |
Glue the box sections together. Edge the inside backing papers with Brushed corduroy DI and a blending tool before lining the inner sections:
 |  |
Then glue the box together:
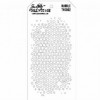
Cover the mount board panels by wrapping the papers around them and gluing behind. I've used Tim's Bubble layering stencil and Grunge paste to create areas of texture on the panels which have been coloured with Evergreen bough DI. The panels have all been edged with Brushed corduroy DI to age them:
 |  |  |
Choose what stamps you want to decorate with - this set is Tim's Urban chic collection, used with black Archival ink:
 |  |
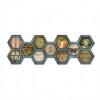
For my decorations I've used various Movers & shapers (I'm a huge fan) and one of the recent Frameworks dies. Inked, edged, some glazed, you can have lots of fun - see how the composition is building?:
 |  |  |
White pre-made flowers (especially roses) are a blessing as you can use Tim's stains and inks to shade them whatever colour you need. As the backing papers are a mix of red and greeny blue the matching colours for this set are Evergreen bough and Barn door. With DI dabbed here and there, the roses were then misted to allow the colours to run and blend. Whilst they were drying I cut out a selection of leaves in white and coloured then with the Barn door DI to match. The leaves have been edged with Brushed corduroy too:
 |  |
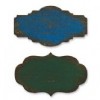
The word 'discover' has been used from Tim's Botanical rub-ons, directly onto a mini styled label. Here are the top, front/back and left/right panels composed:
 |  |  |
Finally, we glue the mount board panels to the box sides. This is the front/rear:
The left/right side:
The top:
Inside:
Finished:
Why not brighten someone's day and make a box for them?
Have a great weekend and thanks for visiting!
Chris xxx




FABULOUS Chris! So beautifully constructed and decorated fantastically. Jenny x
ReplyDeleteA wonderful box and great step by step too - something a bit different by way of construction. Love it.
ReplyDeleteOh wow Chris, I love making boxes/blocks and this one is fantastic and I love the way you have decorated it. Anne x
ReplyDeleteLove making boxes & chunky ATC's at the moment. Seeing your make has made me smile, everything about it is perfect:-) xxx
ReplyDeleteOh my this is wonderful I am in awe of your 3D creativity xx
ReplyDelete