Pillow box design no.1. (my favourite but don't tell anyone !) - uses photo booth and thinlit flowers
Pillow box design no .2. - uses butterfly stamp and die set.
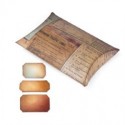
So for both boxes I die cut the pillow box die from card stock , I always use off white/ ivory as I love the way this colour takes the ink. I then combined distress spray stains and distress stain but all stains or all sprays would work fine..
so here goes ...the steps :
I applied the colours to my craft sheet , misted the pillow box die cut and then swiped through the puddles of colour and dried with my heat tool.
(I also took a spare piece of card and did the same to mop up the spare colour, I heat dried this and then dipped in again to create a splattered look , dried and set aside to use for part of the second box.)
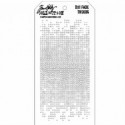
i repeated this stencilling using the dot fade stencil and dried marigold distress ink.
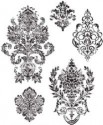
Now I added some stamped detail , again using dried marigold and using one of the distressed damask stamps unmounted - by rolling using fingertip, you can use just part of the design of the stamp.. i did this in some random areas on the die cut - building up the layers.
So here is the finished stamped and stencilled box die cut and the other bits I thought I would use..not all made it - can you spot what I didn't use?
I dyed some seam binding to co-ordinate by spritzing it and dipping it into some stain on my craft sheet , scrunching and leaving to dry over night.
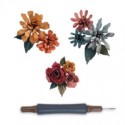
Now for the flowers , I coloured a small piece of card , as I did for the first layer of the box, using stains , dried and then die cut three of the new Tim Holtz thinlit tiny tattered florals...love these!
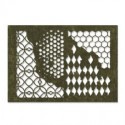
Now to complete the box I added a piece of the harlequin mixed media die cuts, that has been coloured using dried marigold distress ink and edged in walnut stain distress ink to the box die cut. I also glued to box into its final shape..
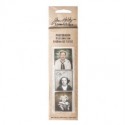
I added the dyed seam binding...a photo booth card that I had sanded and scuffed and inked with walnut stain distress ink, a chit chat sticker and finally the tiny tattered flowers.
Now for pillow box number two... I coloured the base die cut as for box no .1.
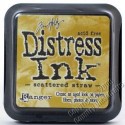
I added some stencilled layers as above using the dot fade stencil and this time using abandoned coral and scattered straw distress inks to give it a brighter feel . I heat dried and then spritzed some water on and dried. I also added some distress damask stamping , as above for box one , using tattered rose.
To brighten the colours I then added some scattered straw using a blending tool in areas to make the colours brighter for this box.
Now to add some faux bleached areas using my distress sprayer an d the harlequin stencil
Place the stencil over an area and then lightly spritz some water, leave for a few seconds then remove stencil and heat dry.
see below, as the distress ink reacts with water , this has removed a subtle amount of the colour..I repeated in a few places...as it is all about building up layers in interest.
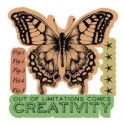
Using the mop up card from the stains , I stamped the butterfly from the limitations stamp from the framelits sets, and then die cut by using the magnetic base plate (which is great to hold these dies firmly in place and no need for messy tape !)
these dies cut perfectly...so now to add some colour to this using my distress markers and a waterbrush
I like to scribble colour from the marker onto my craft sheet and then pick up the colour using a waterbrush..
Because the butterfly is not going to be completely stuck down I coloured the back using distress ink..
The finishing touch, I added some seam binding dyed using squeezed lemonade and scattered straw
and also a chit chat sticker....I also added a highlight of rock candy distress glitter to the butterfly and here is finished box no.2.
So hopefully that has inspired you to make some boxes using stamped and stencilled layers ..wonder which box is your favourite?
So whatever you are doing ... keep those fingers inky!
trace xx










These are really lovely! Trace n such a wonderful way to wrap a gift. Thx for sharing how you created them . love them xx
ReplyDeleteOh Trace, I think I need that die now too and also the butterfly one.... sigh. These are so beautiful! Anne xx
ReplyDeleteOh Trace, I think I need that die now too and also the butterfly one.... sigh. These are so beautiful! Anne xx
ReplyDeleteWonderful Trace, love your monochromatic layers, they have so much depth! And the butterfly is lovely but have to admit I love the photobooth gift box is my fav :O)
ReplyDeleteLove These Trace!! XOXO-Shari
ReplyDelete