Pages

Wednesday, 28 October 2015

From Me to You


Hello everyone, Jennie here today, with my second project for this month. I am a great fan of 4" x 4" cards and I love to have a few ready in my card box to be able to send out for any occasion. So here is a quick make using the block stamping technique.


This is quite an exciting technique in that you really don't know how it is going to turn out ! so I find it best to do this on a piece of white card rather than directly on to the card itself. I inked my stamp block with Dusty Concord Distress Ink (taking the ink pad directly to the block) and then spritzed lightly with water and carefully laid it onto the card. If you use too much water you will get a bit of seeping at the sides - a little is quite nice though!


Once the ink has dried overstamp with some background style stamps - here I have used those wonderful text stamps from the Shabby French set and used Dusty Concord Distress Ink to keep the colours uniform, but really anything goes!


I added a sentiment and then mounted my white cardstock onto a corresponding darker piece and stuck it to the front of the card.


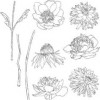
I stamped the glorious Cone Flower from Tim's Flower Garden Set and gently painted it with more Dusty Concord Distress Ink. Once I had cut it out I blended a little more Dusty Concord around the edges which gives it a bit of a finish and evens out some of my not very good fussy cutting! Finally I layered the flower with some shallow foam dots onto the card, so that it just makes the ordinary letter post here in the UK.


Another card for my card box!  I shall be making a few more using this same design but experimenting with different Distress Ink colours.

Thank you for joining me today.

Jennie x


Monday, 26 October 2015

Evergreen tree

Good morning crafters, Brenda here to share my latest Christmas card with you. Now it's been designed it doesn't take too long to make and I think I will try it again using different background colours. In real life the background on this card is a bluey green whereas this looks very yellow - obviously the light conditions have affected the photography.


Anyway to make a start take the green distress inks, smoosh them on your craft mat and spritz with water until you see small droplets form.


 Press your card into it and dry with a heat gun, repeating these two steps several times until you have this lovely mottled effect.


Die-cut the tree and flick watery picket fence distress paint over to look lie snow. Ink the edges with ground espresso.


Die-cut the mini reindeer from greyboard, ink and cover with glitter.


Stamp the background card using distress paint, then blend complimentary or contrasting inks over, then use a damp babywipe to remove it from the distress painted parts.


Assemble the pieces and complete the card with some glitter stars and a script word.


My Christmas card box is happily increasing in numbers - what about yours? If you are like me you try to keep costs down when sending cards through the post and this will go as normal letter post, so couldn't be better eh?


Thanks for stopping by today. All the main supplies I used are listed below and with just one click you can be transported to the Country View Crafts shop.

Have a great week.

hugs Brenda xxx


Saturday, 24 October 2015

Poof Boom Bang!

For my posts this month I'm featuring these fabulous Tim Holtz stamps:
Earlier this month I made a tag for my friend. This month I made a bookmark for my son that could easily be turned into a card!
I started by adding blue and green Distress Inks to the tag with an applicator. I then misted with a little water because I love the mottled finish that gives!
Next I rubbed some brown Distress Ink on my craft mat, spritzed it with water and then swished the tag through it. I didn't want a lot of brown on the tag but didn't mind it being concentrated in areas as most of it would be covered up!
I then played with the stamps to see how they would fit onto the tag, moving them about until I was happy. There are a few combinations to choose from so it took a while!
Then I stamped the first two stamps directly onto the tag because I wanted the puffs of smoke to be in the background of the image. I then stamped out the images onto cream card ensuring, when I cut it out, that I left room for the puffs of smoke. I coloured in the images with Distress Markers and added a little brown Distress Ink at the edges. As a final touch I added a little more brown Distress ink to the edges of the tag and drew a couple of lines as a border.
Thank you as always for popping by. If you like this stamp set and you'd like to see one more project there is a bonus project on my blog - feel free to pop over and see! 
Gabrielle x