I am often struck by some images and find myself using them over again and I like to mix them with ones you might not expect so this very 'grown up' image from PaperArtsy was crying out to be given a twist! So, this is a little photo heavy but this is how I made the tag (obviously you could make a card etc but I do like tags as they're very versatile!)
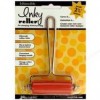
I started by adding sage paint to the tag with a brayer. This is a lovely soft colour and is a current favourite at the moment!
To add a little contrast I then used a white paint
I love layering backgrounds. I like how your eye takes all the elements in but then you still seem to see more! I wanted to add a little, subtle visual interest so added some arrows.Then I wanted to add a different layer to the tag so I added some large Distress Ink dots
The joy of Distress Ink is that you can get a whole new look if you spritz water on top so I softened the dots, giving the water a minute or two to 'bleach' the Distress Ink before drying the tag. In this photo you can see that the Distress Ink appears to be behind the arrows even though the arrows were added first. It's clever stuff isn't it?!
I knew which images I wanted to use but it's always good to line them up to make sure they'll fit! Eagle eyed people will spot that I'd added a stripy stamp to the edges of the tag!
I stamped the main image twice, cutting the lady out and colouring her (I used watered down paint but you could use Distress Markers or your favourite colouring pens/pencils) I also cut out one of the speech bubbles and coloured that. All of the images had a little Distress Ink at the edges.
The final touch was to add some final stamping in the background and some painty line (I dip the edge of a old credit card in paint) before adding the "#bestie" sentiment.
Thank you as always for popping by and supporting us. Next time I have used these stamps to make something for a boy!


great tag, Gabrielle, I love the mixture of the two stamp styles!
ReplyDeleteawesome work - I love the speech bubbles - haven't noticed them before!! Hugs Rachel xx
ReplyDeleteFantastic Gabrille great idea xx
ReplyDeleteThat's so much fun Gabrielle! Deb xo
ReplyDeleteTotally inspired - love it!
ReplyDeleteAlison x
Fantastic tag!
ReplyDelete