..... and I don't know about you but I am loving my crafting journey!
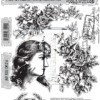
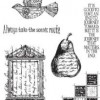
Hello! Jennie here with you today to share my first post this month using one of the lovely Lady Rose stamps by Tim Holtz to create this single layer card. So read on if you want to see the details!
I started with a piece of glossy cardstock and my favourite Tim Holtz technique: wrinkle free distress. It really is my all time favourite way of getting colours onto the page.
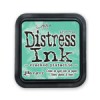
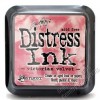
I pressed my Distress Ink Pads (Cracked Pistachio and Victorian Velvet) onto my craft mat, spritzed with water and then kept laying my cardstock into the "puddles" and drying each layer before picking up some more ink. I love the way the inks sit on the surface of glossy cardstock creating quite a different effect than on matt card.
Then I stamped the smaller of the rose leaf stamps from the Lady Rose stamp set. I used Black Archival ink on the glossy paper as I wanted to paint the roses later in the process and it does give a better finish on the glossy cardstock.
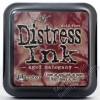
Next, a little overstamping using some small stamps and Aged Mahogany Distress Ink.
And then a little time spent painting in those glorious roses again using the Aged Mahogany Distress Ink. I just press a little ink onto my craft mat and spritz some water alongside and dip the paintbrush into the water before picking up some ink. I love the versatility of the Distress Ink pads!
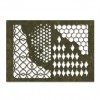
Now I had in mind all along to use the Mixed Media Harlequin die to cut the top right hand corner and I was a bit nervy doing it at this stage in the process, but I thought it would better than cutting it first and then trying to ink around the cut edges. I do think it gives a more natural finish.
And finally, when layered onto black cardstock the diamonds really do stand out!
Although this is a single layer card you could also layer over the diamonds some lovely flowers, leaves and ribbon to make a wedding or valentine's card (and perhaps a more appropriate quote!).
Thank you for joining me today.





This is so beautiful Jennie x
ReplyDeleteBeautiful card with a great 'how to'. Thank you so much for sharing.
ReplyDeleteAbsolutely love your card and your great tutorial. TFS.
ReplyDeleteBeautifully put together Jennie xxx
ReplyDeleteBeautiful Jennie, lovely watercolouring and the die cut harlequins are striking with the black card behind! Deb xo
ReplyDelete