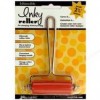
I started by scraping some blue paint on the page. I used an old gift card (and then a brayer for the later layers) but you can use whatever you prefer.
Then I added a layer of white
And then a layer of green
I kept adding layers until I was happy with the finished result (remember to dry layers in between otherwise you can damage the paper beneath)
Now for the really fun bit! I placed my stencil on the page and drew inside with the distress crayon. Then, with the stencil in place, I rubbed the crayon with my finger so it blended and took on the form of the stencil. You get a thicker line at the edge in places which adds a natural highlight so I kept those bits in! I did falling drops at the top of the page and green stripes at the bottom.
I needed a little added interest to the background so I added some stamping in coordinating Distress Inks
All that was left was to add some white highlights to the Distress Marker stencilled marks, the sentiment and the main image. The main image was stamped on to an off cut from a tag (I really like the creamy colour - I normally cover that up with layers of paint!) Using the edge of my gift card I added some gold and dark grey lines.
Thank you, as always, for popping by


Fabulous background layers and finished design Gabrielle xxx
ReplyDeletefabulous work Gabrielle xx
ReplyDeleteLovely page Gabrielle! Fab colours & I love the highlight effect of using the crayons with the stencils.
ReplyDeleteHugs
Lesley Xx
Lovely page Gabrielle! Fab colours & I love the highlight effect of using the crayons with the stencils.
ReplyDeleteHugs
Lesley Xx