Tuesday 28 June 2016

Pointing the way!

The Crackle theme of this month's challenge over at Country View Crafts Challenges has been really good fun to join in with. As the month draws to a close I thought I'd share a final project. By the time you read this the grand end-of-exams-and-16th-birthday-party for my daughter will be over! We'll hopefully have done the washing up and tidied up (but there's no guarantees!) I wanted to ask our guests to be directed to come into the garden as we might not hear the door if we're outside and so this was made!
I started by covering an arrow shape in blue paint
Then I added a generous layer of Crackle Glaze
When thoroughly dry I added a layer of white paint - the cracks appear instantaneously - it's so much fun!
I sanded the edges and added some Archival Ink. I then used a baby wipe to remove most of the Archival Ink as I only wanted a 'halo' effect. Then to decorate I stamped out the balloons and presents onto tissue paper (they would have stood out too proud on paper as I sealed the whole piece at the end and tissue paper lies nice and flat)
The word 'party' was die cut from some pre-painted tissue paper. I added some gold stencilled stars and a stamped ones as well as an arrow.
Here's the sign in situ!
Hope you have joined in with the crackle challenge - if not - there's still time!

Friday 24 June 2016

Be Fearless - tag

Hi everyone, it's Brenda here and my turn to share a design with you; I have a masculine tag today.


I began by painting the tag with both black and white gesso to create my own custom dark grey shade and let it dry. Next I gave it several washes of what I would call battleship blue which was water, cerulean blue and phthalo blue mixed together on the spritzed (with water) background. Again when dry it had a couple of washes of quinacridone gold and heat dried. Then I stamped text one of Andy's steampunk stamps in grey media paint and layered on DecoArt transparent crackle glaze and leaving it overnight to dry. You can see where the cracks have appeared .......


.... but look what happens when you paint over with media antiquing cream, leave it for a while then rub over the surface with a wet babywipe and a dry cloth to reveal the cracks even more ......

I used a square of Tando board to create the focus of the tag by adhering some scrunched up tissue paper and giving it a wash of phthalo blue paint, when it was dry I blended neat phthalo blue around the edges and again when dry a little burnt umber. I also sanded the edges and used a small brush to paint on some titanium white.

I decided to use this handsome gentleman from the photo booth collection and thought that maybe he was home from the army and enjoying a Sunday with his family .....


.... so with that as a theme in mind I gathered some embellishments, a heart and wings for courage, a star for the anticipation of being decorated, a clock and spinner to represent the vulnerability of being a soldier and how life is so fragile in wartime, the pen nib, air mail sticker and stamp to write and put on his letters home and I stamped the words 'be fearless' to create a sense of bravery overcoming fear for this young man.


I used champagne ice and iced espresso metallic lustres on the metal pieces to bring the colours of the metal together and give them some uniformity.


Here's the base of the tag with those fabulous cracks showing through.


You can see the title raised bringing it up to the thickness of the chipboard.


Thanks for stopping by today. Have you had a chance to join in the crackle challenge yet? Do pop over if you think it's something you would like to do and remember you could even use a crackle stamp it doesn't have to be a crackle medium.

Have a fabulous week.

hugs Brenda xxx


Monday 20 June 2016

More Distress Crayon Love !


Hello Everyone!

Jennie back with you today and again I am sharing those gorgeous Distress Crayons, this time in my art journal.


Some time ago I coloured these gorgeous wallflower die cuts with the Distress Crayons blending the colours with my fingers and then giving them a little spritz of water. They have been sitting on my desk just asking to be used, so I thought I would use them in a journal page.


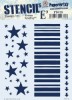
I started with a pre-gessoed double spread and added some texture using a Tim Holtz Layering Stencil and Texture Paste.


I had planned to use the Distress Crayons on the page, but unfortunately they were a bit too heavy on the textured area, so I resorted to using the same colours but with Distress Inks instead.


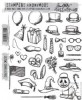
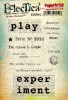
I added some stamping using some of my favourite stamps.


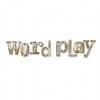
A little too late I realised that the text would be too dominant for my quote which I wanted to stamp directly onto the page, so I knocked it back a bit with a baby wipe, although it does look as though it has been out in the rain!


I then layered my flowers onto the page using foam pads at the top of the flowers to give a little depth.


Finally I spritzed the pages using the Distress Spritzer Tool and Ground Espresso Distress Marker.


This is really quite a colourful page for me but I really love how using these Distress Crayons is widening my colour horizon! I hope they are doing the same for you!

Thank you for joining me today.

Jennie x