Showing posts with label dies. Show all posts

Wednesday, 1 April 2020

Chapter 2 Tim Holtz dies

Hi Brenda here with two Spring cards using two of the new Tim Holtz dies.


For the process steps and photos showing how I made these cards please pop across to 
Bumblebees and Butterflies where there all the details can be found including a new way to use acrylic paints for the background of the first card.

hugs Brenda xxx


Saturday, 18 January 2020

A Tim Holtz Curio Box

Using Tim's new Curio Box die I've created a mini scene with a retro/vintage transport theme. To get that lovely retro vibe I used Andy Skinner's transfers


The base of the box was cut from black card and lined with the die-cut shape from the lid which was cut from white card.
Sealed with gesso and then covered with the transfers the lid piece and insert was then dipped in some cobalt turquoise wash and dried before putting together.
As I like to do I distressed the edges with brown distress ink and spritzed it lightly with water before drying it to get that aged look and did the same over some of the backgrounds.


I kept one of the car transfers to rub onto white card and cut out for part of the focal point in the front with the lovely couple ....


.... painted a metal penny farthing bicycle and adhered to the top ....


... and added some 'extras' to set the scene.


Thanks for stopping by.

Brenda xxx

From the Country View Crafts shop -

Friday, 12 July 2019

Altered book pages for journalling

A friend had some books in her car ready for the charity shop the other day and one was A Country Diary birthday book, certainly not old at all but the illustrations are all of flowers and are hand painted prints so I decided to take it off her hands and have a play at using some of the gorgeous flower designs in some journal pages.
This is the first one stuck into my nature journal.

       
To age the illustration I stamped with some text and gave it a light coat of watery gesso and distressed the torn edges.


I painted some of the Tim Holtz wildflower stems .....


.... and drew round one of Tim's transparent butterflies on watercolour paper, dipped it in some pinky paint washes, glued them together then covered the surface with glue to make it matte. I also added a Tim Holtz crochet die border and a quote.


Altering book pages is a great way to get an initial start to a journal page and then add your embellishments to add more interest and finish it off with a good quote.

I hope you enjoy trying your own pages like this.

Thanks for stopping by.

hugs Brenda xx

Supplies from Country View Crafts
Tim Holtz wildflowers die and crochet die
Tim Holtz stamps Nature's Wonder
Tim Holtz Transparent acetate wings

Sunday, 14 May 2017

Tiny House

I am thrilled to be able to share my little house with you today.
It was such a lovely project to make and I know you'll have fun customising your own versions! This house is tiny so I used a simple image rather than make it look really cluttered - there is a larger die on the plate and that one lends itself to a busier finish.
Using a smooth heavy weight watercolour paper I die cut the smaller of the two dies on the Tiny House die (you'll need to do this twice) and then painted it pink using an old gift card. Try and aim for an uneven finish (like the one on the left) as it gives you a more interesting result in the end.
Add a thin layer of white paint over the top (using the old gift card)
Put a brick stencil over the top and, using white paint on some Cut-N-Dry foam, add some bricks! I used a Wendy Vecchi stencil but you could use one from Tim Holtz.
When you've done this it will look like this:
I liked this finish but as I like things a little more grungy I sanded the piece and it then looked like this:
Now, at this point I got so excited making the house I forget to take photos (doh!) but I did the following steps:
  • glue two sides together and add Vintage Photo Distress Ink on all edges
  • lie the project flat on your desk and carefully add the numbers to the bottom of the house in a continuous run
  • complete the construction of the house
  • stamp the butterfly image on some tissue paper; cut it out and adhere to the front of the house. Where the image goes over the edges make sure you use use them to help the house stay glued
  • choose a sentiment using some stickers; edge with Distress Ink before adhering to the house
  • adhere a star to the front
For the roof I die cut several strips of watercolour paper. I coloured them with Broken China Distress Ink and edged them with Vintage Photo Distress Ink. Starting at the bottom of the roof I adhered sections of the strips building up the roof tiles. You could make the tiles any shape - how about triangular?
Glue the roof to the house and you're finished! This is the front of the house:
This is the back:
I love this little house - and the bigger one is just as fabulous! I've made a mini village!
Thank you for joining in with me today - Gabrielle x


Friday, 14 April 2017

Easter card

Hi Everyone - Brenda here with a Spring Easter card for you using the lovely Distress Oxides.


I began with the wrinkle free distress technique using just broken china and iced spruce distress oxides ...... 


and then splattered over some ground espresso and hickory smoke DIs to get a sort of speckled egg effect.


For the oval I used broken china DI direct to card using the ink pad and then stamped with water to create the ghost effect. I blended hickory smoke round the edges.


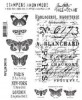
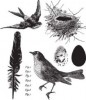
I stamped and cut out the bird colouring it in with watery hickory smoke and broken china DIs ..... 


... and I stamped the nest onto the oval.


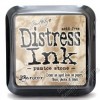
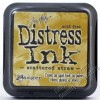
I created the egg by again using the wrinkle free technique this time with pumice stone and scattered straw DIs and stamped with frayed burlap.


Although I stamped four I only used one on the project, but it leaves me with some to tuck into other projects if they fit.


To bring some contrasting colour into the card I die-cut some of the small tattered florals from yellow and orange offcuts of core'dinations paper, spritzed them with water and scrunched them before leaving them to dry.


I also triple dipped some seam binding ribbon into broken china oxide.


I used the hashtag sentiments for my sentiment word but I cut the actual hashtag sign off of it (don't tell Tim!) but I do like the words on their own and I cut the legs off the bird so she could sit neatly on the nest.


There we have my Easter card, I hope it brings you a little inspiration to create your own Spring card.


Thursday, 24 November 2016

Wishes from the Heart

Hello Jennie here with you again sharing another card using some of Tammy Tutterow's latest dies and a link to my blog for another flower tutorial using the Shabby Posies Die.


My card measures 6" x 3" and is one of my favourite sizes being extremely economical in terms of a 12 x 12 sheet of cardstock! Cut the sheet into four 6x6 pieces and score down the middle for four great cards.

It is also a great size for using up oddments of lovely patterned paper stock too. I cut a backing from the lovely script paper and used the Waterfall Die to create a small fancy edged pocket.


You all know how much I just love Vintage Photo Distress Ink and I have used the ink here to die my seam binding, but also to make this rolled rose using the  Shabby Posies die. Please click the link HERE to go straight to my blog and a tutorial for the flower.


I layered everything onto my card base creating the pocket first and then decorating it with some lace and a strip of matching cardstock. A Tim Holtz Flashcard fits perfectly into the pocket! I decorated the flashcard with some background stamping and a few Remnant Rubs before blending more Vintage Photo around the edges.


I finished the cluster with a stamped butterfly and some pins. 

Tammy has a great tutorial HERE for tying a fabulous ribbon bow. I wouldn't do it any other way now - it always works a treat!


I used a tab from the Frayed Tabs Die which is  just perfect for this small card too. Again a small scrap of matching paper is all it needs. Blend a little Vintage Photo Distress Ink around the edges to keep everything in harmony!


Another vintage card for the card box for next year's birthdays.
Working with dies certainly makes things so much easier and I particularly like these ones!

Thank you for joining me today.

Jennie x