Friday 27 January 2017

Canvas Board

Hi it's Brenda here again today.

I am using one of my most loved canvas boards which is 5 x 7 ins in size. I have made a fairly simple textured background and then take bits from my 'left overs' box to die-cut the dapper man and create a card.

.
I began by taking a palette knife and mixing DecoArt modeling paste and white gesso together in about a 50:50 mix and then roughly spread it over the surface leaving some of the canvas board exposed and left it to dry.


Choose three colours that will tone and blend together well and not create 'mud', ie 3 warm colours, 3 cool colours or take one colour and make a tint and a shade of it to go with the original.
(In color theory, a tint is the mixture of a color with white, which increases lightness, and a shade is the mixture of a color with black, which reduces lightness. A tone is produced either by the mixture of a color with gray, or by both tinting and shading).

Take blue-green light media fluid acrylic paint, mix with water to create a very watery wash and dip the board in and dry it.


Repeat the above step with burnt umber.


Take blue-green light, mix with titanium white and drip the paint through the canvas, spritzing with water and heat drying when you are happy with it. Repeat with burnt umber mixed with titan buff.


Blend over evergreen bough distress ink, flick with water and roll dry with kitchen paper.


Repeat with vintage photo and again with evergreen bough to get depth of colours.
Give a coat of ultra matte varnish to seal the distress inks. Be very light with the brush otherwise the varnish will move the distress inks around.


Rub a coffee archival ink pad around the edges and over the high points.


Then choose the elements you want to add to make a mixed media piece of art or you could add an easel and give it as a card.


I love mixed media backgrounds, hope you like this one.

Have a great weekend.

hugs Brenda xxx


Sunday 22 January 2017

Watercolour powders

Hi Brenda here.

Here's a quick background for you and using the Tim Holtz doily stencil with infusions but do read on to the bottom as you will see what happened after I had created and photographed the process steps.

When using a stencil and Infusions (or other watercolour powders) you can get both a positive and a negative design from them. let's take a look.

1. Lay the stencil on the card, spritz lightly with water and shake some infusions powders lightly over the top. I used Royal Blood and Sunset Beach. Spritz over the surface again lightly with the water mister ........


2....... so that the colours will settle onto the card and you will also have watery colours on the surface of the stencil.


3. Remove the stencil and you will be left with the positive design, roll a paper towel over the surface to remove excess colour or heat dry.


4. Take the stencil, flip it over and lay on a piece of card, press down gently with a piece of kitchen roll.


5. When you remove the stencil you are left with the negative design - my one is rather watery so ease up a little on the spritzing if necessary.


6. Again roll over the surface with kitchen towel or just heat dry.


7. Lay the stencil back over the design, take a couple of distress inks and blend them over .....


8...... so that you fill in the positive image again.


Ok so this is where I say my stencil choice and colour choices did not go well together and to be honest I think it will have to go in the bin - see we all do it lol. I debated starting from scratch and re-doing everything again but I think it's important that we share our mistake as well as our successes, we can't get it right every time. So here's another I made and used for the final card.

Here I used the Nordic stencil with Violet Storm and A Bit of Jade Infusions ......


...... and dusty concord, peacock feathers and gathered twigs distress inks for a completely different look.


I cut the design to 9½ x 18 cms and a tall card to 10½ x 19 cms so they would fit together.
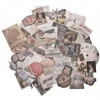
gathered some elements to make up a collage and sentiment.


And hey presto we have a vintage card.


Thanks for bearing with me, I hope you get to have a play with the infusions and if you's like to see more I have another design over on my blog too. I would love to see you over at Bumblebees and Butterflies.

Happy Sunday.

hugs Brenda xxx


Wednesday 18 January 2017

Forever

Hello and welcome to my second project this month which utilises a few scrap pieces!


It all started when I squeezed out rather too much Nougat Fresco Paint and was looking around for something to paint to use it up when I spied a couple of experimental pieces lying in the scraps box. I would imagine I have used a combination of Seedless Preserves and Picked Raspberry Distress Ink for these inky layers with a stencil but way too bright for me! 


But look at the lovely hues when they are covered with Nougat Fresco Paint - fabulous and much more me!


I added a couple of strips of tissue tape and some very light stamping with Hickory Smoke Distress Ink.


Then a little contrast stamping with Black Archival ink. 


I decided not to introduce any further colours so hunted through the scraps box again and found this stamped butterfly .....

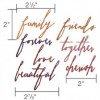
.... and a die cut from one of Tim's handwritten words (always so handy for this kind of card!). Everything then got a bit of a splattering with some watered down gesso.


I then stuck everything on to a 6" x 3" card blank cut from some cream cardstock and edged with gold pen. 

I shall certainly be looking through my scraps box for more brightly coloured experimental pieces as the coating of paint really makes for a lovely muted background.

Thank you for joining me today and have a great week!

Jennie x

Live The Dream