Showing posts with label oxides. Show all posts

Monday, 8 May 2017

Watercolour oxides.

Hi Brenda here.

I recently had some fun making up a masterboard with some of the oxides and gesso to produce this set of small (4x4) cards.


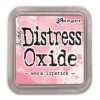
Take a piece of card that will take watery layers and dip it in separate washes of spiced marmalade and worn lipstick distress oxides and also a wash of fired brick distress ink. Dry between each wash.


Next mix some gesso with water and create another wash and dip it into this and heat dry. Depending on the size of your card you may need to do this quite a few times (my card was A4 size). Now you have a soft shabby feel to the background.


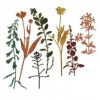
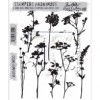
Cut the card to make backgrounds for whatever size card you are making - I decided to do some small cards and make them into a set to sell. First I chose the wildflowers stamps and dies to use and practised the watercolour technique with the oxides on a stamp, misting it and stamping to see what effects I got. Love it.


So with core'dinations cut flowers, the oxides, walnut stain DI and greetings made on the computer I set to work.


If you haven't tried using watery gesso for the shabby look or even to tone down colours you're not sure of it's well worth a go.


Thanks for stopping by.

hugs Brenda xxx


Monday, 24 April 2017

More oxides and butterflies

Hi it's Brenda here with you today.

I so love playing with the oxide and butterflies together I have another design for you today.


 I found some pieces in my bits box that I was really happy with when I did them and I'm still happy with them now and rather than let them just sit there I decided to retrieve them and make a couple of cards. I thought these infusions and stencil backgrounds would make the perfect backdrop.


Whether it's because of Spring I don't know but I seem to have butterflies on my mind and I took one of Tim's stamps and his oxides and using peeled paint, broken china and walnut stain I stamped two mixed colour butterflies and before I knew it I had spritzed one with water - I just wanted to see what it would do .......


....... my brain was working overtime so I quickly heat dried the watery mess and re-stamped the butterfly again over the top and look what happened once I had cut them both out  ........  one beautiful crisp and multi coloured butterfly and one beautifully smudged looking one - I don't think I can choose between them so I'm pretty glad I had enough backgrounds to make two cards.


I continued on with some more edge inking and sentiment gathering until I was happy to assemble the cards together.


I kept it fairly simple even though I sat for ages trying to add other embellishments and stamps that I knew would clutter the design and spoil it.


Thanks for stopping by today.

hugs Brenda


Tuesday, 28 March 2017

Tim Holtz inspired background card #2

Welcome and I hope you have been having fun playing with Tim's new Distress Oxides. This is the second card I made after the playtime I had with them a few weeks ago which you can see here and here and if you missed the first, more feminine card, you will find it here.


This is what the background looked like and I love the rusty patina colours in it.


I gathered the collage elements together with a similar colour palette using Tim Holtz ephemera packs and papers.


And I made my own little cabinet card type frame using a round die and using tarnished brass distress paint on the edge of an old credit type card and stamped the stars with the broken china oxide ink.


The guy is from Tim's photo booth set.


I layered up the collage elements ......


.... keeping it all flat so that the card can go in the post easily.


I think that little bird adds extra interest and would hopefully be great for a dad who has interest in birds in the wild.


 The greeting is one I made myself - I tend to print out an A4 sheet of various ones so I can pick and use one fairly quickly. I just don't own many words stamps and sometimes they're just not the right size.


Thanks for stopping bby this month, I hope you have enjoyed seeing how I used the Distress Oxides.

hugs Brenda xxx

Bumblebees and Butterflies


Friday, 24 March 2017

Tim Holtz inspired background card #1

You may have seen my posts for the present Country View Challenge - Inspired by Tim Holtz - both on the challenge blog and at Bumblebees and Butterflies. So for my shop projects this month I thought I would use a couple of those inky backgrounds just as they are and make a couple of cards. here's the first with that drippy, speckled background and some feminine shabby flowers.


I used Tim's sizzix Bigz tattered florals and his new Thinlits small tattered florals to get the flower pieces which I cut in crinoline. I spritzed them with water and dabbed on both picket fence and victorian velvet distress paints, scrunched them up and dried them .....


.... before putting them together with pretty brads.


Next I collected the pieces I wanted for my layout .....


 .... and eh voila the card came together (but without the string bow - it just didn't look right with it on).


The oval plaque was a chipboard covered with some paper from my bits box.


The Tim Holtz strip die borders helped pull it altogether.


Although I wasn't sure about the mix of the more industrial looking background with pretty embellishments, I'm really happy with the outcome.


The greeting is one I made on the pc and printed out.


If you are having fun with the oxide please let us know and enter the challenge with them.

hugs Brenda xxx