Showing posts with label Fresco. Show all posts

Monday, 24 July 2017

Follow Your Heart

I have rediscovered my Dylusions Inks and my very favourite is Fresh Lime. This whole project was designed around this ink! The finished project looks like this:
I sprayed a tag with Fresh Lime and Dirty Martini. Dry the tag throughly.
Then, using a large Stencil with White Linen spray the tag. I didn't mind the extra ink in the bottom corner as it all adds to the whole aesthetic of the tag.
I cut out a large heart. I painted it in London Bus paint and adding some coloured pencil to the edges.
Using a Texture Fade I added some Gathered Twigs Distress Ink to the top part of the fade and then embossed the shape instantly giving it texture and a second colour.
For the final touches I added some shadowing to the largest numbers; Gathered Twigs to the edges of the tag; a paper doll; a pinecone die, a quote chip and a little torn dictionary page.
Thank you, as always, for popping by.

Wednesday, 26 April 2017

A little birdie

I am thrilled to share a page in my Dylusions Journal. I wanted to use a tag as the central image and to create a background that was complementary but the reverse... I hope that makes sense!
I used an old store card to spread paint on a tag.
Then I sanded the tag and added some brown Distress Ink.
I forgot to take a photo of the next stage of the tag but I did the same on the journal page! After putting paint on the page (as before) I added the darker colour through a stencil. When dry I added white over the top and then sanding when dry.  
Then I added a little stamping to the tag and it's complete! The stamps I used were Zinski Art for PaperArtsy - ZA05, ZA07 and ZA08
Thank you, as always, for popping by.

Wednesday, 18 January 2017

Forever

Hello and welcome to my second project this month which utilises a few scrap pieces!


It all started when I squeezed out rather too much Nougat Fresco Paint and was looking around for something to paint to use it up when I spied a couple of experimental pieces lying in the scraps box. I would imagine I have used a combination of Seedless Preserves and Picked Raspberry Distress Ink for these inky layers with a stencil but way too bright for me! 


But look at the lovely hues when they are covered with Nougat Fresco Paint - fabulous and much more me!


I added a couple of strips of tissue tape and some very light stamping with Hickory Smoke Distress Ink.


Then a little contrast stamping with Black Archival ink. 


I decided not to introduce any further colours so hunted through the scraps box again and found this stamped butterfly .....


.... and a die cut from one of Tim's handwritten words (always so handy for this kind of card!). Everything then got a bit of a splattering with some watered down gesso.


I then stuck everything on to a 6" x 3" card blank cut from some cream cardstock and edged with gold pen. 

I shall certainly be looking through my scraps box for more brightly coloured experimental pieces as the coating of paint really makes for a lovely muted background.

Thank you for joining me today and have a great week!

Jennie x

Live The Dream


Tuesday, 20 December 2016

Christmas Ornament

Each Christmas I add to my collection of small plaques and this is the latest one!
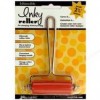
I started by brayering white paint to a board. I really didn't want a perfect finish because it adds to the grungy nature of the finished article:
Then I used a dark blu paint through a snowflake stencil. The paint bled slightly under the stencil, I don't mind that but I know you might!:
Next, I stencilled white paint over the blue. Just move the stencil a couple of millimetres in a diagonal direction so the blue becomes a shadow:
I then lightly sanded the whole board and added brown Distress Ink to the whole piece, paying attention to the edges:
The next step is to make the bauble. I painted a little Metallic Glaze to an area on some white card and then stamped two baubles on the card, one on the Metallic Glaze and one on the plain card.
On the plain one, colour the bauble in with paint, crayons, pencils, ink - whatever is your favourite medium and cut it out. Turning your attention to the one on Metallic Glaze cut out the top and the centre stripe.
Adhere the bauble, add a sentiment and doodle a white line border. This might be plaque for me but it could easily become a card, journal page, tag or anything else you fancy!
Thank you, as always, for popping by,

Tuesday, 6 December 2016

Three Christmas Tags

You are probably aware by now that I am a huge Christmas fan and that I treated myself to the new ElenaZinski stamps as a very early Christmas present! I am really glad I did as these stamps are incredibly versatile!
I started by using some previously made backgrounds  on card that were left over from a previous project (I tend to save everything as you never know when it'll come in handy!) I made the backgrounds by layering paint with a brayer - this was it in pink:
And this one in blue:
I then stamped a tag shape on the card and cut them out:
For the figures, I stamped them on to card, coloured them in and adhered them to the tags. 
For the girl holding the candy cane I scored each side of her arms with a craft knife so I could feed the cane between them so it looked like she was carrying it. All that was left was to add a sentiment! It was such an easy make that could easily be turned into a card or invitation but mine are, unsurprisingly, gift tags - just 20+ more to make!😉


Friday, 18 November 2016

A little secret

I am really embracing these new Elenazinski stamps and chose to make a journal page with a secret!
In a black journal I started by brayering the page white and also brayering both sides of a piece of black card. I scored a bend about 1cm from the top of the piece of card.
I then added blue and yellow paint (remembering to dry each colour first) to the journal page and both sides of the piece of card. Adhere the card to page. Don't worry about trying to match up the paint so far - that comes next!
Then I added black painted stars through a stencil. When dry, open the flap you've created with the piece of card, reposition the stencil and stencil the areas under the flap.
When all is dry add borders to the stars using a white pen.
If you look carefully at the figures there are little lines that extend past the drawing. To save cutting all those little details out I stamped the figures onto my page meaning I only had to cut out the solid sections - much easier!
Colour the images in - as they are monsters let your imagination run wild! As my background is very strong I coloured my monsters pretty simply so they'd stand out. Adhere the solid areas to the journal page. I drew over the black lines of the stamps that I used for the clouds, for the monsters to stand on and the legs and eye stalks of the monsters.
And now for the secret...! Under the flap...
I love the secret but I am so proud of the pattern matching under the flap!
Thank you, as always, for popping by