Showing posts with label Emma Godfrey. Show all posts

Wednesday, 30 May 2018

LIVE!

My latest addition is to my Gel Plate - there is an unlimited amount of fun to be had printing your own backgrounds and making a whole range of things! This month I have made two different backgrounds for my large Journal using the same equipment. The first journal page I made I shared last week.
Before I start, a couple of things to note: I made this on a really hot day so I wasn't able to photograph everything as the paint was drying so quickly! The second is that the sunshine created some shadows on my photos so please forgive these!

I brayered Bougainvillea paint and created my first print
The second print used Snowflake
Then a print using Banana
Then a print using Caribbean Sea in just part of the paper
Then I used Teresa Green - I didn't intend to over print the blue - doh! But the joy of this system is that you can just keep adding layers!
Another layer of white fixed that problem!
Then the first stencil - Tracks with Banana
I added two more stencils Gothic (using Slate) and Splotches using Bougainvillea. Then I sanded the page and trimmed it.
In completing my page I used off cuts from other projects using the same paint colours
The final piece included stamps from Everything Art and Emma Godfrey. The quotation (typed on my ancient typewriter!) says:

Live! Live the wonderful life that is in you! Let nothing be lost upon you. Be always searching for new sensations. Be afraid of nothing. Oscar Wilde

Thank you, as always, for popping by - and do have a look at my first project here.
Gabrielle x

Thursday, 26 October 2017

October Dyary Page

I am very much enjoying creating a weekly page in my Creative Dyary. I don't get as much time as I'd like to to be creative each week (working full time gets in the way!) however ensuring I do something creative at least once a week is very satisfying! The Dyary has a week planned out on the left page Monday to Sunday but there are no preset dates/months so you can start your Dyary at any time. I started mine in February and haven't missed a week! On the right side, some pages are preprinted with black and white drawings, some with coloured backgrounds. Here I've adapted one of the coloured backgrounds.
The backgrounds are pretty fabulous and really need very little work but of course I just can't help myself...! This was the background before I meddled!
Add Lemon Zest and Bubblegum paint to the page through a number stencil and then Squeezed Orange through a dots stencil.
Dylusions have bought out a fab set of background stamps where you get a stencil and a matching stamp. There are leaves, brickwork and cobwebs in either 9 or 12 inches to match your projects.The idea is to stencil the background and the stamp the detail in the foreground. Now, it's a terrific idea but don't feel limited to use these in one way - you can try this idea! Lay the 9" leaf stencil upside down and the wrong way round (so the word 'front' is showing like in the picture)
Use Fresh Lime paint through the stencil - try to have different lengths of leaves to create a bit of interest.
I drew round the leaves roughly in white ink, but of course you could use black!
Then, using the bottom portion of the leaf stamp, add some leaves in black ink.
Using Black Marble ink in a water brush, colour in the stamped leaves.
I added some stamped details from this fabulous Zinski Art set. I stamp the larger images because there are details that are hard to cut out! 
This is the finished page with a small sentiment from a terrific Emma Godfrey Halloween set.
Thank you, as always for joining me! If you'd like to see more of the Dyary pages I've created this year - please click here.
Gabrielle x

Thursday, 28 September 2017

Fright Night

For my second Halloween themed project this month I made a mdf plaque to add to my growing set of decorations for the big day.
I do need to confess that I forgot to take lots of photos (sometimes we get caught up in making the piece!) I started by covering the plaque with Tango paint then added Black Soot Distress Ink through a stencil.
Isn't it effective?!
I added some tissue tape, paper dolls and extra stamping courtesy of this fab Emma Godfrey set. To give the paper dolls a little more of an aged finish I sanded them and added Spiced Marmalade Distress Ink.
Thank you, as always, for popping by!

Thursday, 14 September 2017

Spooky

With the start of September and more Autumnal weather, my thoughts have turned towards Halloween and using the Halloween themed stash I have. I try not to limit Halloween or Christmas goodies to just those holidays because it seems a waste to leave them sitting on the shelf for a year but inevitably we do. So, time for me to dust them off and ink them up!
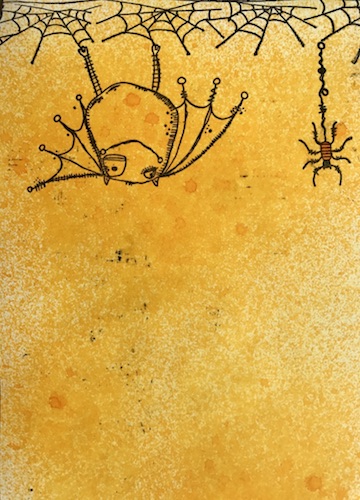
I started by spraying a page in my Small Creative Flip Journal with Pure Sunshine ink. I love this colour!
I then added a border for the bat  and spider to hang from. The spider's body was coloured with Squeezed Orange ink decanted into a water brush. By stamping the bat on the page you retain all of the little details that would be really difficult to cut out. I also stamped him (and the chap from the stamps set) on card to colour and cut out.
I then added some Speckles using Black Soot Distress Ink.
I stamped out some accessories and die cut them. I should have coloured them before cutting them out (which is what I usually do) as the broomstick in particular felt very delicate! Always learning!
The sentiment was stamped with alphabet stamps (I LOVE these!) and some additional word stamps by Emma Godfrey. The washi tape is from the Aristocrat set. Some white circles (made with an old lid) and gold painty lines finished the page off.
Hope you feel like dusting off your seasonal stamps too!

Tuesday, 22 August 2017

Forgotten the words

I recently bought a new Dylusions a small Creative Flip Journal. This page was one of my first experiments in it!
I started by spraying the pages with Fresh Lime (my very favourite colour!)
Then I added areas of Calypso Teal and used some kitchen roll to mop up the ink
Next I added some diamonds using a stencil and Slate Grey ink. Again I used kitchen roll to mop up the ink.
Finally I added some Picket Fence through an alphabet stencil
Using a leaf stencil I added Dirty Martini ink (decanted into a water brush). I wasn't super careful as I wanted the ink to bleed a little under the stencil as it looks like watercolour. When the ink was dry I used a black pen to drawn the leaves in. Notice how the green ink highlights the Picket Fence beneath - gives your leaves a really lovely extra detail
I added some tape for my Zini to stand on and stamped the Zini on the page and on some white card. There are some lovely details on the stamp that would be really difficult to cut out so if you stamp the image on the page then you don't have to worry about those additional details!
Then it's a matter of adding the extra images and sentiment. The arrows are from this Emma Godfrey for PaperArsty set and the spider is from this one. The bird is from an Elenazinski set.
The birds on this page are from these stamps sets (Set 5 and Set 8). The text stamps are from the Emma Godfrey set above. A few white paint circles and Black and Gold lines using an old lid and gift card.
I hope you like the journal pages. I love making them!

Monday, 14 August 2017

Card with PaperArtsy Zinski stamp

Hello everybody, it's Monika here.

When I first saw the PaperArtsy Zinski stamp (ZA13) I knew I needed that. 
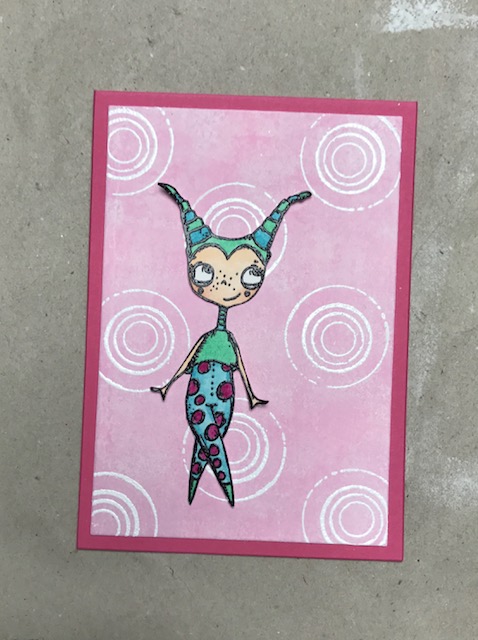
First I have made a card with a lovely creature/fairy/girl (whatever you like) from this set.


The basic card was cut out from a fuchsia cardstock with Sizzix Framelits die (658610).

The top was cut out from a white watercolour paper with a one size smaller rectangle die and I painted pink with DecoArt Poodleskirt Pink.


After drying I tapped watered white acrylic paint onto the pink card and I also spritzed with water.


Then I stamped circles with one of the stamps of the PaperArtsy EEG24 stamp set and heat embossed with white embossing powder.

As for the fairy... I stamped with Ranger Archival Jet Black stamp and after I used clear embossing powder.
I coloured the fairy with Ranger Distress Markers (Tumbled Glass, Cracked Pistachio, Picked Raspberry) and Zig Clean Markers (Flesh Colour, Blush).


The text (EEG18) was stamped with Ranger Archival Jet Black ink then I added clear embossing powder.
I cut it out with scissors irregularly and I glued onto the card.


I hope you like it! Happy crafting!

Tuesday, 6 December 2016

Three Christmas Tags

You are probably aware by now that I am a huge Christmas fan and that I treated myself to the new ElenaZinski stamps as a very early Christmas present! I am really glad I did as these stamps are incredibly versatile!
I started by using some previously made backgrounds  on card that were left over from a previous project (I tend to save everything as you never know when it'll come in handy!) I made the backgrounds by layering paint with a brayer - this was it in pink:
And this one in blue:
I then stamped a tag shape on the card and cut them out:
For the figures, I stamped them on to card, coloured them in and adhered them to the tags. 
For the girl holding the candy cane I scored each side of her arms with a craft knife so I could feed the cane between them so it looked like she was carrying it. All that was left was to add a sentiment! It was such an easy make that could easily be turned into a card or invitation but mine are, unsurprisingly, gift tags - just 20+ more to make!😉


Tuesday, 18 October 2016

All Dressed Up!

My project this month is a journal page that could easily be a card or another Halloween project!
I started by spraying the page with Dylusions sprays - I used a yellow spray and then an orange spray. I didn't want a complete coverage so used the sprays with a little more restraint than usual!
Using Black Soot Distress Ink I added a stencilled border. I added a drawn white edge around each stencilled shape.
I added the broomsticks and the stamped the skulls and hats on some spare white card. I coloured the broomsticks and the hats in and cut them out. Using some of the sentiments from the Emma Godfrey stamp set I made a title and added a note against each broomstick.