Friday 26 August 2016

Be an Individual

I wanted to make a super quick book mark for my daughter who has been participating in an NCS course. I wanted something motivational and this sentiment is perfect!
Start by taking a black tag and brayering some white paint on. Please don't be tidy - it adds to the finish it you're not!
Next, stamp the sentiment in the middle of the tag (I forgot to take that photo!) Then mask the sentiment with a post-it note and then stamp over the top. To do this I inked the background stamps (with DistressInks) while still on the contact sheet - then stamped them!
Then, add Distress Ink to the edges where the stamping is.
Super quick and really effective! Thank you, as always for popping by.

Wednesday 24 August 2016

Stencil Fun!

Hello! Jennie here sharing a few cards made with my (ever growing stash of) stencils!

When stencils first started appearing I was actually rather scared of them but amazingly I wouldn't be without them now. Once I learnt how to use them in layers over the top of each other using either inks or texture paste I have really enjoyed using them.


So here are a few cards and step by steps using the layering stencil process.


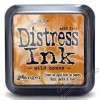
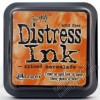
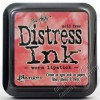
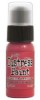
I really like creating cards using ATCs. They are a great size for experimentation and sit well on a blank white card as a little note or thank you card. I used the Wrinkle Free Distress Technique to get some colour on this matt ATC - I used Blueprint Sketch and Twisted Citron (I really love this combination!).


I used a layering stencil and the same coloured inks to create the first layer.


And then a number stencil and there are a few dots in there too from another one!


After adding a little text stamping with Blueprint Sketch Distress Ink I used another stencil and texture paste as a final layer. I love the white paste layer but it does pick up a bit of ink too which makes for some interesting colour.


I finished this ATC with a sentiment stamped from in Picket Fence Distress Paint on black cardstock before layering the ATC onto some more black cardstock and then my white card blank.


I thought it would be fun to try the same colours on a glossy cardstock ATC and here are the results - I think you will agree quite different!


I love the way the initial stencil layer looks almost 3D.

So ....... a girl can't have enough stencils! well this one anyway!

Thank you so much for joining me today.

Jennie x


Monday 22 August 2016

Travel book covers USA

Hi it's Brenda here with you today and I'm sharing the covers I made for a sketchbook to take on holiday to America, more a mini scrapbook I suppose you would call it.


I began by cutting the card to size, measuring out three stripes and edging with artist tape, then painted with phthalo blue, pyrrole red and titanium white.


This tape is quite stretchy and doesn't give a perfect straight line - but 'embrace your imperfections' and all that.


Oh and I found my red and blue sharpie markers neatened up the edges just fine.


Wanting a more aged look I dipped the panels in burnt umber watery wash, drying between each dip and when dry gave them a coat of antique decoupage.


Now to build further layers - a large text script and distress embossing powder ......


........ and embellishments - Tim' faded glory flag, triple cut in card, layered together and embossed with distress embossing powders .....


...... USA stamped from mini blueprints 2, dipped in watery phthalo blue media acrylic paint and coloured in with distress markers .....


....... die-cut stars embossed with frantage shabby white embossing powder .....


.... and the spine is a piece of jointer's drywall tape sealed with black gesso, stamped with one of Andy's toxic set stamps in titan buff then given washes of phthalo blue, pyrrole red, paynes grey and burnt umber.


I sanded the edges of the covers and blended ground espresso ink around them and put it all together with some shabby ribbon, stained with distress inks, to keep it tied and closed.


A quick shot of the back and front of the sketchbook.


Now I'm looking forward to seeing it completed, I need to get those photos printed off.

If you get a moment to pop over to Bumblebees and Butterflies you will see another two made by my granddaughters.

Don't forget we have a stencil challenge on at the moment on the challenge blog. We'd love to see you there.

Enjoy the rest of August - the months just keep rolling on by.

hugs Brenda xxx


Thursday 18 August 2016

Let's splatter some paint!


I do love paint and I do love making a mess! Today's cards were inspired by Brenda Brown - from Bumblebees and Butterflies - I spent some time with her recently doing some art journaling and she has this great technique of using an acrylic block to apply paint. I thought I would make some cards using this approach.
1. Add a little background stamping and clear emboss
2. Take some paint and add a little water - apply to an acrylic block
3. Turn over and add to the card
4. Repeat as desired
5. Add more colours - either drying in between or allowing a little marbling
6. Use a small brush and watery wash of paint to create splatters
7. Repeat with other colours
8. Take some embellishments - spritz with a little water and add paint
9. Add more colour as desired


I made three in total - adding Tim Holtz hash tags. You can see the cat version closer up on my blog.
Nikki