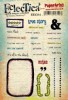
Showing posts with label Darcy. Show all posts

Friday, 20 July 2018

Misted Ink Background

There's something really satisfying about making different backgrounds for your projects. There's a quick and easy background that you can make as easy, or funky as you'd like!
Simply draw squares in your journal (I used the small Dylusions journal block as  I like the wavy lines). It should look like this - don't worry if, like me, you need to go over a few lines!
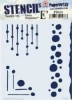
Add some stencilled shapes. I used circles with a stencil like this one.
Then the fun starts! Fill a water brush with Black Marble Dylusions Ink. Colour in the background on one square and the shapes on the next, making a chequerboard effect. It's very therapeutic!
This is the finished effect.
You could leave it just like this. But knowing the ink reacts beautifully with water then I just couldn't help misting the page until the ink started to run.
You can, of course, use any combination of colours you like to make the background. Also, don't just do squares, you can use stripes or any other shape you like!
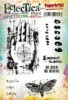
To finish this off I used the new Darcy stamps for PaperArtsy. I added a few gold lines and white painty circles for added interest.
Thank you, as always, for popping by


Saturday, 31 March 2018

Final Postcard ideas

Hello! It's the last day to enter the Postcard challenge on our challenge blog and in case you need some final, speedy inspiration I have three quick ideas you can use. Each postcard took less than 30 minutes so you'll have an entry in no time! There is some typing on each postcard - I have an old typewriter that I used but you could use a sentiment stamp or alphabet stamps for your sentiment.
Let's take each one in turn!
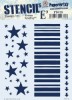
For this postcard, add paint to the postcard for the background (I used Bubblegum Pink and Vibrant Turquoise) and then added White Linen, Lemon Zest and Black Marble paint through some stencils. It really doesn't matter if it looks messy - you'll cover it up!
Then stamp your images - I coloured in a few areas so the white was a counterbalance to the crazy background! When it was assembled I drew some lines from the shape to the scalloped edge so that they look like they are hanging.
The second postcard features a flamingo from Dylusions. The heart is from the Creative Dyary Stamp Set 2.
I used Distress Inks (Broken China, Shabby Shutters, Gathered Twigs) for the background and leaf stamps - the centre of the leaf stamp was inked with Dylusions Fresh Lime ink.
A tip for difficult to cut out images... cut across an area that you can easily glue back together - I regularly cut off the heads from stamped images!
For the third, and final idea I sprayed a stencil with Vibrant Turquoise and then covered the card with Gathered Twigs Distress Ink to give it a vintage colour palette. I then stamped lots of images on the background from an old Tim Holtz set. Then I stamped lots of Darcy for PaperArtsy images on card and coloured them in.
I hope you join in with this month's challenge!
Gabrielle

Tuesday, 14 June 2016

June

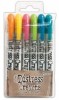
For my calendar page this month I chose to play with Distress Crayons and stencils. There's something really satisfying about crayons - is it because it reminds us of being a child?! Anyway the joy of using crayons still persists!
I started by scraping some blue paint on the page. I used an old gift card (and then a brayer for the later layers) but you can use whatever you prefer.
Then I added a layer of white
And then a layer of green
I kept adding layers until I was happy with the finished result (remember to dry layers in between otherwise you can damage the paper beneath)
Now for the really fun bit! I placed my stencil on the page and drew inside with the distress crayon. Then, with the stencil in place, I rubbed the crayon with my finger so it blended and took on the form of the stencil. You get a thicker line at the edge in places which adds a natural highlight so I kept those bits in! I did falling drops at the top of the page and green stripes at the bottom.
I needed a little added interest to the background so I added some stamping in coordinating Distress Inks
All that was left was to add some white highlights to the Distress Marker stencilled marks, the sentiment and the main image. The main image was stamped on to an off cut from a tag (I really like the creamy colour - I normally cover that up with layers of paint!) Using the edge of my gift card I added some gold and dark grey lines.
Thank you, as always, for popping by


Monday, 10 February 2014

Happy UNvalentine…

Those of you that know me well know that periodically my cynicism rises to the surface and ends up as a reflection in my crafting so, for those of you who don’t care to celebrate Valentine’s Day (the ‘a happy heart is for life, not one day’ philosophy) here’s an UNvalentine tag just for us, lol!


Starting with a medium manila tag with Pansy and Rose Fresco splodged on and dried with a heat gun:


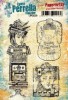
Next came the embossing - a standard clear embossing ink using the large broken heart stamp from Darcy's (Eclectica³) stamp set and black embossing powder:


Repeated on to white card, coloured with Promarkers (or whatever you have) then cut out:


Next I decoupaged them onto the tag and used a white (Posca) ink pen to highlight the bubbles:


Now what better than Dyan Reaveley's sarcastic text stamps? lol - Stamped with standard black ink, cut out and glued flat:

Then I took 3 wire-stemmed paper roses and did the coiling thing. If you don't have any of these you can make your own paper buds by twisting a small oval of card and coiling jewelry/craft wire to glue behind it.):


The scrap box came in useful - I found some matching scraps, one lain and one patterned which matched with the colours already used. Cut a strip of the plain and tear a thinner strip of the patterned to place on top:

Use Black soot Distress ink and a blending tool to edge both strips of paper before mounting them and also edge the tag itself. Glue the three roses/flowers in place (equidistant) on top of the strips:


I wanted an embellishment to match the colours so I found some blue beads that have an irrisescent purple coating and made a little bead drop with some jewelry findings:


This was added to the top left corner:


I added a little mauve chiffon ribbon to the tag to finish it off:


I hope you have a fabulous Valentine's Day whatever your feelings [g]!

Thanks for stopping by, have a great week,