Friday 28 October 2016

Halloween Gift Box & Tag

We received these Thank You items the other day from a Customer. They are so gorgeous that we wanted to share them with you - not the contents though as they are being eaten by us


Thank You Anne We Loved Them
 
You can check out more of Anne's Creations on her Blog


Wednesday 26 October 2016

Infusions Love!

Hello Everyone! 
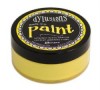
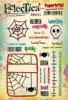
Jennie here with you today sharing a (very) simple and quick card and tag set using those wonderful little pots of PaperArtsy gorgeousness - Infusions.


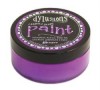
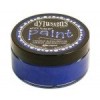
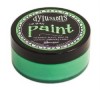
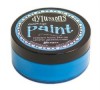
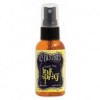
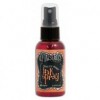
The most difficult part of using Infusions is choosing a colour, or colours - they are all so fabulous! At the moment my favourite is A Little Jaded and I love the deep turquoise effects the powders give.


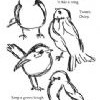
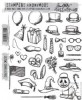
I started by cutting 2" squares of white cardstock and then stamping this gorgeous Lin Brown flower head using Versamark and White Embossing Powder.


When the embossing had fully dried I spritzed the cardstock with water and then poured a little of the powder onto the damp cardstock. In places I added more water before drying with a heat gun and mopping up with a roll of kitchen towel.


I quite like the lighter watercolour look to the Infusions so you can see how much I mopped up!


I stamped and inked a small luggage label in the same way and then mopped up all the ink on my craft mat with some seam binding.


The squares were then edged with a gold pen and layered onto some black cardstock before being layered onto a 5" x 7" white card blank.


I finished off the tag by edging it with a gold pen and sticking another tag onto the reverse.


A very quick card/tag set to make, however, the combination of the Infusions and Lin's wonderful stamp design result in quite a stunning make.

Thank you for joining me today!

Jennie x


Thursday 20 October 2016

Going crazy with colour.....

Scribbly Birds Journal - Dylusions Paint
Hi everyone and welcome to my final project for the CVC project blog. I am leaving the team at the end of October after two great years! 

So for my final project I have gone a little crazy with colour in my journal using a combination of Dylusions and Dina Wakley paints. The background was created by painting in patches with a combination of a brush and my fingers - no great plan... just adding the blue / yellow / green in various places. 
I then added some white paint with a credit card and also through a layering stencil (Splotches.) I also added some background stamping in archival ink.
I die cut some scribbles and splats in white card and sponged some  of the same colours on them adding a little black archival to contrast.
I took a piece of thinner white card and lightly brushed with purple and blue paints - intentionally keeping it light and patchy. Once dry and stamped the scribbly birds and fussy cut.
Scribbly Birds Journal - Dylusions Paint
A quote and some doodling around the page edges finished my page!

I hope you like it!
Nikki


Tuesday 18 October 2016

All Dressed Up!

My project this month is a journal page that could easily be a card or another Halloween project!
I started by spraying the page with Dylusions sprays - I used a yellow spray and then an orange spray. I didn't want a complete coverage so used the sprays with a little more restraint than usual!
Using Black Soot Distress Ink I added a stencilled border. I added a drawn white edge around each stencilled shape.
I added the broomsticks and the stamped the skulls and hats on some spare white card. I coloured the broomsticks and the hats in and cut them out. Using some of the sentiments from the Emma Godfrey stamp set I made a title and added a note against each broomstick.

Wednesday 12 October 2016

Distress Glaze Resist

Hello, Jennie here with you today and welcome to my first post this month. Just lately I have got a little hooked on Distress Glaze as it makes a fabulous resist for Distress Inks.


The technique I am sharing is certainly not my own, in fact you can see a number of examples on Pinterest and which is where I discovered it. However, this is my version and I thought you might appreciate a little step by step so you can see how it came together.


I started by layering Fossilised Amber through one of the mini layering stencils. I found I got better results with a stencil which was not too intricate.


I then layed the stencil back on the tag and blended the Distress Glaze over the circles only with my fingers. You don't need much in fact a dab in the jar does about three circles and that way you get varying degrees of resist.


I then used various colours of Distress Inks (Rusty Hinge, Dusty Concord and Peeled Paint) and the Wrinkle Free Technique to get the ink onto the tag. You can see that the Distress Glaze has resisted the ink reasonably well, but just a little does get through which makes for a rather nice effect!


I then used Rusty Hinge to stamp the mesh stamp over the top, not pressing down too hard so it was a bit hit and miss. I really love this gorgeous inky background and have been experimenting with other stencils and getting quite different effects.


The trouble with such a lovely background is you don't really want to cover it up! So I have used minimal embellishments, painting the cone flour in a mixture of the same colours.


And finishing off with a few rub ons.


Many thanks for joining me today and I hope this gives you some ideas for another style of background for cards, tags and journal pages.

Jennie x