Showing posts with label shabby chic. Show all posts

Friday, 24 March 2017

Tim Holtz inspired background card #1

You may have seen my posts for the present Country View Challenge - Inspired by Tim Holtz - both on the challenge blog and at Bumblebees and Butterflies. So for my shop projects this month I thought I would use a couple of those inky backgrounds just as they are and make a couple of cards. here's the first with that drippy, speckled background and some feminine shabby flowers.


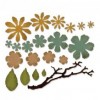
I used Tim's sizzix Bigz tattered florals and his new Thinlits small tattered florals to get the flower pieces which I cut in crinoline. I spritzed them with water and dabbed on both picket fence and victorian velvet distress paints, scrunched them up and dried them .....


.... before putting them together with pretty brads.


Next I collected the pieces I wanted for my layout .....


 .... and eh voila the card came together (but without the string bow - it just didn't look right with it on).


The oval plaque was a chipboard covered with some paper from my bits box.


The Tim Holtz strip die borders helped pull it altogether.


Although I wasn't sure about the mix of the more industrial looking background with pretty embellishments, I'm really happy with the outcome.


The greeting is one I made on the pc and printed out.


If you are having fun with the oxide please let us know and enter the challenge with them.

hugs Brenda xxx

Tuesday, 8 November 2016

Shabby Posies

Hello Everyone! Jennie here with you today to share a card made with some lovely new dies from Tammy Tutterow. 


I have been a great fan of Tammy's techniques and style for a number of years, so I was itching to try out the new flower dies in my own style. 


I started my card by using the Waterfall One Die.  I used some old, but still much loved, Prima papers cutting the top one in vintage text and the lower one in something plainer which I then stamped with a sentiment.


I chose some more papers for my base card and die cut a label from the Frayed Tabs and again stamped with a sentiment.


And then it was down to making the flowers and ribbon bow.

I die cut three flowers using the Shabby Posies Die. There are four dies in the pack and the one I have used for this card is the second largest one. The edges were inked with Distress Ink: Fossilised Amber, Rusty Hinge and Seedless Preserve. The flowers were then spritzed with water and scrunched up before being curled when dry.  There is a  step by step tutorial on my blog HERE today for this flower using Tammy's dies.

The ribbon was dyed with same Distress Inks.


And here is the finished card. I absolutely love all the layers it is possible to create with the waterfall die and I am sure that the Frayed Tabs die will become a firm favourite.


The five petal flower die makes for a lovely layered flower.


And if you want to tie a lovely shabby blow then click the link HERE for Tammy's tutorial. 

 I hope my card gives you some ideas of how to use these wonderful dies. I'll be back again later in the month with another card based around these dies.

Thank you for joining me today.

Jennie x


Thursday, 18 February 2016

Shabby birthday hanging

I have a couple of friends birthdays coming up so I thought I would make a different and more special 'card' for their happy day. I don't know about you but I put a lot of effort into making friends cards so why not make one that they can actually keep rather than throw or put sway after the big day. This was to be a wall hanging card which at the end changed my mind and I will add Tim's mini easel on the back so that will definitely mean they can keep it out on their shelf for longer.


I started with a 5 x 7 inch canvas board and layered it with gesso using a brush, palette knife and plastic card to add texture and coverage.


When dry I added some text texture using Tim's typo stencil and DecoArt modeling paste and when that was dry I used his harlequin stencil and some glassy gel from my supplies.

I felt a shabby colour palette would be popular with one of my friends so chose titanium white, titan buff, green gold, hansa yellow, sap green, prussian blue and quinacridone red media fluid acrylics (see shop list below) and the white shimmer mister to mix up the soft palette I wanted. Mixing the greens, cream, white and blue I created watery colours and let them drip and misted them with water to get the mottled effects.


The board then went through a whole process of me experimenting with layers until I was finally happy with the results .... adding more drips of paint and drying them ....


.... adding text stamping using olive archival ink ....


 .... spritzing white paint with the shimmer mister and drying it ......


.... adding some brown distress inks to create shadows round the letters .....


.... spritzing the distress ink to create more drippage ....


.... taking out some of the brown and adding in more of the green because I thought it took away from the shabby feel I was trying to create ....


... and then spritzing with the white mister again and using a piece of cut and dry with white gesso and rubbing over the raised letters to bring them up whiter.


Now feeling happy with the background I set about collecting the embellishments. Paper flowers, a wooden frame, a metal wing, a metal butterfly all painted with gesso. A word band painted with bundled sage distress paint and before it was completely dry I wiped across the surface leaving the lettering slightly green. Lace, leaves, cheesecloth and other little bits (and more came later).


Some close ups of the finished piece - a wordband with some lace and tiny flowers ......


... a shabby bow and a prima mini watch with one of Tim's photos in it (it must have come from one of the 6 x 6 pads to be so small), the little red pear is from my supplies ....


.... I finished by dabbing over some glossy accents and adding some glitter glass for added sparkle but as always it is very difficult to photograph .....


..... and here is a mini bottle I added that had been coated in gesso then decoart white crackle paste and when dry a little bundled sage distress ink rubbed on.


I hope you like my birthday board - I was going to add Tim's mini easel on the back but my Big Shot has had to go back to Sizzix to be looked at, but I will cut one from white mountboard and add to the back then it can easily stand on a shelf.


There is still time to take part in our CVC challenge of make your own backgrounds and maybe I have inspired you to have a go at this shabby mixed media style.

Enjoy the rest of the week into the weekend.

hugs Brenda xxx