Friday, 12 August 2016

Summer Weather

Sometimes it's nice to create something that can be used in different ways - this could be a postcard, or card topper or the front of a shiny new journal...!
Start by ripping a piece of card into a rectangle and stencilling leaf shapes with some cut and dry foam
Using the remainder of the paint on the foam, edge the paper
Brayer a layer (that rhymes!) of white paint over the top and then gently sand to reveal the stencilling
Stencil some white arrows and then, when dry, add green paint over the top. I used a translucent green paint so putting white beneath it makes it 'pop'! Then add a little background stamping - I love these boxes, so useful!
Finally, stamp some flowers and arrows (for leaves) and then paint them
Thank you for popping by!

Wednesday, 10 August 2016

It is the Journey That Matters

..... and I don't know about you but I am loving my crafting journey!

Hello! Jennie here with you today to share my first post this month using one of the lovely Lady Rose stamps by Tim Holtz to create this single layer card.  So read on if you want to see the details!


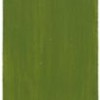
I started with a piece of glossy cardstock and my favourite Tim Holtz technique: wrinkle free distress.  It really is my all time favourite way of getting colours onto the page. 


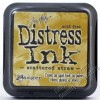
I pressed my Distress Ink Pads (Cracked Pistachio and Victorian Velvet) onto my craft mat, spritzed with water and then kept laying my cardstock into the "puddles" and drying each layer before picking up some more ink. I love the way the inks sit on the surface of glossy cardstock creating quite a different effect than on matt card.


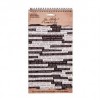
Then I stamped the smaller of the rose leaf stamps from the Lady Rose stamp set. I used Black Archival ink on the glossy paper as I wanted to paint the roses later in the process and it does give a better finish on the glossy cardstock.


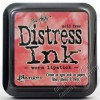
Next, a little overstamping using some small stamps and Aged Mahogany Distress Ink.


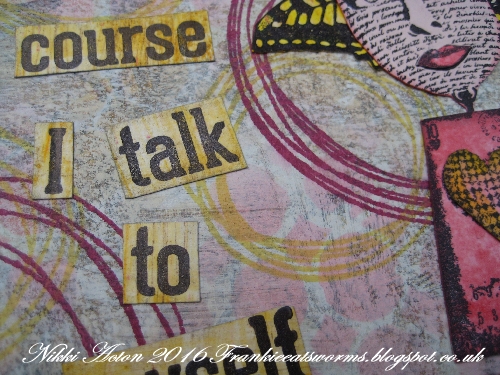
And then a little time spent painting in those glorious roses again using the Aged Mahogany Distress Ink. I just press a little ink onto my craft mat and spritz some water alongside and dip the paintbrush into the water before picking up some ink. I love the versatility of the Distress Ink pads!


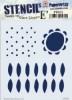
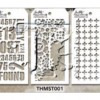
Now I had in mind all along to use the Mixed Media Harlequin die to cut the top right hand corner and I was a bit nervy doing it at this stage in the process, but I thought it would better than cutting it first and then trying to ink around the cut edges. I do think it gives a more natural finish.


And finally, when layered onto black cardstock the diamonds really do stand out!

Although this is a single layer card you could also layer over the diamonds some lovely flowers, leaves and ribbon to make a wedding or valentine's card (and perhaps a more appropriate quote!).

Thank you for joining me today.

Jennie x

Live The Dream


Monday, 8 August 2016

Tailor made on Dapper Street

Hi it's Brenda here and I'm am sharing a tag I made using the new dapper stamps from Tim Holtz.


Step 1. Tear some tissue tape and add to the background before stamping over it with black archival ink.


Step 2. Add some other stamped images.


Step 3. Take a couple of stencils and modeling paste and add texture to the tag.


Step 4. Apply very small dots of media acrylic colours - I used phthalo green yellow, hansa yellow light and quinacridone gold - spritz some water to the side of each dot of paint (if you spray directly on top of the paint you get a coloured spray over your mat and work if it is close by - believe me this is the voice of experience talking lol). Use a coffee stirrer (or anything else you have to hand for this job) and mix the pigment with the water.


Step 5. Drag the tag through the colours - this was all that was left when I had finished but you can see a little paint goes a very long way.


 Step 6. If you have gaps showing through the colours you could leave them or I just picked some colour up with my fingers and spread over the gaps to fill them in. Heat dry and if your tag buckles with the wetness pop it under a heavy book or box to flatten it.


Steps 6 onwards. This is where my brain just gets stuck in to what I'm doing and I haven't taken photos of every single step, but I went on and used a brush and paints to go over the textured pieces, dried it and then rubbed tiger lily, olive green and coffee archival ink pads over it to get that more artsy, mottled look. I used a brown pitt pen on some of the edges of the words and numbers to make them stand out a bit more and I also used a black pen on the hat, jacket and bow tie to create more depth of shading.


 To finish off add some hemp string dipped in quinacridone gold and a small talk sticker.


So I hope you like my brighter, artsy tag today with these fabulous new stamps - I can see these coming out for some masculine cards needed in the future.

Take care.

hugs Brenda xxx


Thursday, 4 August 2016

I talk to myself...

PaperArtsy HP1604EZ Addicted to Art
Hi everyone, Nikki here today to share a project that was made using scraps left from other projects. 
Like many others, I keep a box of scraps of inked or painted paper and card that was left from other projects. I took some of these and stamped the image (in archival ink) from PaperArtsy HP1604EZ. The background card was some patterned paper (Tim Holtz I think) that I had added a wash of gesso over.
I added some stencilling and stamping to this background. The circles are PaperArtsy EEG15.
I added a few extra bits of ink to my 'girl' and some wings left over and on my desk - then some stickles to add some sparkle to the crown. 
I stamped the words from HP1604EZ and cut them out as I didn't want to use the entire phrase.
I do love this slightly crazy image...now need to find someone to give this too!
Nikki