There is something about a blank journal page that terrifies
people – in the same way that a blank page frightens a writer. I thought I’d
share a page today that is really easy for you do and may help you get over any
journaling nerves! I made up my page roughly in four parts... If you're a messy crafter you'll enjoy seeing my messy desk in the background of the photos!
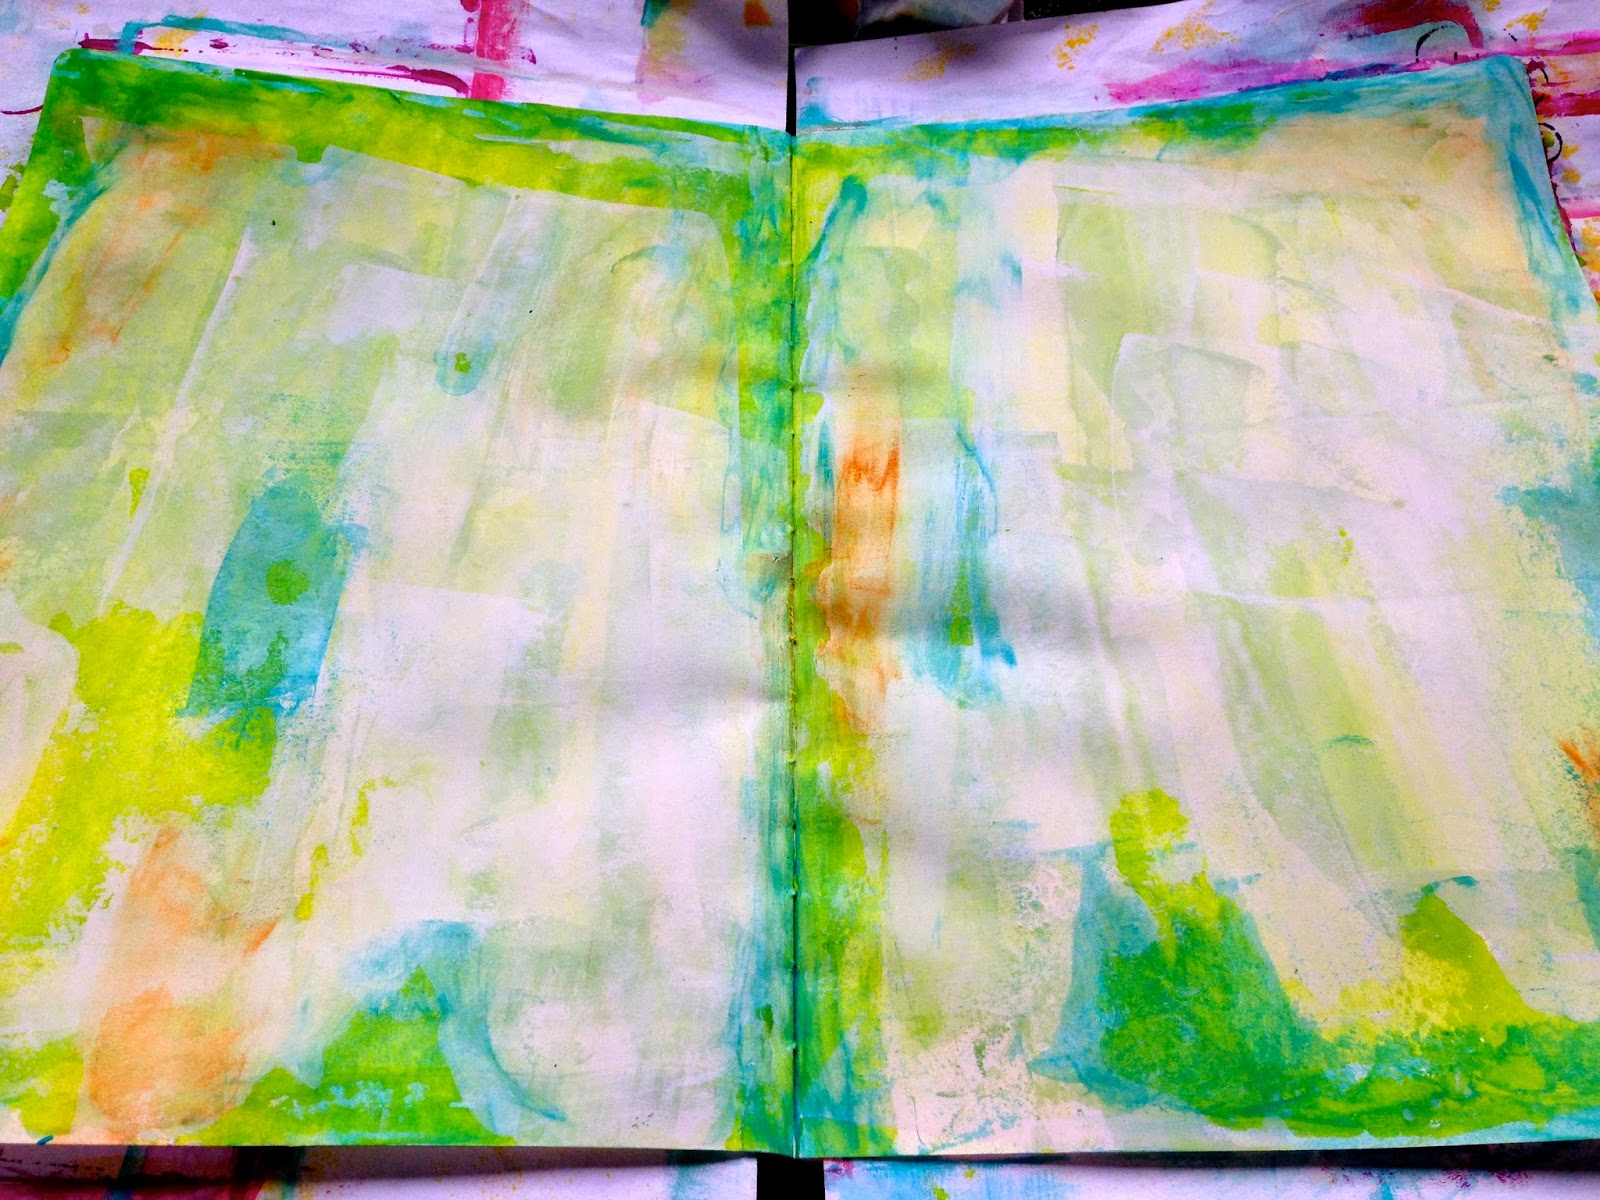
Part One:
Before I begin I add pieces of copy paper underneath each page so when I slop paint about I don't cover my whole journal! I normally start by putting white paint on my page but that’s
really hard to photograph so for you, so I did the opposite – as you can tell
there are no real rules to making journal pages! I put a layer of green paint
on my page – I squirted it on the top of my page and then dragged it down using
a palette knife. Don’t have one? An old credit/gift card works well as does a
small ruler! When the page was pretty covered, I dried it. There are some
darker areas, this is where the paint has overlapped – I love these areas the
most because they add interest in the background for no effort on my part!
I then added a layer of white paint – in exactly the same
way – this time I left some areas uncovered so that the green paint would show
through.
The final part of painting was to add some blue and orange. I put very
small amounts on my ring finger and rubbed the paint over the area I want it.
Too much? Then baby wipe the excess away. Too little? Add more! Part one is now
complete!
Part Two:
In a word... Stencilling. I added stencilling to a page to
add a little more detail for the eye but often it gets covered over with stamps!
For this page, as the green was so strong I added white paint through a stencil,
mainly at the edges and in the middle. I will often, at this stage, lightly
sand the page. This will give the page a nice smooth finish for the next stages
of stamping but will also soften the stencilled images as sometimes they can
look quite stark.
Now we’re on to stamping! I like to add lots of stamps in
the background and have collected all sorts of stamps for just this purpose! If
you’re looking to start a collection
Ellen Vargo and
Sara Naumann’s stamps for
PaperArtsy are fabulous as are some of
Tim Holtz’s earlier stamps. For this
page I added lots of stamps in Broken China Distress Ink so that it
complemented the colours in the page. You can, of course stamp in paint! The final
stamping I do in black ink – you’d be amazed at how a page comes alive when you
add those marks in black ink! Scary at first but then liberating! I wanted you
to be able to see the painted background in the finished version so I left some
areas uninked – you, of course, can add as much stamping in the background as
you like! If it ever seems too much, add a thin layer of paint over the top and
it will ‘knock’ back the stamps.
Part Four:
The final part is to add those all important final
flourishes! In this case I had some leftover wallpaper from last year’s mad
decorating fest and I knew I wanted to use the birds somehow. I cut them out and
added Distress Marker to the edges and then some Gathered Twigs Distress Ink. When
they were adhered to the page, I drew round the birds with a super soft pencil
and softened the lines with a paper stump. If you don’t have a paper stump you
could try a cotton bud! I do this because a little shadowing makes the image ‘pop’.
You can try just highlighting the natural shadow areas – you don’t have to do
the whole image like I did!
Then I found a quotation that I liked and added that to the
page. I added a white gel pen outline to the letters to give them a little
definition.
When it’s all completed I added rings of paint using
salvaged lids dipped in coordinating paint. I will sometimes add lines of paint
using an old credit/gift card. There are lot of other flourishes and effects that can be
added and we haven’t even discussed creating textures...! Maybe that’s for
another day! Thank you for stopping by – I hope this has helped to demystify
how I journal!


 The final part is to add those all important final
flourishes! In this case I had some leftover wallpaper from last year’s mad
decorating fest and I knew I wanted to use the birds somehow. I cut them out and
added Distress Marker to the edges and then some Gathered Twigs Distress Ink. When
they were adhered to the page, I drew round the birds with a super soft pencil
and softened the lines with a paper stump. If you don’t have a paper stump you
could try a cotton bud! I do this because a little shadowing makes the image ‘pop’.
You can try just highlighting the natural shadow areas – you don’t have to do
the whole image like I did!
The final part is to add those all important final
flourishes! In this case I had some leftover wallpaper from last year’s mad
decorating fest and I knew I wanted to use the birds somehow. I cut them out and
added Distress Marker to the edges and then some Gathered Twigs Distress Ink. When
they were adhered to the page, I drew round the birds with a super soft pencil
and softened the lines with a paper stump. If you don’t have a paper stump you
could try a cotton bud! I do this because a little shadowing makes the image ‘pop’.
You can try just highlighting the natural shadow areas – you don’t have to do
the whole image like I did!


This is a fabulous journal page!! I love those birds - I need those birds, lol!! the colours on this spread are just fabulous.
ReplyDeletelove this page and you instructions make it so easy I will have to try it!!!! Thanks for sharing!!!!
ReplyDeleteI love what you have done and is perfect as I had a very small journal before, but got a large one in July for my Birthday and have been scared to work in it because it is so very very blank and I would love to be able to do something like this, thank you for your inspiration.
ReplyDeleteDenise x