Sunday, 16 April 2017

Hippity Hoppity

So Trace here today with some Easter cards that I have created using lots of yummy distress oxides and lots of other goodies..


I started by applying some matte texture paste through Tim Stencil, no 034 and leaving to dry. I applied at top and bottom of piece of card to fit card front in opposite corners...I love the crisp design it creates .


So I will carry on with all the details for the orange card and all the steps are the same for the greeny toned card and the tags  - yes I made matching tags too...


I started by smooshing some distress oxides onto my craft sheet and spritizing with water..( here I used worn lipstick,fozzilised amber and spiced marmalade ditress oxides )


I swiped my card through and dried, spritizng with a little water and repeated this dipping and dabbing and drying between each layer, spritzing a bit more water until happy...I just love how the colours layer and the effect of water is something special!


I used the left over oxides to dye some seam binding, spritzing, dipping in left over colour and scrunching in a ball, leaving overnight to dry as I like the crinkle you get but you can gently heat dry if you're in a rush.


For the green colours I used peeled paint, fossilized amber and a smidge of cracked pistachio distress oxides.


Mr Bunny was cut from a movers and shapers Tim Holtz die and covered with a layer of grit paste which I dabbed my palette knife into to create texture...once dry he was coloured with ink and distress crayons and his little bow added.


The flowers were cut from a piece of card already coloured with the same technique using the distress oxides as for the card from without texture paste ...I then used the new Tim Holtz thinlits - small tattered florals die cut lots of flowers and leaves that were edged with brown distress ink.


I added some distress ink in brown to the edges of the card having added coloured panel to card front, I used ground espresso distress ink.


To completed the card I added a stitched oval piece, also coloured in same way, Mr Bunny, the hand dyed seam binding and the flowers and leaves with potting soil enamel accents for centres and finally a stamped greeting using black soot archival and Tim Holtz crazy talk stamps..


and here is the completed green tones one...


I also made some matching tags , minus the paste in the same way ...


And people are always asking how I use my tags ...so here is how...this was part of an Easter gift for my Mum and Dad...and I think the tag looks so much nicer than a bottle bag...


so there you have my Easter makes
Have a Happy Easter

trace x

Friday, 14 April 2017

Easter card

Hi Everyone - Brenda here with a Spring Easter card for you using the lovely Distress Oxides.


I began with the wrinkle free distress technique using just broken china and iced spruce distress oxides ...... 


and then splattered over some ground espresso and hickory smoke DIs to get a sort of speckled egg effect.


For the oval I used broken china DI direct to card using the ink pad and then stamped with water to create the ghost effect. I blended hickory smoke round the edges.


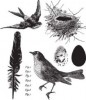
I stamped and cut out the bird colouring it in with watery hickory smoke and broken china DIs ..... 


... and I stamped the nest onto the oval.


I created the egg by again using the wrinkle free technique this time with pumice stone and scattered straw DIs and stamped with frayed burlap.


Although I stamped four I only used one on the project, but it leaves me with some to tuck into other projects if they fit.


To bring some contrasting colour into the card I die-cut some of the small tattered florals from yellow and orange offcuts of core'dinations paper, spritzed them with water and scrunched them before leaving them to dry.


I also triple dipped some seam binding ribbon into broken china oxide.


I used the hashtag sentiments for my sentiment word but I cut the actual hashtag sign off of it (don't tell Tim!) but I do like the words on their own and I cut the legs off the bird so she could sit neatly on the nest.


There we have my Easter card, I hope it brings you a little inspiration to create your own Spring card.


Wednesday, 12 April 2017

Cover Art

I am thrilled to share with you the cover to my small journal. It's the sort that a police officer uses on the TV (and I assume in real life!) and it is my favourite of my journals!
I started by peeling the film off one side of an acetate ATC and stamping a character from Elenazinksi on it. I then stamped some greenery and something for the chap to stand on. Ensure this stamping is dry before moving to the next stage! This will be the reverse of the finished project.
I then painted in the details. As this will be the reverse it doesn't matter if you get any paint on the black outline.
I used PaperArtsy's Fresco Finish Paints. Some paints are translucent (like Limelight that I used on the leaves and grass) and to make the paint 'pop' I covered them with white paint. The back of the ATC looked like this when I'd finished:
Instead of painting a sky on the ATC I thought I'd paint the cover and allow the cover to become the background of the ATC. Using white, then blue paint I brayered the background and then added a stencilled background (Schoolhouse and Dot Fade).
Then all I did was add glue to the painted areas of the ATC and adhered it to the cover. The final flourish was to peel the top coating off the ATC. All done! Thank you, as always, for popping by.