

So I have created a step x step for this to show how I created the layers and put the card together..
I started by covering my base card in some paper from the wallflower paper stack.

I then used an edge distressing tool to scuff up the edges

then I added some walnut stain distress ink using a blending tool.

Now for the layers, I selected two of the new pocket cards from the idea-ology range, scuffed the edges and added ink, as for the card base.

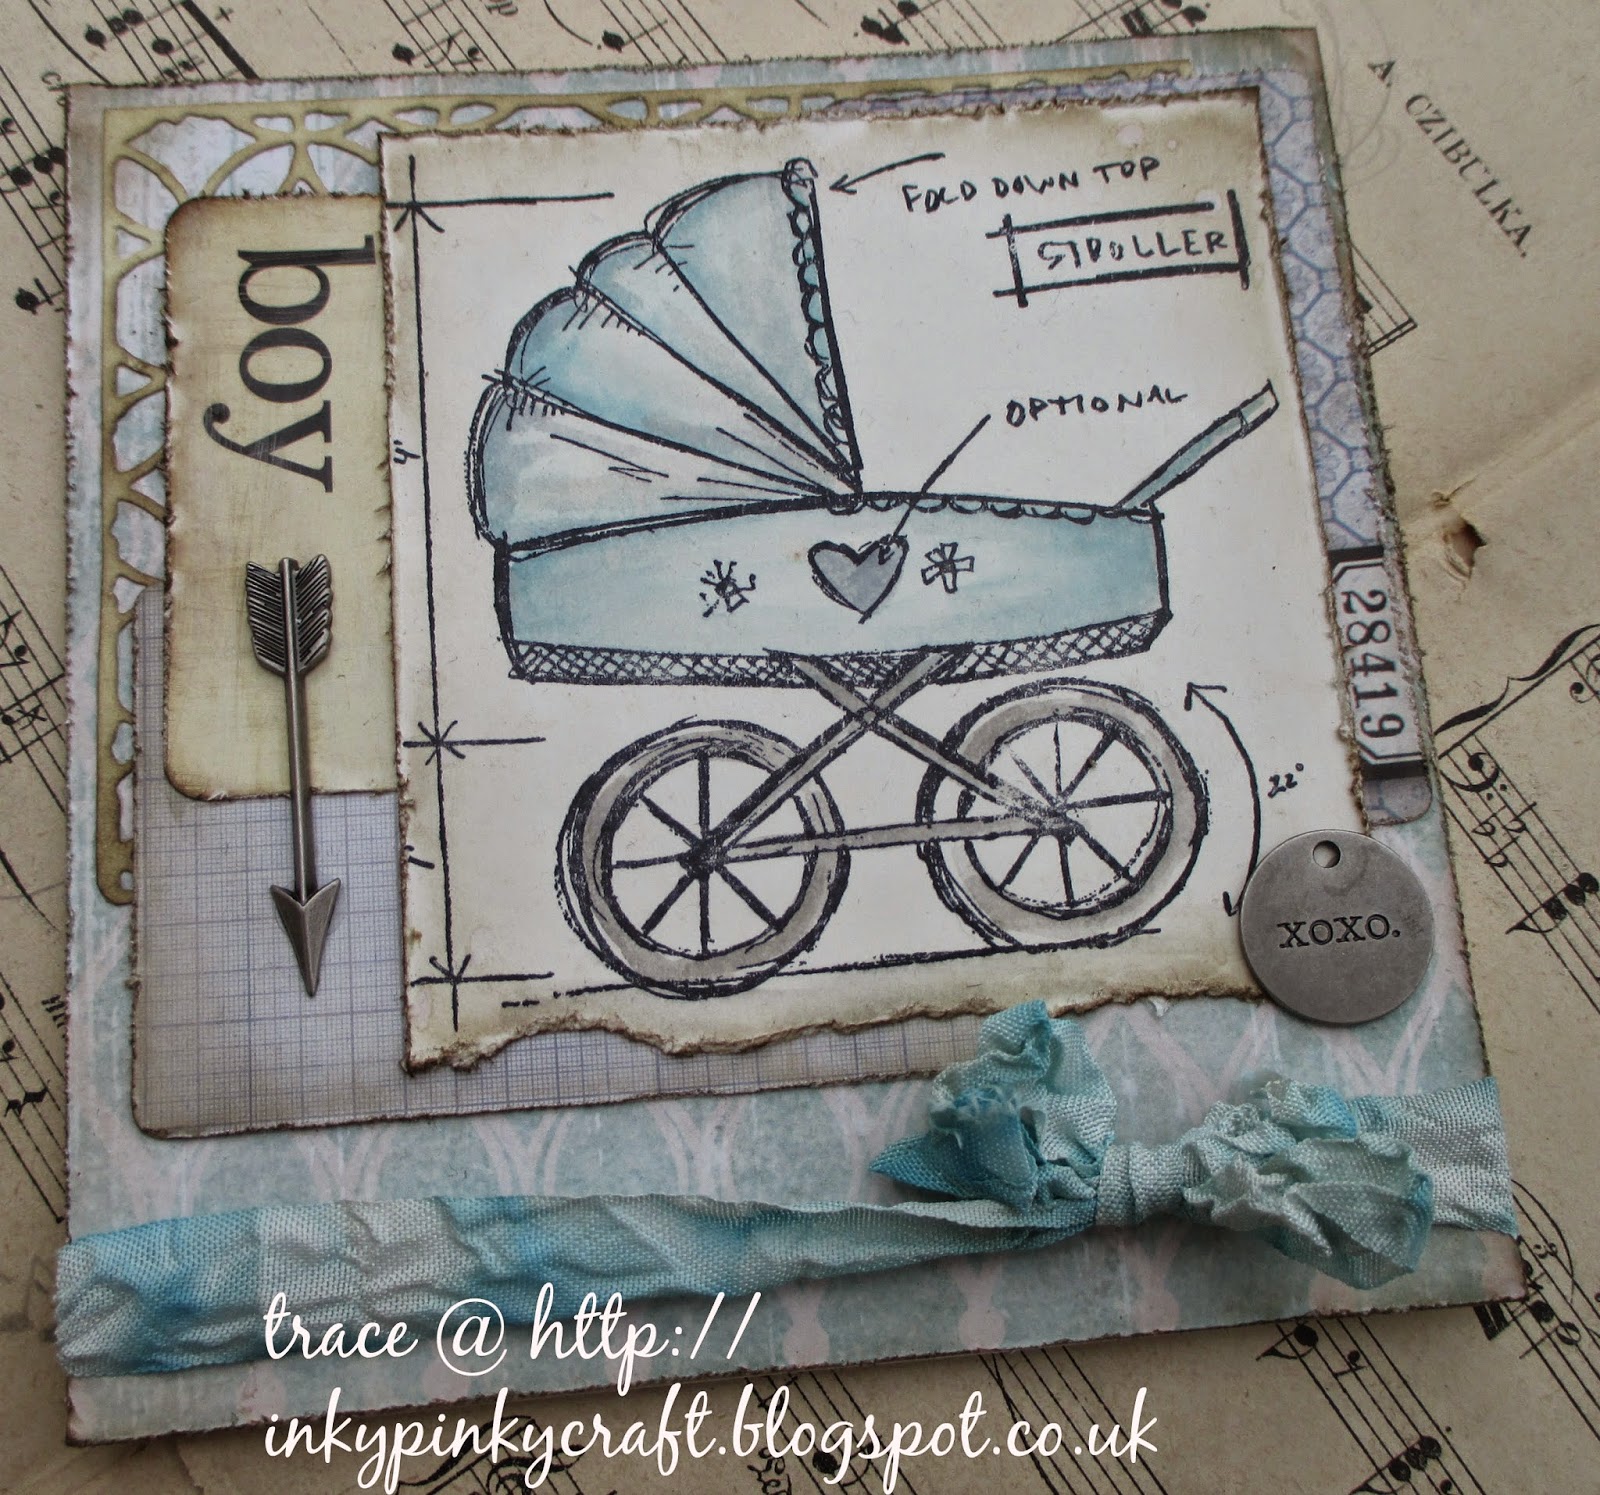
For the main image I stamped in jet black archival and then coloured various distress markers onto my craft sheet to create a palette. then using a waterbrush I picked up the colour and applied to the blueprint image, layering up the colours and allowing to blend. Then dry before adding final layer of colours for shading.

i chose the word boy from the flash cards , from idea-ology rnage and sanded and scuffed .


For the final layer I die cut one of the mixed media thinlit dies which are so useful and inked with walnut stain distress ink.

To finalize the design I lay all the pieces on till I am happy with where they are ..

laying out all the elements helps me shuffle things about and move things around to get the final composition.


I used a pokey tool to create the whole for the seam binding to slide through, giving a neat finish inside and out.


Finally once seam binding is through the card tie to form a bow on front of card.

The seam binding was dyed using distress stain picked up from craft sheet and then scrunched and left to dry overnight.

So there you have the final card... complete with a couple of additions from the idea-ology range...a typed token and an arrow.

hope you like my make
keep those fingers inky!
trace x


You should have gone with GIRL & set it to Kensington palace!
ReplyDeleteSally
Thanks yes maybe I should ! X
DeleteSuch a lovely original card for a new baby . Really love what you have done to create this Trace. n thx so much for sharing your step by step .
ReplyDeleteThanks Amanda xx
DeleteSuch a wonderful baby card Trace, how great to see your process! hugs :)
ReplyDeleteThanks so much xx
DeleteLovely card Trace, the vintage pram image looks great set against your backdrop. Tracy x
ReplyDeleteThanks so much Tracy xx
DeleteWonderful Trace, any new Mom would be thrilled to get this wonderful card!
ReplyDeletethanks so glad you liked it x
DeleteAbsolutely adorable, Trace! Great tutorial. Great composition. I love how you have combined so many elements into such a lovely, sweet vintage feeling baby boy card. Beautiful work, as always.
ReplyDeleteThanks so much Candy you are kind xx
DeleteFabulous, Trace!! Love your layout of the papers in the background and the soft bluish/gray hues are simply perfect for a baby boy card! Uber Adorable!! :) XOXO-Shari
ReplyDeleteThanks south Shari , so glad you like it x
DeleteWhat stamp did you use for the baby carriage?
ReplyDelete