Monday, 17 September 2012

May You Always Be Inspired - By Gabrielle


Thank you for your lovely comments on my previous post with the new Stampers Anonymous stamps. They were lovely! I promised something a little different and I thought I might show a different way to use the new Metallic Distress Stains with masks.
The new Metallic Stains are so incredibly versatile. There are lots of ways to use them, much as you would use the rest of the stains in the range. They react with water and you can stamp with them too! There are many videos and tutorials on the internet with ways to encourage you use these stains so please do look out for them.

 
I started by cutting a tag from white card and adding Picked Raspberry and Peeled Paint Distress Inks. I then laid two masks from the Mini Floral Masks set over the top and misted water over the top. This left an outline where the masks had been... There are lots of different mini masks in the range - do look them out. My favourite is the postage stamp on the Best of British set - just perfect for layouts commemorating this summer’s incredible events! Why not check out the Leaves, Christmas or Antique sets too?

 
I then squeezed some Brushed Pewter Metallic Distress Stain  onto my craft mat and painted the stain over the leaves with my water brush . For the flower I used Antique Bronze . I also added some pewter to the edges of the tag by swiping the bottle directly on the edge.

 
I then stamped a little script in Sepia Archival Ink and some dots in Tarnished Brass Metallic Distress Stain to finish the background. The main sentiment (from Seriously Art ) was also stamped in Sepia Archival Ink.


For the flower I used Clearly for Art and die cut a flower and added Wild Plum and Gold Alcohol Inks to it. I then curled it with my heat gun (watch your fingers!) and added the silver button  centre. The flower at the top was made from floral Ideaology pieces and Paint Dabbers (Snowcap , Citrus, Silver  and Gold ) with a little Picked Raspberry over the top of the white to tone it in.

Thank you for popping by and for leaving a comment. We really do appreciate your visit!

Sunday, 26 August 2012

Tim Holtz Dragonfly Wall Art - By Gabrielle

Gabrielle is back with another inspiring project, this time using some of Tim Holtz'  fantastic range of stamps, which you can find on the Country View Crafts web site Here.

Over to Gabrielle:

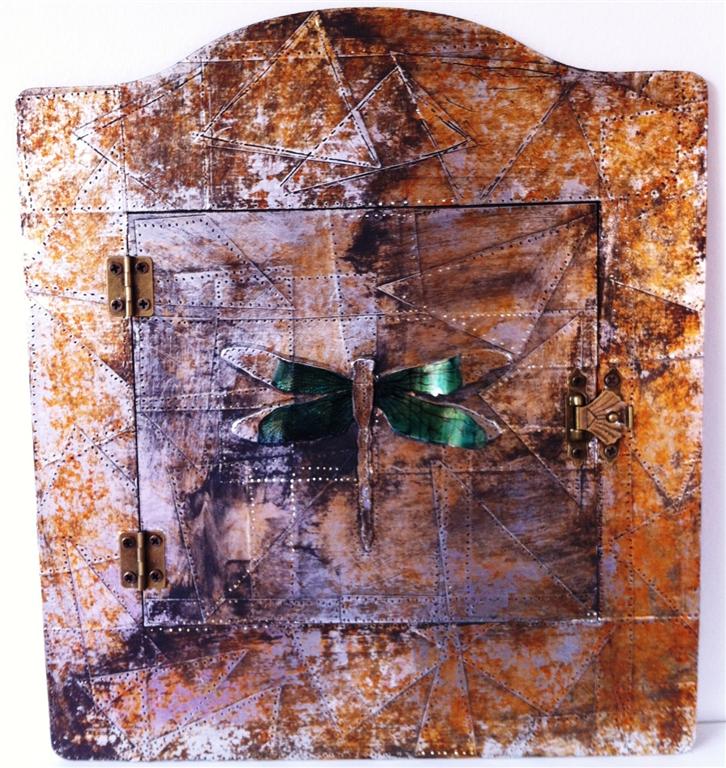
Tim Holtz’ newly released stamps are really exciting. They offer a whole new style, much more sketchy hand drawn feel which is refreshing! However today I wanted to show you a way to use the Dragonfly stamp which I think might just become one of those ‘go to’ stamps as I can see it used in 100 different ways! I wanted to use it twice, in two different ways and so I made a little wall art.


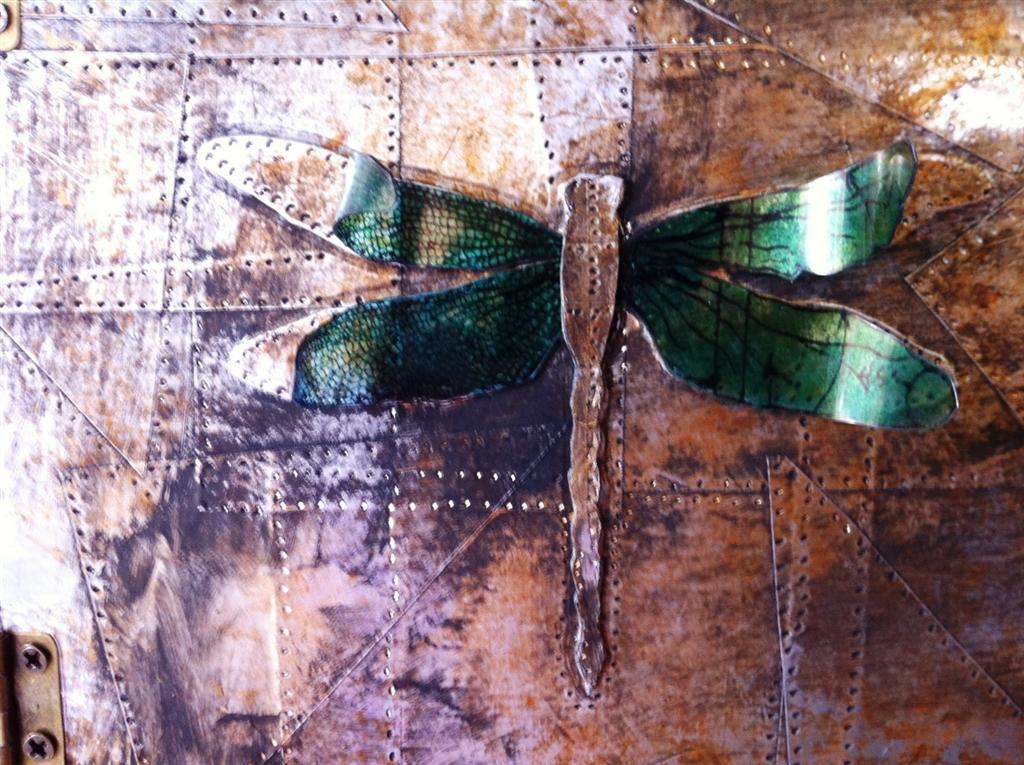
I took one of Wendy Vecchi’s Art Part Arched Frame and covered it in small sections of metal tape, allowing them to overlap. I used a pencil to make marks where the overlapping metal met creating dimples. You can use metal tools but to be honest a pencil works well! I then used Gold and Sunset Orange Alcohol Inks over the top and then rubbed black paint over the top of that (I use my fingers!) and wiped it away with a piece of kitchen roll. I never worry if a little of the colour underneath is removed too – it adds to the grungy look! 


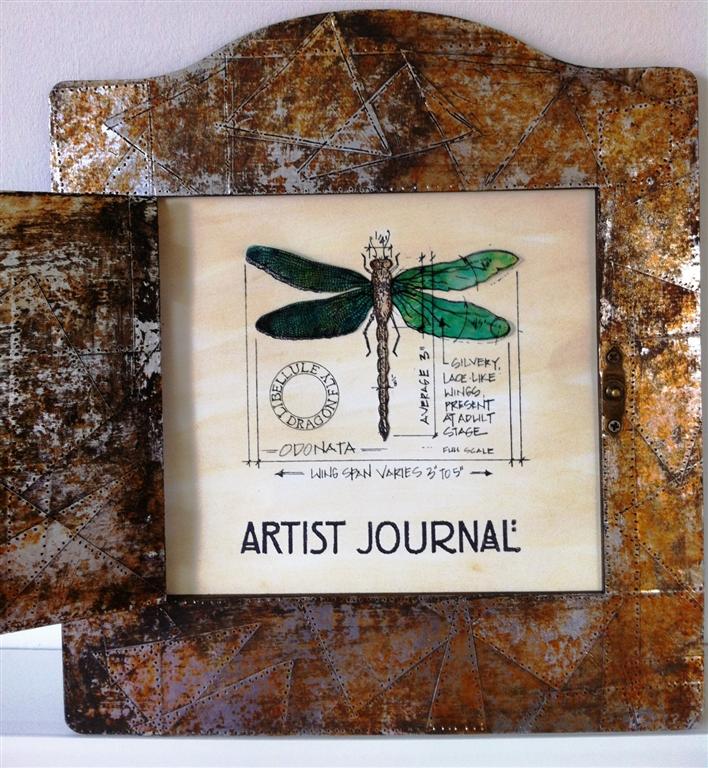
It occurred to me that I could make a ‘door’ by using the centre of the Art Part so I then repeated what I’d done on BOTH sides of the centre piece. The only thing I did differently this time was I stamped the dragonfly onto a piece of card and cut it out and added metal tape over the top. This would form the basis of the dragonfly on the cover. Notice I said both sides – this might be because I had forgotten that you’d see the back of the door when it was opened!

I stamped the dragonfly’s wings onto Clearly For Art and added Alcohol Inks to create the colours (Stream, Pool, Lettuce and Gold). I cut the wings out and heated them so they would curl. I covered a small piece of Grunge Paper with metal and use the techniques as before. On the reverse I stamped the Dragonfly’s body and cut it out. I then placed the wings and the body on top of the dragonfly on the door and added hinges and a ‘lock’.


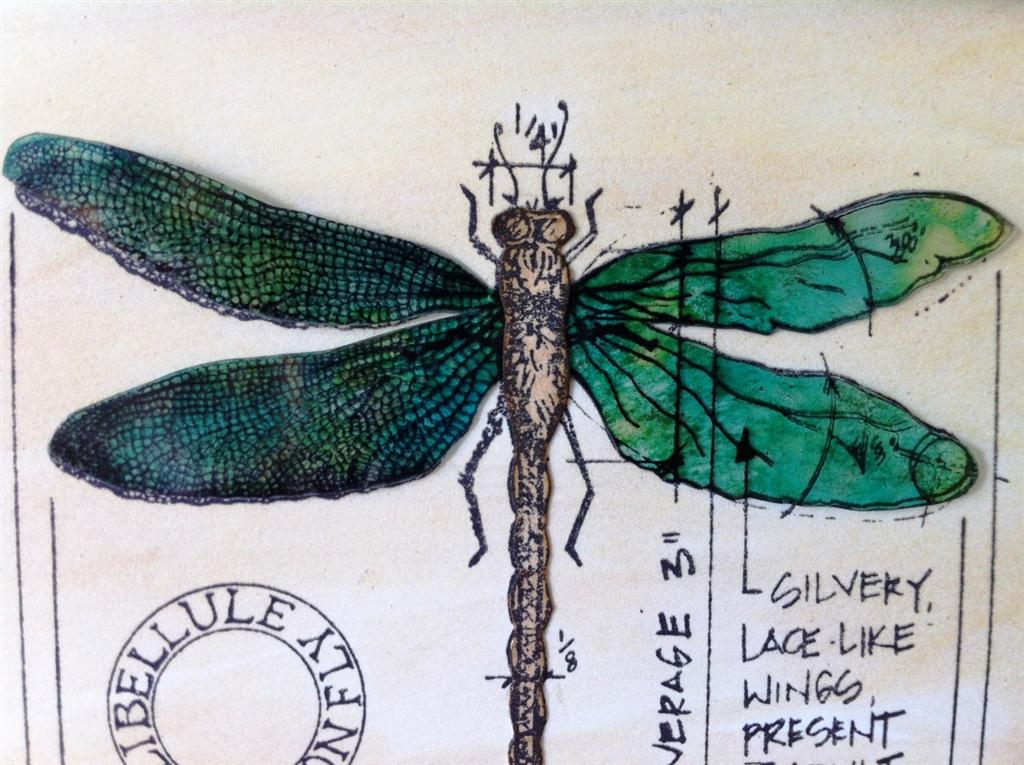
For the inside I covered a piece of white card with Antique Linen Distress Stain and stamped the dragonfly and the words ‘Artistic Journey’. For the dragonfly I cut another pair of wings as before and a body (from white card edged with Vintage Photo Distress Ink) and adhered to the stamped image. This time I did not curl the wings as the door will squish them!


I hope you like my wall art! Alternative ideas include: cutting out more dragonflies and arrange them around the frame before adding the metal tape... painting the Art Part and stamping the image several times around the edge... If you are someone who uses pens you could stamp the image and colour it in... gosh, there are so many possibilities! Thank you for joining us at Country View Crafts Blog... there’s something a little different next time!

Thursday, 2 August 2012

Scrap Album By Gabrielle


When I saw this amazing Want2Scrap Album Chipboard Album I knew I wanted to use PaperArtsy Fresco Finish paints and stamps! I primed each piece with Snowflake Fresco Finish paint by squeezing a little paint on my craft sheet and ‘painting’ each piece with Cut and Dry foam. For the covers I painted Beach Hut Fresco Finish paint over the top with Cut and Dry foam, dried them with my heat tool and sanded them all over. Where the areas of paint had been removed I added a little Vintage Photo Distress Stain. I added a little handle to the front cover by dabbing the Ideaology flower with the blue painty piece of Cut and Dry foam and adding a Hitch Fastener in the centre.


For the next page I used a circles mask and Gold Fresco Finish paint. I laid the mask on a corner and lightly sponged the paint over the top. I did this over all four corners and then moved the mask to the centre of the page and dabbed the gold paint through the mask, allowing it to blend over the edges of the areas you have already masked. The Gold paint is a little more liquid than some of the others and so it may bleed under the mask. I like this look and so never mind when it happens! As with all of the pages I sanded it and then added Vintage Photo Distress Ink. To position the stamped images, pop the cover page on the top and then position the stamps where you would like them.


The book lends itself to be a scrap book and so with these pages I thought I might show you how you can create a background just ready for your pictures and memorabilia! Having prepped the pages with Snowflake Fresco Finish paint I added Hey Pesto Fresco Finish over the top. I used the sensational A4 alphabet mask and sponged Toad Hall Fresco Finish paint over the top covering the whole page. I then nudged the mask a small way and repeated the whole technique with Hyde Park Fresco Finish paint.  After sanding and adding Vintage Photo Distress Ink I stamped more images but at the edges so I could add photos another time. 


To complete the back page I used the Metal Effect mask and Gold paint. The ribbons are metal tape, beaten with my Texture Hammer and dabbed with painty Cut and Dry foam. The giant hand is actually from the packaging from the mask! I stamped the images on to more of the packaging and cut them out.

Tuesday, 17 July 2012

Caged Bird Bookmark


This is an old project but we thought it might be of interest to Tim Holtz fans. It was made for a bookmark swap on the Crafttelly forum. I wanted to make something a little different to the usual flat bookmark but something that could still be used for its intended function. 

The bookmark is made from Tim Holtz Grungeboard for durability and the 3D element at the top is made using Tim's Caged Bird Sizzix die. I cut two cages out of grungeboard and bowed them a little, grungeboard is great for this as it is very flexible and cuts nice and cleanly with the Sizzix steel rule dies. These were treated to various colours of embossing powder on both sides to create a gilded look. They were fixed to the flat part of the bookmark using simple brads covered up with some gems. The edges of the cage were then glued together giving the impression of a circular cage.

The bird was stamped with Creative Expressions Rubber Stamp Textures and slotted through the cage so it pokes out front and back. The main part of the bookmark was then distressed, stamped with Creative Expressions Rubber Stamp Textures and some embossed swirls added. Oh, and the letter L was added for the lady the bookmark was made for :-)


Thursday, 12 July 2012

Blossom Bucket by Gabrielle


For my latest project I have been playing with my favourite designer’s products. The fabulous Wendy Vecchi designs wonderful stamps, Art Parts and now embellishments! I used an Art Part Arched Frame and covered it in Peeled Paint Distress Stain. I then over stamped it with a dotty stamp in Sepia Archival Ink.  To the edges of the frame, inside and out, I added Vintage Photo Distress Ink (I know, I use it on everything!) I then took two leaves and stained then with Peeled Paint Distress Stain an, once I’d finally decided on where to place them, I used Glossy Accents to attach them.


I took the rather lovely beige flower  and added Vintage Photo Distress Ink to the edges to give it a little colour and attached it on top of the leaves. The full Art Part shape in the background was coloured with Tumbled Glass Distress Stain and I used Cobalt Archival Ink to stamp the tree. The sentiment was stamped onto kraft card using three stamps from the Collectibles Art set.


 The small rectangular Art Part was inked with Broken China Distress Stain and edged in Vintage Photo Distress Ink. I used Broken China Distress Ink to stamp the tree and then added the bottle and floral bouquet. The base of the bouquet was a smidge too big to fit inside the neck of the bottle so I ‘nibbled’ the edges with my scissors.  To finish the frame I added stamped leaves and an advertisement - both were stamped onto grungepaper.  Thank you so much for stopping by! 

Saturday, 9 June 2012

Jubilee Coaster Book by Gabrielle


I wanted to make a small book that we could add mementos and photos from the Jubilee celebrations we were attending. It has been such an exciting weekend with so many memories that it’s great to have a place to keep them and be able to look back and say ‘I was there’!!!


I took a Maya Road Coaster Book and covered each page with London Line papers (making sure facing pages matched and the patterns were the right way round!) I used Glue N Seal to adhere the papers down as this gives a really good coverage and reduces the chance of the paper buckling. Then I sanded the edges and added Vintage Photo Distress Ink to the edges.  Once I had done the preparation I was able to add embellishments which is always the fun bit! I used bunting die cuts and twine to make strings of bunting. The fabulous flowers and gems stones, buttons and hearts and, of course, the obligatory crown!


I also made a matching tag!


Tuesday, 5 June 2012

Telephone Book by Gabrielle


 When I was given the incredible opportunity to work with Susan and everyone at Country View Crafts I wanted to make something that reflected how I first found Country View Crafts. I was looking for Tim Holtz dies and they had the best prices and I am sure that’s how I have suddenly got so many! I have made a book to write telephone numbers in. I used three sheets of grungeboard and coloured two with Wild Honey Distress Stain. Then I stamped a Wendy Vecchi dotty stamp on all four sides using Jet Black Archival Ink. On the front page I added an invitation to ‘look inside’! Then I used the third sheet of grungeboard to die cut one of Tim’s new die – the Vintage Telephone. I painted it with Little Black Dress and Pewter Fresco Finish paints, sanded it and then highlighted the sanded areas with Vintage Photo Distress Ink. I also edged the covers heavily with Vintage Photo. I made inserts from kraft card, stamped on lines and letters cut from Tim’s Word Play die using dictionary paper. To hold the book together I used book rings.