Saturday, 24 November 2012

Giving Thanks by Amanda


Product Focus: Sizzix Inkable Embossing Plates, DCWV Papers, Distress Inks

Before I discovered scrapbooking, the number of birthday and Christmas cards I needed was nowhere near enough to satisfy my crafting addiction, so I became very polite, sending thank you cards for everything!  It’s a type of crafting I still love to do, as you have so much freedom about design and, as thank you cards are no longer really expected, they’re always such a lovely surprise to receive.  Unlike other cards, thank you notes are made after the event though, so I try to keep them simple, or it takes me so long to get them made that nobody can remember what they’re for! 

If you have some special people to thank, why not give these quick designs a go?  I’ve used some gorgeous Sizzix Ink-Its Letterpress Plates to create some quick textured cards that you can use for any occasion.  These plates are especially good if you like the look of stamped images, but are not a confident stamper, as they give a similar finish, but with the added special detail of light debossing.  I’ve teamed these with some beautiful DCWV papers that need little or no embellishment.


 For this card I’ve used coordinating papers from DCWV’s Nana’s Nursery mat stack for the background and main image.  For the middle layer, I’ve embossed with the Craft Concepts Hexagon Illusion embossing folder (hexagons are so trendy at the moment!) and then rubbed over with Dusty Concord Distress Ink to really highlight the texture (and to add purpleness of course J).  For the main image, I’ve used the Ink-Its Flower Vine Letterpress Plate, inked up with Broken China Distress Ink, and then painted in with a damp paintbrush dabbed onto the Dusty Concord pad.


 My next two cards use the beautiful Sizzix Ink-Its Rustic Elegant Flowers Letterpress Plate.  I really love this design, and it’s so flexible, as you have the bird detail and the main image, which can be cut down too.


 For the square card I’ve inked up the plate with two colours of Distress Inks (Peeled Paint and Tea Dye) before embossing on white card and trimming round.  The background is two coordinating papers from the DCWV La Crème 12x12 stack.


 For the A6 card, I used the DCWV Garden Party 12x12 stack and again inked up in two colours of Distress Ink (Peeled Paint and Worn Lipstick) before trimming round and cropping.  I’ve then distressed it and highlighted the texture by dabbing Vintage Photo and Worn Lipstick Distress Inks onto a craft sheet, misting with water to mix them, and blending onto the card with a piece of Cut n Dry stamp pad foam.  I’ve finished the card with a butterfly cut from one of the Garden Party papers.


 I’ve used the Letterpress plates with my Big Shot: you’ll need all the layers of the Multipurpose Platform (Tab 2), but only one cutting pad from a pair. I hope you enjoy playing with them!

Thursday, 22 November 2012

Alterable Advent Calendars


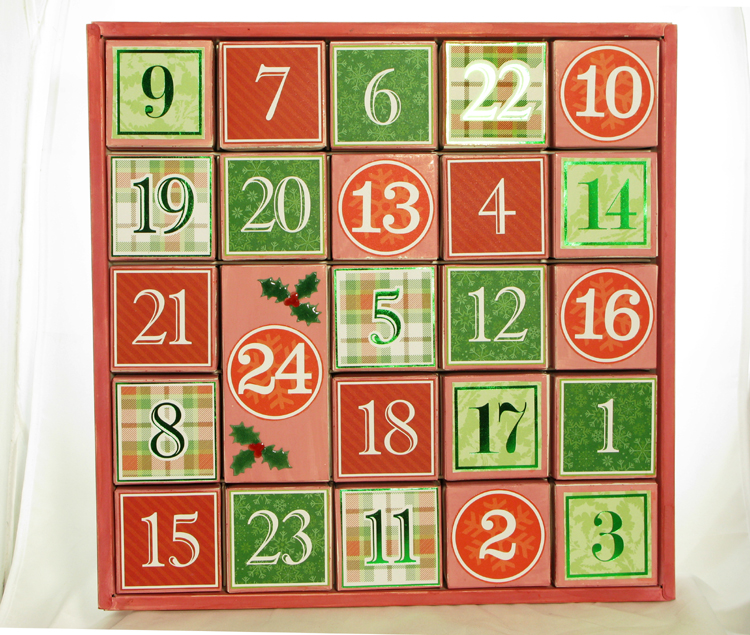
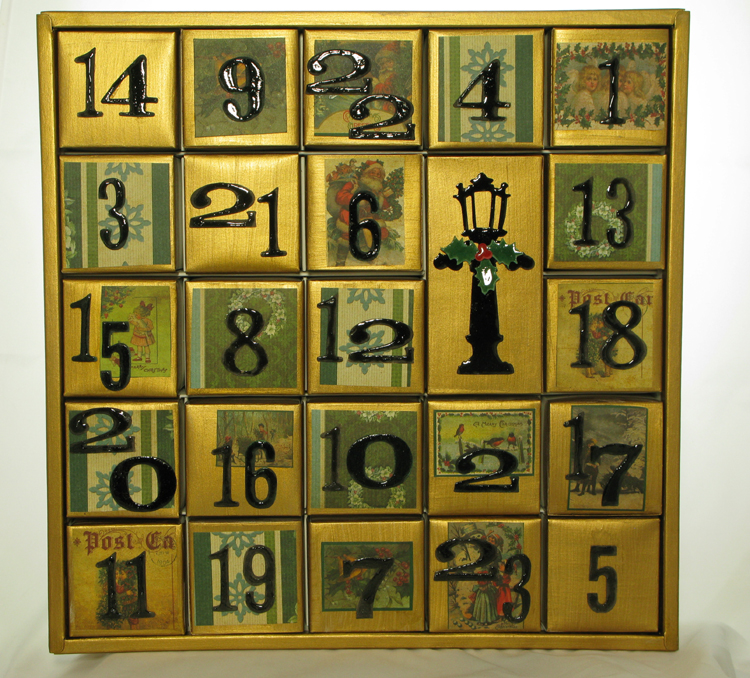
Here are a couple of Alterable Advent Calendars ready to be given on the 1st December. These are great as the boxes are quite large (6cm x 6cm square boxes) and can fit more than just a chocolate inside. The kit comes as an assembled frame containing the 23 square boxes and one double rectangular box.


I decided I had to use up some of my paper stash and I found last year’s DCWV and Marianne Design Specialty Paper Pads. I painted one Calendar with 2 coats of Fired Brick Distress Stain and cut out one of the number pages from the DCWV stack, stuck them on the boxes and then used 2 holly die cuts from the Sizzix Tim Holtz Lamp Post Die. Inked the holly with Evergreen Bough Distress Ink Pad and the berries with worn lipstick distress ink pad, these were then covered with Glossy Accents and stuck to the calendar. 


The second calendar was painted with the Viva Décor Gold paint. I chose one of the pages from the Marianne Design pad this had lots of small vintage Christmas pictures on that I cut out and glued onto some of the calendar boxes. Using the Sizzix Tim Holtz Word Play Die I cut out the numbers from Kraft Paper and inked them with Tim Holtz Black Soot Distress ink. 


I also cut out the Sizzix Tim Holtz Lamp Post – this was slightly too long for the calendar box so trimmed near the top of the post where the join would be covered with the holly & berries. I stained with Black Soot distress stain and then used Glossy Accents. Glue the numbers and lamp post onto the calendar.


Monday, 12 November 2012

The Gift of Die Cutting! by Gabrielle


I absolutely love die cutting. I love how you lay a piece of paper on top of a die and when you press a button (like on my Sizzix Vagabond) or crank a handle (like on my Cuttlebug) you get a shape from the other end! It’s such a fun thing to do and best of all you can repeat it time and time again! Beats cutting out with scissors any day!

So, this is a little project to show you how you can combine a few dies and make a gift box for the ‘big day’ that seems to be coming faster and faster!


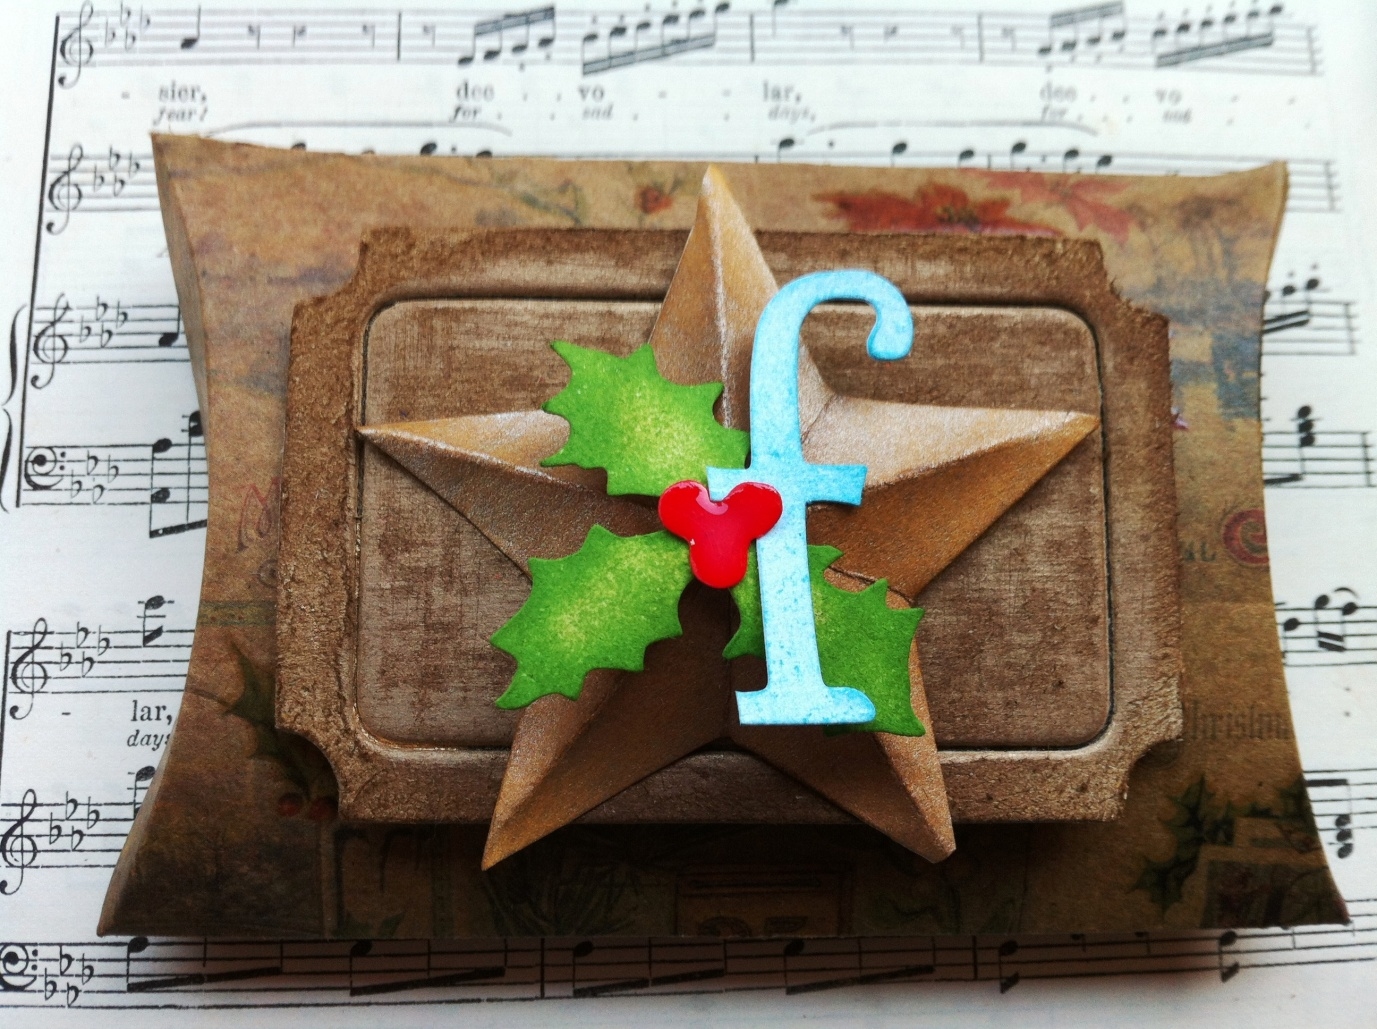
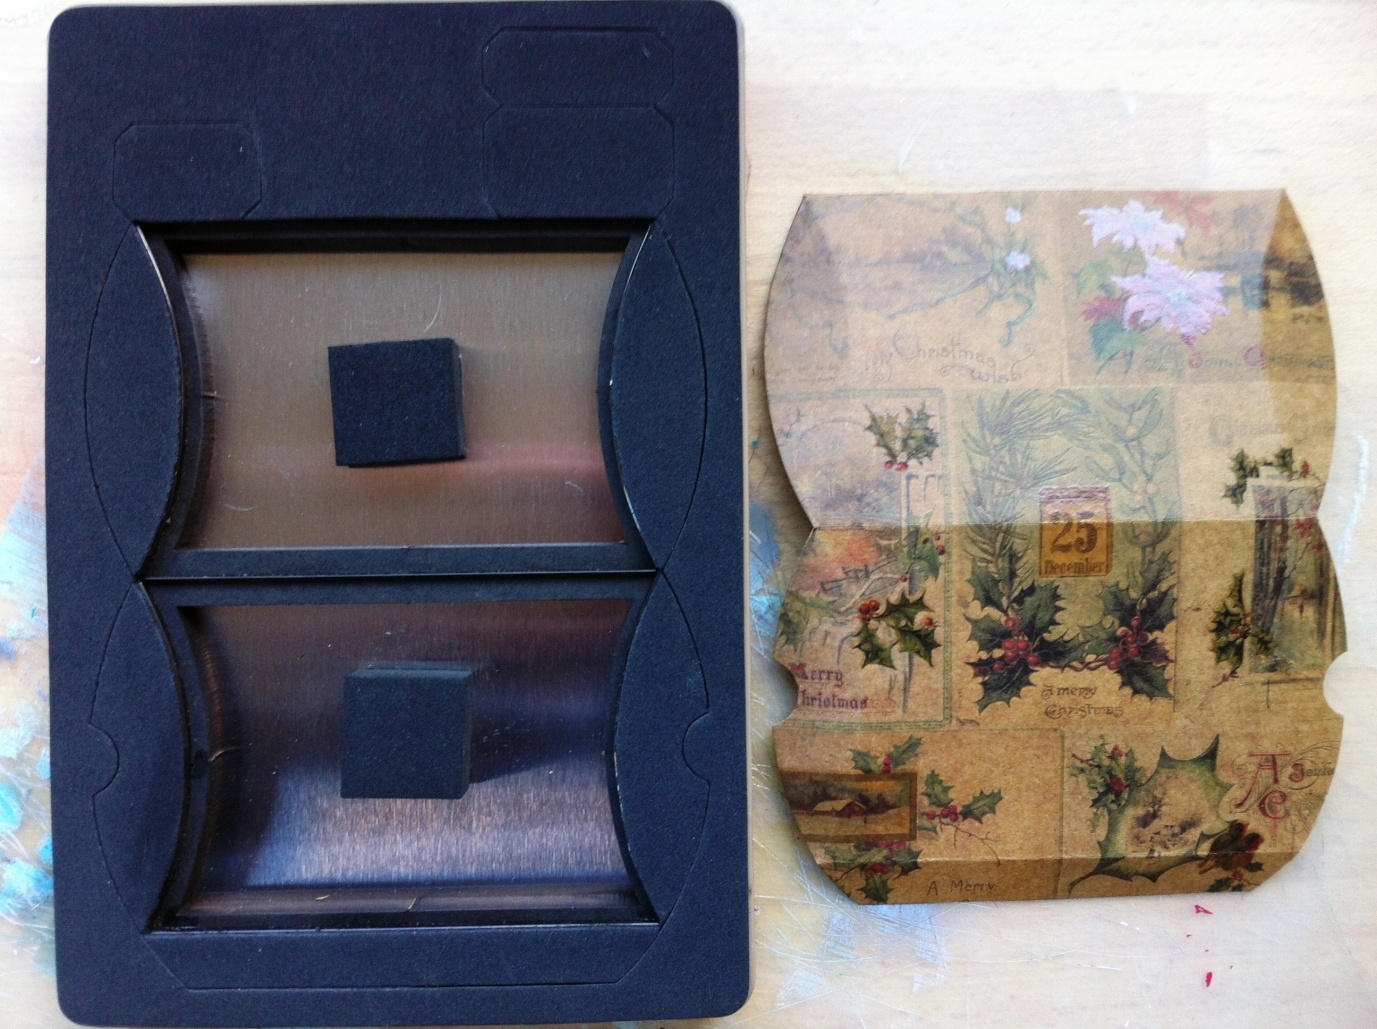
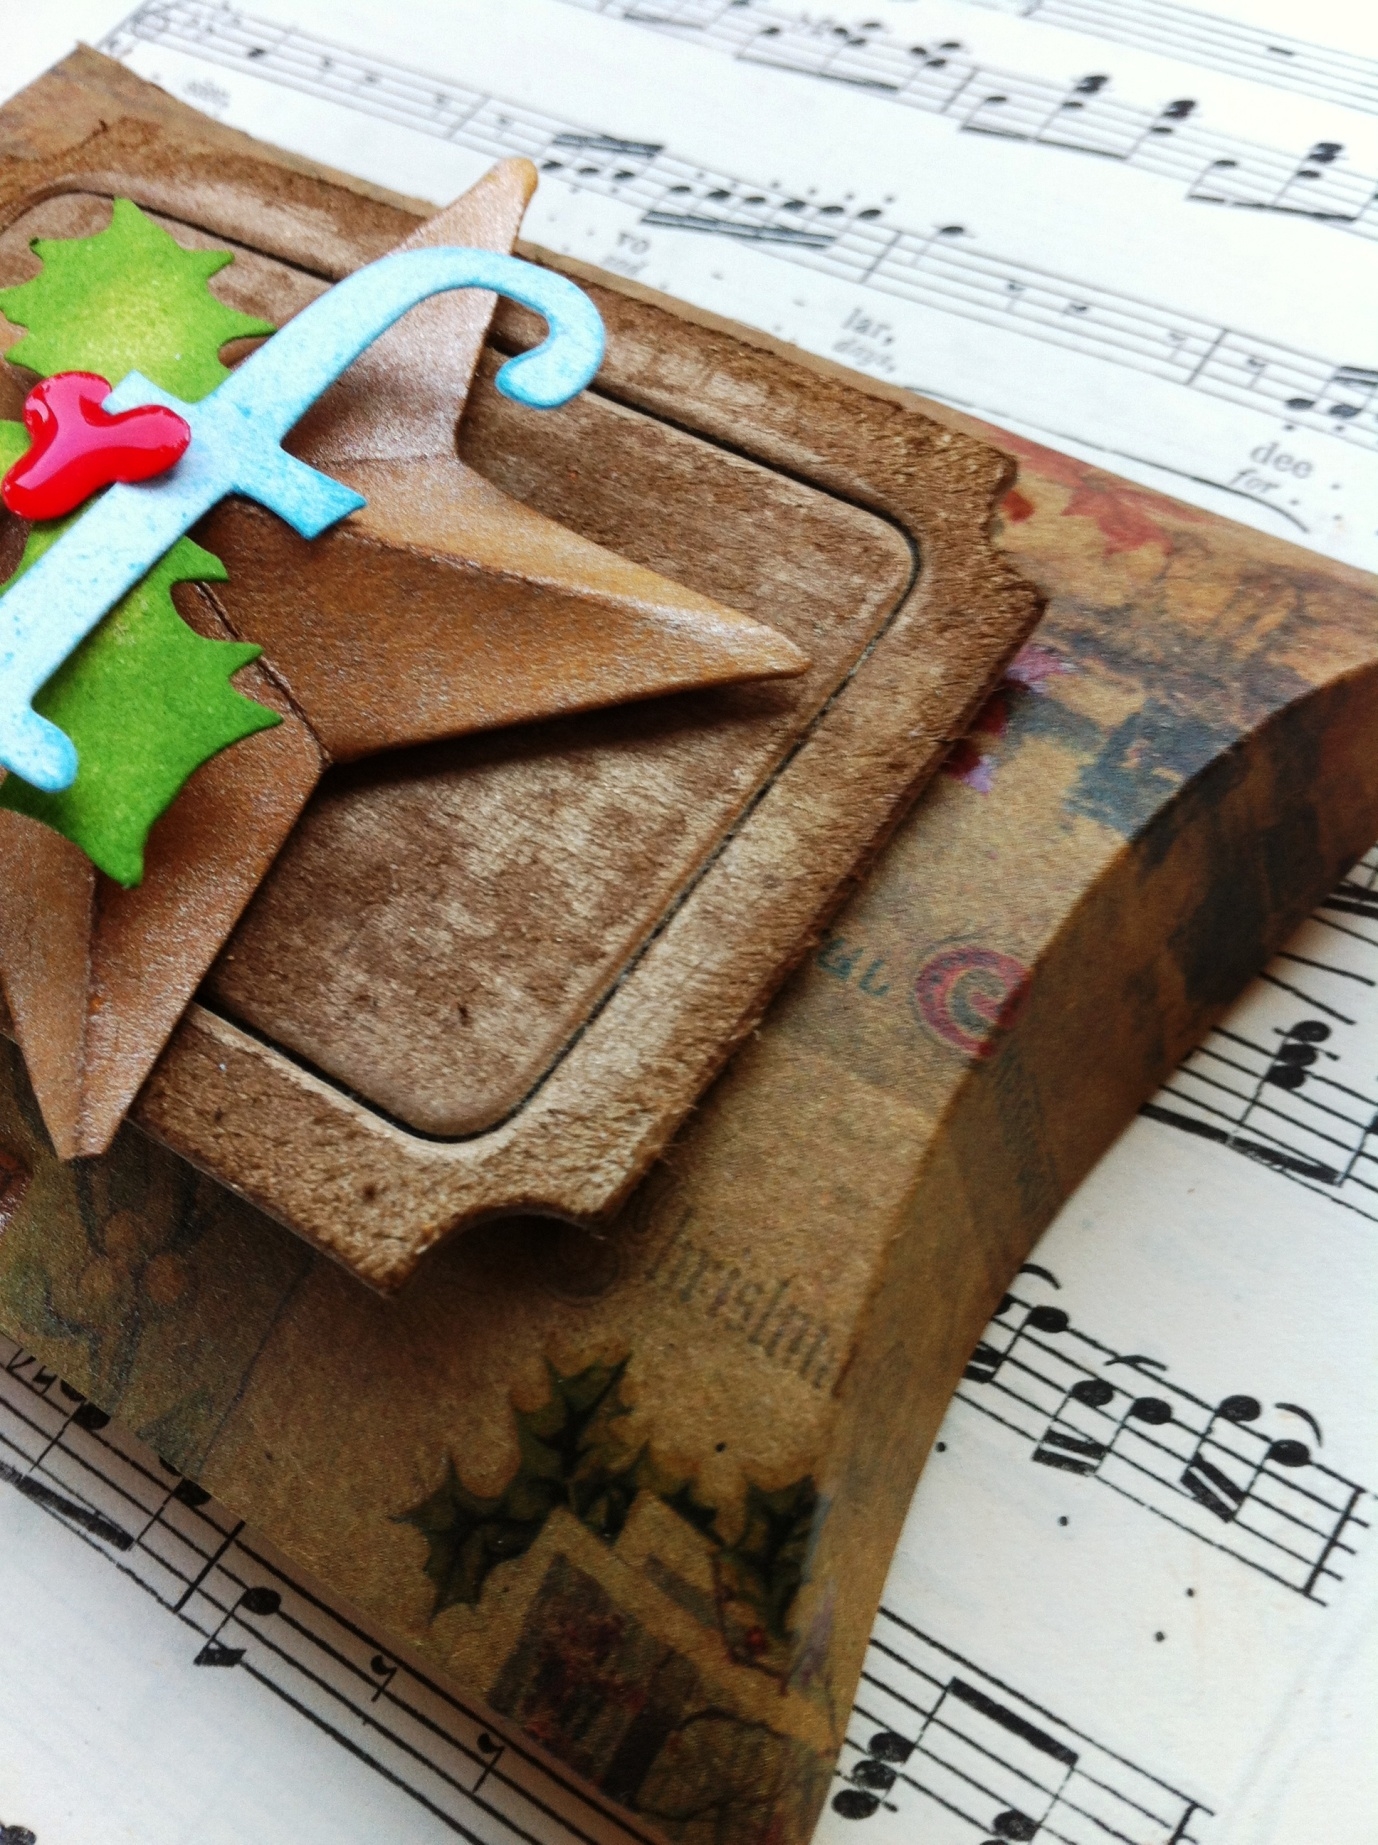
 I started by cutting a rectangle of Christmas paper from Tim Holtz’s Seasonal Kraft Resist paper and die cutting a gift box using the Tim Holtz Movers and Shapers Pillow Box die. I must confess that when I ordered it I did worry that it might make a very small gift box but actually, once it is made up, it would accommodate a fair sized piece of jewellery or small gift so I was pleasantly surprised! To get the die to crease nicely it is advised that you use a crease pad as this allows the die to cut out the shape and add nicely even score lines.


From Grungeboard I die cut out the Large Ticket. I painted the ticket with Gold Paint Dabber, sanded it back and added Gathered Twigs Distress Ink over the top. The small Star was die cut the same way as the Pillow Box and covered in Tarnished Brass Distress Stain. After I had creased the lines on the star I added Gathered Twigs Distress Ink to the creased lines to add a little contrast. I wondered how I could personalise each gift box and thought I could die cut a letter from the truly fabulous Word Play die which I inked with Broken China Distress Ink. I wanted to make the letter a little more Christmassy and so I added a little holly (Shabby Shutters and Mowed Lawn Distress Inks) and berries (Barn Door Distress Ink and Glossy Accents for shine!) from the Holiday Lamppost die.

I hope that you might try mixing and matching dies to create fabulous projects in minutes!


Friday, 2 November 2012

Movember


Do you know anyone who is growing a moustache for Movember? Why not send them a card of encouragement, we have a number of moustachioed dies and art parts for you.


And if you use your imagination you can even make a Tim (Holtz) Tash :-)


Monday, 22 October 2012

** SALE ** Viva Decor Paint & Effects

All of our Viva Decor Paint & Effects are more than 50% off. When they're gone they're gone so don't hang about.

Viva Decor Paint & Effects


Sunday, 21 October 2012

Initial Birthday Cards by Amanda

We're very lucky that one of our best friends also happens to be a very talented designer. Amanda Curtin has designed and demo'd for docrafts and has written many magazine articles as well as appearing on C&C TV. In this demo she shows us how to make some beautiful personalised birthday cards. Over to you Amanda...

Initial Birthdays
My little boy has just turned a year old (eek!), so I’ve had a few first birthday cards to make for babies we know from our local children’s centre.  I really love all the patriotic collections released for the jubilee and Olympics, and thought it would be lovely to use some for these first birthdays, as turning one in such a special year will be something to talk about when they’re older.  I picked the London Line collection for my projects, as I love the pastel shades and lovely watercolour style for babies, and it’s cute without being sickly.

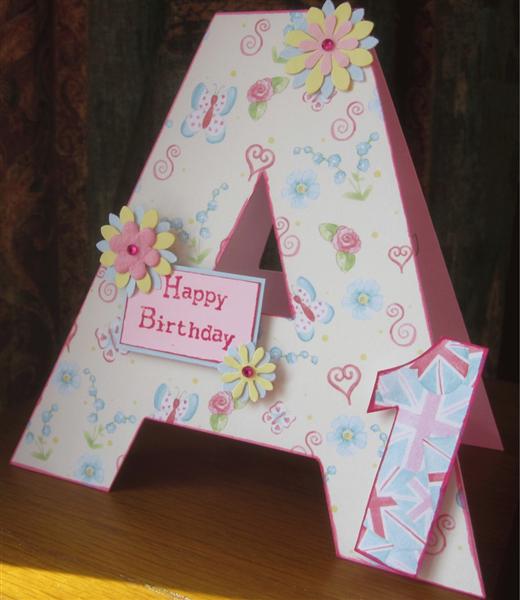
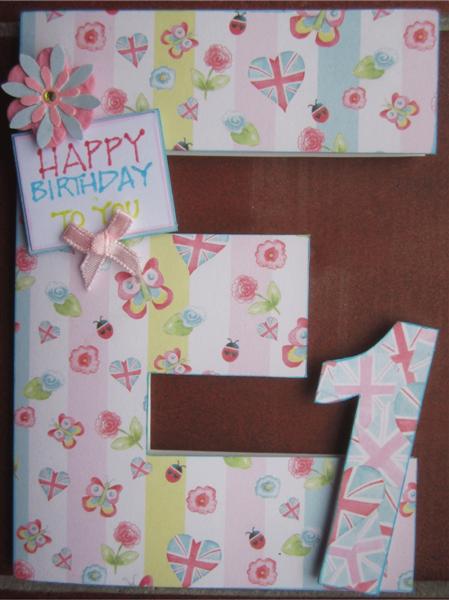
My two favourite types of cards when I was little were shaped ones and ones with age badges.  One year olds are a bit young for badges, so I made my cards in the shape of each child’s initial.  The design is suitable for any age, so to turn these into badge cards, just make the number with two thicknesses of card (so it’s sturdier), attach a safety pin to the back with silicone glue and attach it to the card with removable glue.


1.    Cut the first letter of the child’s name from a card blank, making sure it’s nice and chunky (4 or 5cm wide is nice), so you have something big enough to decorate, and that you have a bit of the card fold remaining.  I made mine for Ava and Evie: I used a 13.5cm square card blank with the fold at the top for the ‘A’, and a portrait A6 card blank for the ‘E’.


2.    Die cut or stamp and cut out a number for the child’s age.  Cover the card and number with coordinating papers from the London Line 8x8 paper pack and ink the edges with a pen or ink pad. 
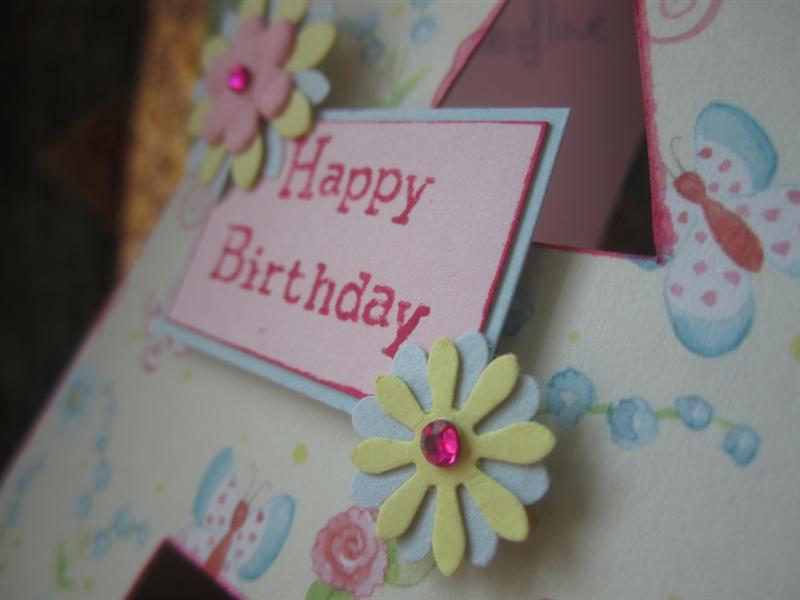
3.    Stamp a greeting in matching inks and mat with coordinating card.  Attach the number and greeting to the card with 3D foam pads (or removable glue, see above).  Embellish with bows, punched or die cut flowers, and gems. 

Tips and Ideas
•    To avoid cutting too far when cutting internal corners (like the triangle in an ‘A’), pierce the corners with a pin or pokey tool first.  You’ll feel the hole with your knife and be able to make a more accurate cut.
•    Pick two or three colours from your papers and add embellishments in just these colours to get a great match without fussiness.
•    Use coloured pens to stamp greetings with multiple words or lines to create a perfect multi-colour match with the colours in your paper.  To get this effect without stamping, colour peel-off greetings with permanent markers.
•    For simple and economical embellishments, punch or die cut flowers in your three main colours and layer up.  This is a great way of using up card or paper offcuts.  For some girly shimmer, spray with Perfect Pearls Mist.


Shopping list:
London Line 8x8 paper pack
Card blank (A6, square, or tall depending upon the letter)
Large number stamp or die
Coloured pens or inks
Flower punches or dies
Happy birthday stamp
Coordinating card.

Monday, 15 October 2012

Halloween Background Tutorial


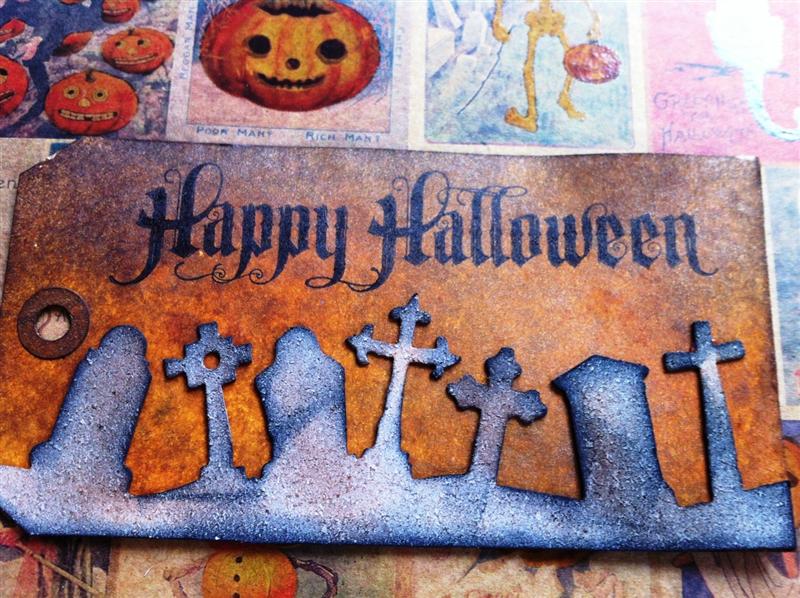
Following lots of questions I was asked to show a step by step guide for the backgrounds in my last Halloween project. They are simply a joy to make and really a matter of layering colour until you are happy with the result! I apologise for the amount of photos but it is so much easier to see what I did rather than read it!


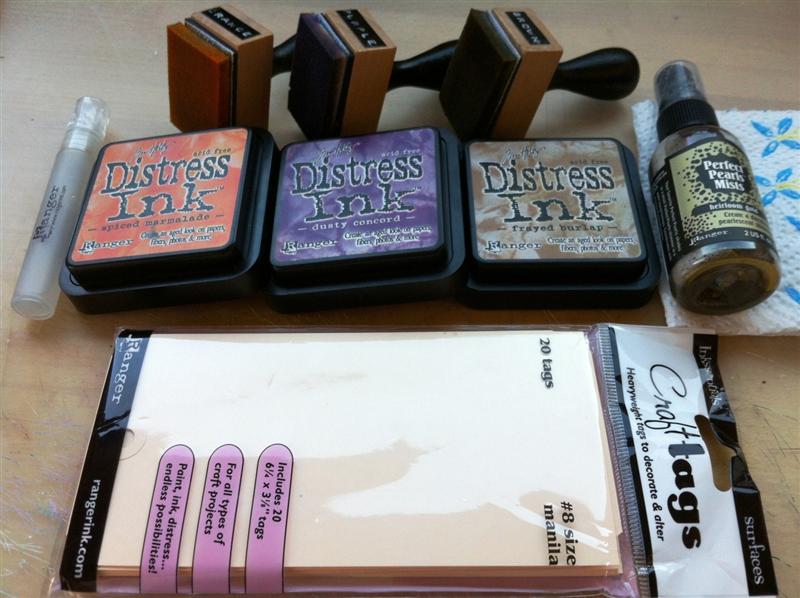
Gather your supplies! I try to get all that I will need together first so that I can get inky faster! I used:


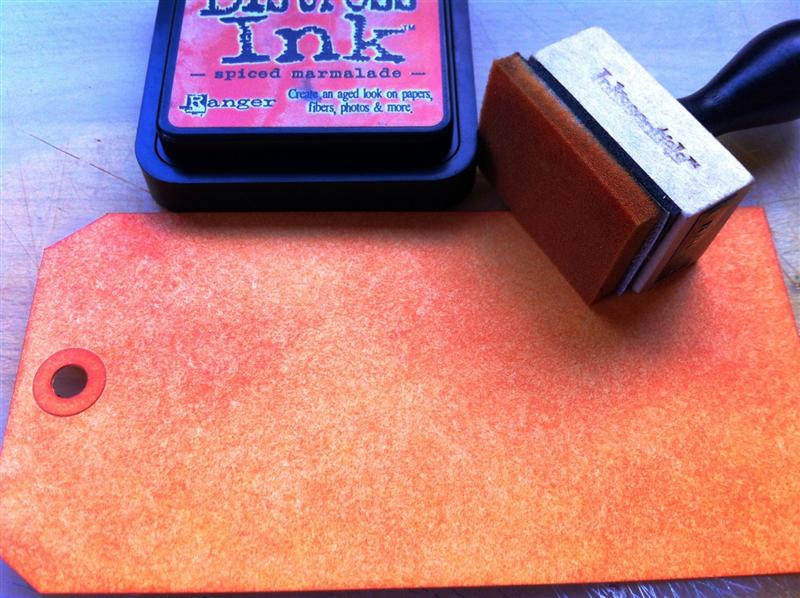
Start by adding Spiced Marmalade to the whole tag. I add a few layers so that the colour is really intense.


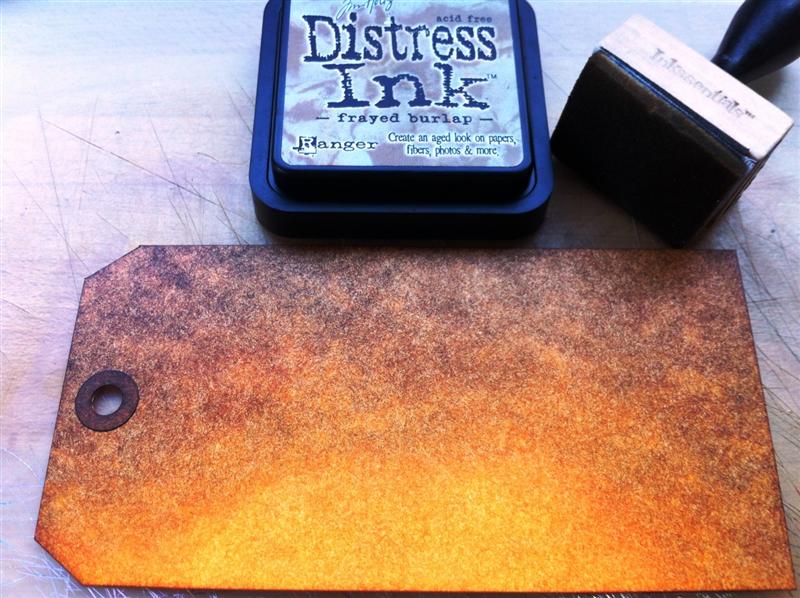
Add Dusty Concord to the tag - I left some of the bottom portion of the tag uncovered


Add Frayed Burlap to the areas you added the Dusty Concord and a little into the Spiced Marmalade to create a ‘sunset’


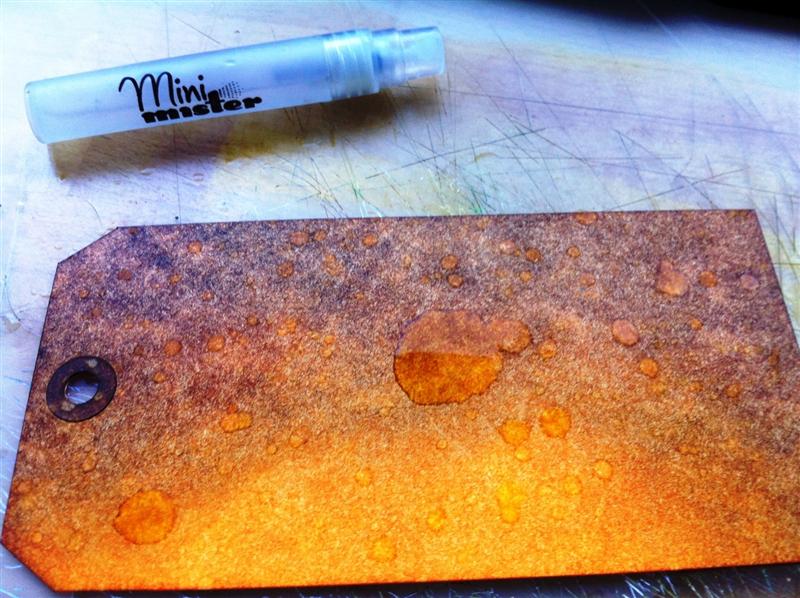
Spray some water, from the Mini Mister into your hand in a little ‘pool’ and then clap your hands together over the whole tag so that the water forms droplets on the tag. Repeat until you are happy with the effect. The water will have the effect of ‘bleaching’ the distress ink and so will leave spots behind. When you are happy with the effect heat dry the tag or dab with kitchen paper


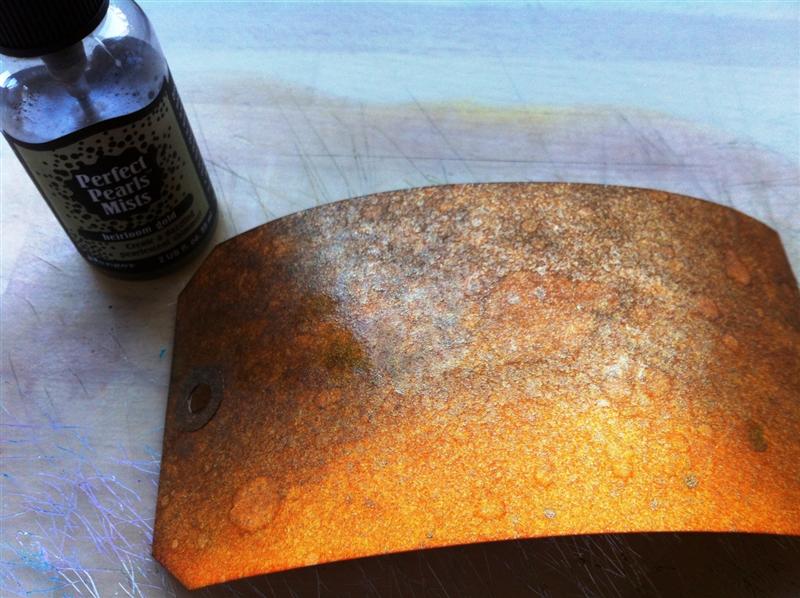
Add Perfect Pearls Mist over the top of the ink. This has two results, the first is it adds a beautiful shimmer, the second is that it too reacts with distress ink and produces new effects! I added my mist very liberally but of course you can be as sparing as you like, building up to the effect that you want. Just like with the water the ink will continue to react to the mist solution so heat dry when you are happy with the result. Don’t worry if the tag curls up - as you dry it the tag will flatten out (remember paper is porous so you may want to dry both sides if you used lots of mist or water!)

I wanted the finished result to be a little lighter so I added Spiced Marmalade over the top of the tag - the Perfect Pearls Mist will continue to be seen through the ink so don’t be afraid of inking over the top!


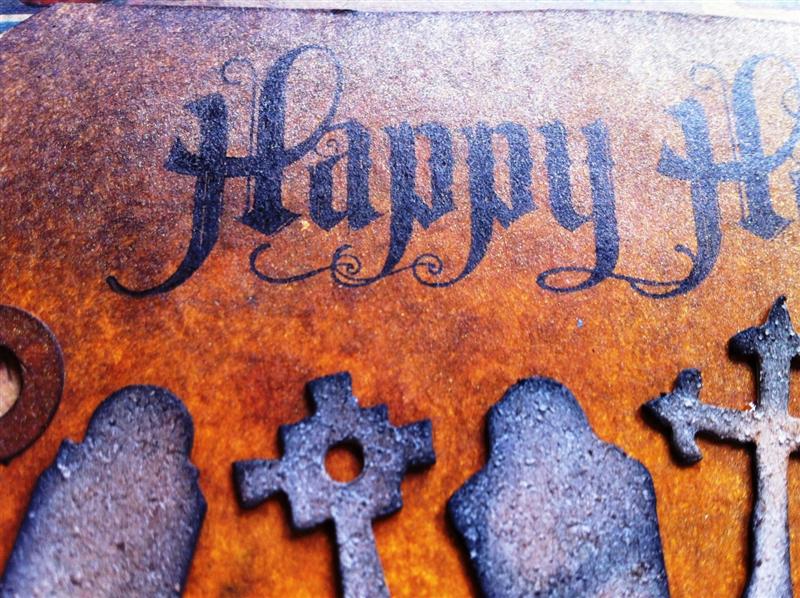
The grunge paper graveyard border on the original tag was simply die cut as normal and then I added Vintage Photo and Black Soot Distress Inks to areas to act as a highlight! The sentiment was stamped in Jet Black Archival Ink.