Friday, 18 November 2016

A little secret

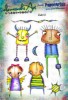
I am really embracing these new Elenazinski stamps and chose to make a journal page with a secret!
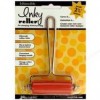
In a black journal I started by brayering the page white and also brayering both sides of a piece of black card. I scored a bend about 1cm from the top of the piece of card.
I then added blue and yellow paint (remembering to dry each colour first) to the journal page and both sides of the piece of card. Adhere the card to page. Don't worry about trying to match up the paint so far - that comes next!
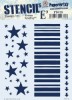
Then I added black painted stars through a stencil. When dry, open the flap you've created with the piece of card, reposition the stencil and stencil the areas under the flap.
When all is dry add borders to the stars using a white pen.
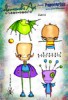
If you look carefully at the figures there are little lines that extend past the drawing. To save cutting all those little details out I stamped the figures onto my page meaning I only had to cut out the solid sections - much easier!
Colour the images in - as they are monsters let your imagination run wild! As my background is very strong I coloured my monsters pretty simply so they'd stand out. Adhere the solid areas to the journal page. I drew over the black lines of the stamps that I used for the clouds, for the monsters to stand on and the legs and eye stalks of the monsters.
And now for the secret...! Under the flap...
I love the secret but I am so proud of the pattern matching under the flap!
Thank you, as always, for popping by


Monday, 14 November 2016

'Tis the Season Christmas card

Hi it's Brenda here and am sharing a card design I created using the gorgeous Scribbly Woodland stamps from Tim Holtz.


I had found a piece of left over infusions drenched paper and cut it in half so I could create two of the same cards (my box needs so many more cards before the beginning of December!!)


I took the scribbly woodland stamps and olive, watering can, coffee and black archival inks and stamped over the scribbly twig and snowflakes.


I love using my Tim waterbrush and took stormy sky, vintage photo and ground espresso distress inks to colour in part of the snowflakes.


You can probably make out that although these two deer heads were coloured with the waterbrush and brown distress inks, I actually stamped them in different colours to begin with. The on stamped in black on the right looks very striking but the one on the left was originally stamped in coffee which made this gorgeous creature look quite insipid, so I took a black posca pen and did my own scribbles over the top to create a more stronger looking deer head.


The sentiment was stamped onto left over card from another project and I was ready to put the card together.


I found some paper string and small holly die-cuts ...... 


 .... and put the cards .........


..... together.


These are gorgeous scribbly images and I can see me using them alot for Christmas cards this year.


Have a great week.

hugs Brenda xxx

Sunday, 13 November 2016

Remembrance Day Poppies

 
For Remembrance Sunday I have made some felt poppies using the Sizzix Brenda Walton Thinlits Die 661090 Large Poppy
 
 
Using your cutting machine cut out 2 pieces in black, 2 pieces in green and 4 pieces in red

 
I've trimmed roughly the black felt to give an irregular stamen and cut the petals to make a smaller poppy


Roll the black felt and glue
Wrap & glue each petal around the stamen

Glue & stick on the leaves


Tuesday, 8 November 2016

Shabby Posies

Hello Everyone! Jennie here with you today to share a card made with some lovely new dies from Tammy Tutterow. 


I have been a great fan of Tammy's techniques and style for a number of years, so I was itching to try out the new flower dies in my own style. 


I started my card by using the Waterfall One Die.  I used some old, but still much loved, Prima papers cutting the top one in vintage text and the lower one in something plainer which I then stamped with a sentiment.


I chose some more papers for my base card and die cut a label from the Frayed Tabs and again stamped with a sentiment.


And then it was down to making the flowers and ribbon bow.

I die cut three flowers using the Shabby Posies Die. There are four dies in the pack and the one I have used for this card is the second largest one. The edges were inked with Distress Ink: Fossilised Amber, Rusty Hinge and Seedless Preserve. The flowers were then spritzed with water and scrunched up before being curled when dry.  There is a  step by step tutorial on my blog HERE today for this flower using Tammy's dies.

The ribbon was dyed with same Distress Inks.


And here is the finished card. I absolutely love all the layers it is possible to create with the waterfall die and I am sure that the Frayed Tabs die will become a firm favourite.


The five petal flower die makes for a lovely layered flower.


And if you want to tie a lovely shabby blow then click the link HERE for Tammy's tutorial. 

 I hope my card gives you some ideas of how to use these wonderful dies. I'll be back again later in the month with another card based around these dies.

Thank you for joining me today.

Jennie x


Friday, 4 November 2016

Just remember...

I have fallen in love with the new Elenazinski stamps from PaperArtsy. I love the quirky characters and that you can colour them however you like and add and remove elements to constantly change them. More of that over the next couple of months! I realise that these characters might not be your cup of tea but hopefully, by showing you how I made this page, you can see how you might be able to use them in your art. The current challenge over at Country View Crafts Challenges is Stars so I could enter this if I was allowed!!!
In a black paged journal I started by brayering a layer of white paint, a layer of pink paint and a layer of blue paint - drying in between.
Next I stencilled some stars on the page in white paint, repositioning the stencil as I went along.
I didn't want a full page of stars so left some areas blank to add interest:
Then I stamped the characters I wanted to use on some white card. I used white because I wanted the eyeballs to remain white when I'd coloured the figures in.
If you look carefully at the figures there are little lines that extend past the drawing. To save cutting all those little details out I stamped the figures onto my page meaning I only had to cut out the solid sections - much easier!
The next bit is fun because you can now choose the colours you're going to use. Will you stick to a few colours to keep it harmonious or will you go bonkers and chose clashing colours? All will work!
The final step is to cut the figures out and adhere them to your journal page. I added some torn sections from an old book to 'ground' the figures - it almost looks like they're on clouds amongst the stars doesn't it?! A spider, a few dots of white paint or pen and some black lines and you're finished!
Thank you, as always for popping by,