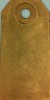
My choice to feature today is the fabulous Passage door die by Tim Holtz. When I first saw it I was strangely drawn to it although at first glance you might be tempted to pass it by. What can you do with a door? Lots of things! The most obvious is to hang a floral wreath on it for your birthday and Christmas cards or perhaps add a 'door number' for a special anniversary or birthday. It also works very well with some of the 'brick wall' stencils and embossing folders that are so popular too. For this project I decided on a 'New home' hanging...

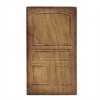
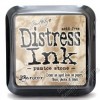
The die actually makes indentations for the door panels so you can achieve some great effects. My door has been cut from mount board which has been covered in strips of one of Tim's tapes first. Once cut, I simply dragged a Brushed corduroy DI pad over it to highlight the panels and misted it VERY lightly to avoid colour running into the indentations:
 |  |
I made a hole in the door using a Japenese screw punch and added an Idea-ology Hitch fastener before mounting it on cream card - the door frame - and edging it with DI:
 |  |
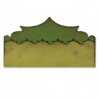
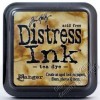
Using the recent Couture Creations 'Bricks in the wall' embossing folder I created a mat for the door in cream card and used Rusty hinge DI to colour it before edging with Brushed corduroy:
 |  |
For the base of the hanger itself I used bare cardboard from a packing box, stripped back and given a rough coat of white Gesso around the edges:
 |  |
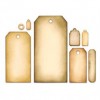
For the layering I have an off-cut from the Ornate On the edge die in kraft card which has been edged and a strip of sanded and inked tissue tape added:
 |  |
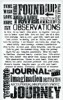
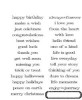
Tim's Simple sayings stamps were my next choice stamped with black archival ink and now he has brought out the die to cut them out with (a part of his recent Tags collection Framelits die set) it makes it so easy!:
 |  |
This Spellbinders corner die (Fantastic flourish two) cut in black and edged with Treasure gold has formed the basis for a metal floal embellishment:
 |  |
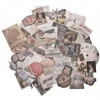
I've also added the word 'HOPE' to the door, a remnant rub, some ephemera and added a pearl bead threaded with paper wire to the metal flower:
 |  |
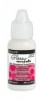
For good measure I've added a little more texture and interest by applying some Glossy accents here and there:
 |  |
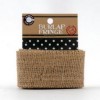
Canvas Corp burlap fringe is brilliant for making loops for your hangers! I added two and threaded some ordinary garden cane through them:
 |  |
Top:

Bottom:

Lurrrrve the Hitch fasteners for door knobs!:

Bottom right corner:

Finished:

Whatever you do, don't overlook this door, it promises AND delivers lots of fun!
Thanks for stopping by today, I hope you've enjoyed looking at this project.
Chris xxx