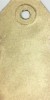
HI Everyone, Brenda here. For today's make I took a canvas board I had made for another project and set about altering it. I really liked it like this but the finished article was not something I thought I would use so I took off the embellishments and set to work.

I took out my distress crayons and started smudging colours over the top ...

.... and then blended over picket fence distress paint and spritzed it with water.

I added more coloured crayons as well as white ...

... then dipped it into spritzed picket fence paint again before drying it and blending over squeezed lemonade, evergreen bough, mustard seed and picked raspberry distress inks.

Now it's completely changed we are ready to rock and roll.
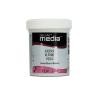
Starting with the metals - some were gessoed and painted with decoart media acrylics, others were given the rusting treatment again using decoart media acrylics.

Here we have lace, wooden pieces and a corrugated heart.

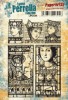
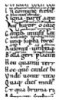
The arch piece has a transfer waiting to be finished but I rubbed too hard and spoiled it so had to turn over and started again.

I layered up the pieces and began adhering them to the board using matte medium.

The sprayed with some misters and a glitz spray from my supplies.

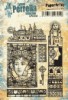
Then added the final embellishments and the pretty girl on the arch.

Really rather pleased with this and reminds me of Finnabair's style. I will put an easel on the back and use it as one of my special cards.

Thanks for stopping by. I hope you are having a fabulous Easter weekend, even with the horrible rain and high winds we managed a break in the clouds yesterday afternoon which was enough to do the Easter egg hunt and later had dinner with all the family - 9 of us this time.
Take care and enjoy the week ahead.
hugs Brenda xxx
Starting with the metals - some were gessoed and painted with decoart media acrylics, others were given the rusting treatment again using decoart media acrylics.

Here we have lace, wooden pieces and a corrugated heart.

The arch piece has a transfer waiting to be finished but I rubbed too hard and spoiled it so had to turn over and started again.

I layered up the pieces and began adhering them to the board using matte medium.

The sprayed with some misters and a glitz spray from my supplies.


Really rather pleased with this and reminds me of Finnabair's style. I will put an easel on the back and use it as one of my special cards.

Thanks for stopping by. I hope you are having a fabulous Easter weekend, even with the horrible rain and high winds we managed a break in the clouds yesterday afternoon which was enough to do the Easter egg hunt and later had dinner with all the family - 9 of us this time.
Take care and enjoy the week ahead.
hugs Brenda xxx