Wednesday 31 July 2013

Krafting Kidz #3

Today it's a simple hanging ATC...


For this you will need some thick card (greyboard or mountboard is ideal but not essential), a delicately patterned backing paper, an eyelet tool, 2 eyelets, some craft wire and JOFY (PaperArtsy) Collection 12 stamps. (I used the Tim Holtz ATC & Corners die to cut my ATC - it's still in the sale at the unbelieveable price of just £6.99!!!!! and I used the Crop-A-dile for my eyelet settings.)


The steps are:

  1. Stick the backing paper to the card and cut the ATC
  2. Stamp the ATC with the JOFY stamps as shown
  3. Colour the stamped images
  4. Use your eyelet tools to make the holes and set the eyelets
  5. Thread craft wire through the eyelets and twist the top to make the hanger

This hanging makes a great gift from the kids to grandparents, aunts and uncles.

Please do check out the SALE section for other exceptionally silly prices! Have fun!

Chris xxx

Sunday 28 July 2013

Tweet, tweet!


PaperArtsy Stamp - JOFY Collection JOFY15

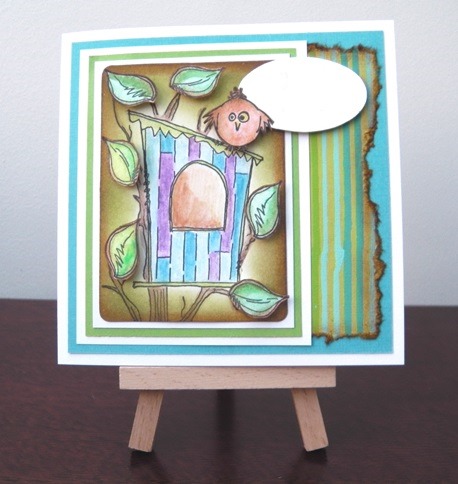
Oh, those JOFYs are fab, fab, fab! Today I’m posting a very quick card made from a few scraps and featuring a few of the images from the JOFY Collection 15 stamp set from PaperArtsy.


The card blank measures 4” x 4” and I’ve used off-cuts and scraps from my scrapbox to make it. Stamped, watercoloured and decoupaged, it makes a quick card if you need one in a hurry. (Sorry, whatever way I took the photo’s I couldn’t stop the glare from the little silver sentiment – it says ‘Best wishes’.)

These quirky little images certainly have a style all of their very own and are appealing to everyone, young and not so young, boys, girls and adults. A fab addition to your craft library. You’ll see that once again I used that great ATC die (Tim Holtz for Sizzix) that I bought a few weeks ago in the sale. It’s paid for itself already!

After making this card I made another 5 in various colour combinations and used different sentiments (Get well soon, 2 x Happy birthday, I miss you, Just to say) and they are now bundled up in tissue, tied with a ribbon and in the ‘gift’ box ready for the church fete. 

Hope you’re having fun crafting out there, thanks for dropping by,

Chris xxx

Thursday 25 July 2013

Tim meets Prima

Yes, I'm using the same 'Flora' die (Flora Grande dies by Prima for Sizzix) as last week but this time for a very grungey card alongside a Tim Holtz flower.


I stamped around the outside of a piece of card using Tim's K3-1210 dandelion (wooden based) stamp but any similar stamp will do. I used a Tim Holtz Distressed embossing powder to give it that grungey look and feel and then went over the whole card with a brown Distress stain. Both the large and middle sized flowers from the Flora die were used, put through a Textured Impressions embossing folder (any) and then inked with a Distress ink pad. The centre is a plastic metallic button.


I chose brown, honey and green for this card but you can choose any colour palette you like. This just shows how versatile this die can be.

Have a great weekend folks, thanks for stopping by.

Chris xxx

Wednesday 24 July 2013

Krafting Kidz #2 - Planning early


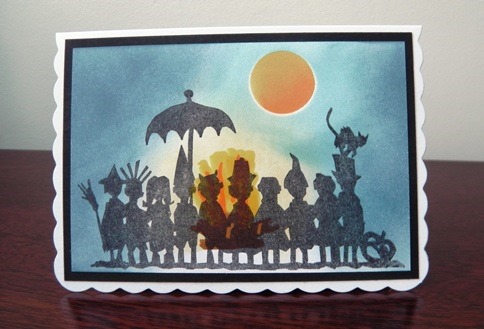
If your kids like having a Halloween or Guy Fawkes party then why not get some early planning done and get them to make their own invites? All you need for this one is some card, colouring pens, Distress ink pads and the Tim Holtz Halloween Cutouts stamps…

cms139-stampers-anonymous-tim-holtz-cling-mounted-stamp-set-halloween-cutouts-14897-p[ekm]209x250[ekm]
Tim Holtz Distress Ink Pad from Ranger - Scattered Straw Tim Holtz Distress Ink Pad from Ranger - Stormy Sky Tim Holtz Distress Ink Pad from Ranger - Tumbled Glass
The kids can draw a bonfire with their felt pens, ink in the background and then stamp over the top with black archival ink. (My stamped image is a little faint because my ink pad needs reinking, lol.)

Ranger Archival Ink Pad, Jet Black - 90mm x 62mm

When the cards are finished the kids can have fun making the party invites to go inside as inserts.
Hope they’re not driving you too crazy yet [g]. Have a great week,

Chris xxx

Tuesday 23 July 2013

Still having fun with ATCs

657184 Sizzix Bigz Die - ATC & Corners by Tim Holtz PaperArtsy Stamp - JOFY Collection JOFY13
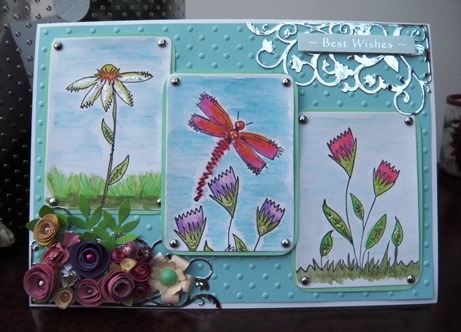
This time I’m using Tim’s ATC die to create toppers for a card. (For the silly price this die is selling for in the sale and with free P&P it’s almost a giveaway!!!) I’ve also used some images from the JOFY 13 stamp collection by PaperArtsy.


These have been stamped with black archival ink and then watercoloured. I’ve made some little flowers using various punches and dies and mounted them on a decorative corner cut using the Spellbinders 'Garden Weave’ D-Lites die cut from silver mirricard.

gardenweave_rs

Please note the embossed background and watch for something very special coming up soon.

Have fun,

Chris xxx
 

Saturday 20 July 2013

Wonderful new A4 embossing folders

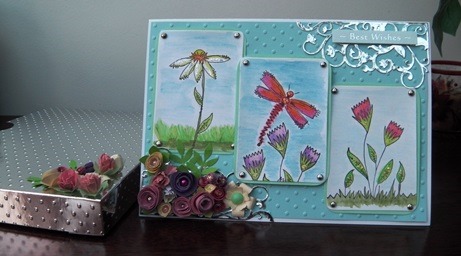
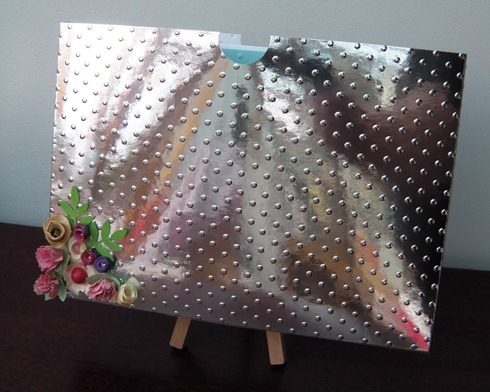
Yes, A4 embossing folders! These fab new embossing folders will extend your crafting abilities in a flash! Remember the card I showed you and asked you to note the background? Well, this is why…


…the background of this A5 card was made in seconds by using one of the new Crafts-Too A4 embossing folders. I not only used it on the card but…


…to make the box for the card too!

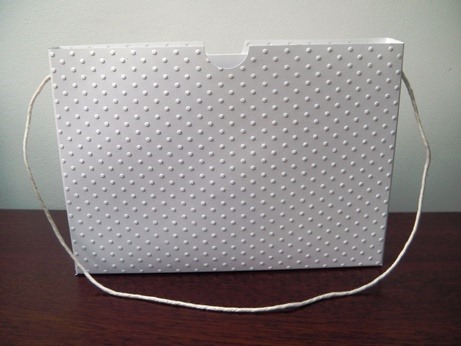
When you make cards that have your own handmade flower embellishments on them then they’re very often for giving and need a box. I make my own very simply using a large scoring board and having this embossing folder means I can make them from inexpensive, plain card or from mirricard and not have to waste my treasured patterned stock. As long as you have a cutting/embossing machine big enough it’s a cinch! (I used the Grand Calibur with the base plate and strawberry adapter plate.)

I made this bag from standard white card and just added a simple string handle…


For those of us on a budget or making lots of cards for charity these folders are a MUST!
This is an example of the dotty one but you can see all the other lovely designs HERE.

Have fun with them,

Chris xxx

Thursday 18 July 2013

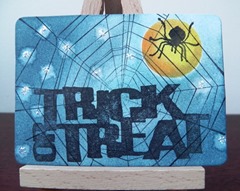
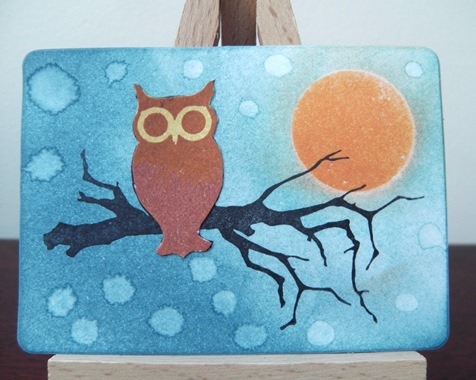
Halloween ATCs

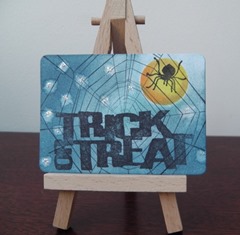
I have to say that I’m not a huge fan of Halloween but I’ve had my eye on these beautiful Halloween Cutout stamps by Tim for some time now and they’ve just come up as top on my wish list (a very, very, very, very long list, lol). I’m getting more and more into silhouettes and I love the water bleaching technique which I’ve used on this ATC and the one below.

cms139-stampers-anonymous-tim-holtz-cling-mounted-stamp-set-halloween-cutouts-14897-p[ekm]209x250[ekm]

When I bought them I noticed that Susan has Tim’s ATC and corners Bigz die in her sale at the very silly price of £6.99 so I bought that too! (Susan, is it the heat? - £6.99!! lol)

657184 Sizzix Bigz Die - ATC & Corners by Tim Holtz

These cutout stamps are fab for making ATCs. You can make ATCs and trade them or mount them on your cards and scrapbooks, they’re so very versatile. This set of stamps is versatile too, they can be used all year through.


Don’t forget to order this ATC Bigz die whilst it’s at this low, low price!
Thanks for stopping by,

Chris xxx


Wednesday 17 July 2013

Krafting Kidz #1

This is for those of you who are looking for something to keep the kids quiet for an hour or so. I will post a very simple project every Wednesday that children can make that won't take a lot of your time to prepare. The first is the Dogwood card...


You need a card blank (I've used size DL but you can use any), a piece of coloured card slightly smaller than the card blank, a corner punch, a branch die (I used the branch from the Spellbinder's Cherry Blossom set but any branch die or dry twigs from the garden will do), the Susan's Garden Dogwood Thinlits dies (or similar) and a sentiment. I recommend that you give them  waterbased glue and paints for this one [g].


The petals are all separate so the kids can have fun colouring or painting them all and then gluing them together. The steps are:

  1. Cut, colour and glue the petals to make the flowers
  2. Cut and colour the branch
  3. Cut the card for the mat & punch the corners
  4. Print/stamp your sentiment
  5. Glue coloured card mat to card blank
  6. Lay out the branch, flowers and sentiment into the positions your happy with
  7. Glue the branch in place followed by the flowers
  8. Add your sentiment

I hope this keeps them busy for a while. More soon...

Chris xxx

Monday 15 July 2013

It's little Mini 18

Yes, another of the JOFY little Mini stamps today and this one is brilliant for both 'New home' and 'We've changed address' cards...


I've made this into a 4" x 4" easel card just like the others a few weeks ago. I've made a box for them and some others which are going in the charity box as a potential gift for someone.


I coloured the picture with paint pens...


and added a gem for the door knob. So simple to make and I think these JOFY images are utterly charming - a must have for your stamp box!

I hope you all have a lovely week. Please watch out on Wednesday for the first 'Krafting Kidz' post.

Chris xxx
www.mycornerofheaven.com

Friday 12 July 2013

I’m lovin’ the Flora Grandé dies!

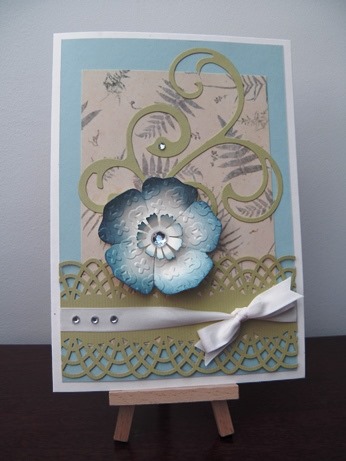
If you haven’t invested in any of the Flora Grandé dies then I can definitely recommend them! They’re fab, fab, fab! A range of floral dies with accessorized scroll and tag dies designed by Prima (the famous paper flower people) for Sizzix. For this quick and easy card I used the ‘Flora’ die

658528-sizzix-bigz-l-die-flora-by-prima-marketing-inc-22274-p[ekm]250x250[ekm] 658528-sizzix-bigz-l-die-flora-by-prima-marketing-inc-[2]-22274-p

I used the middle sized flower from this die and the beautiful large scroll die called ‘Classique'…

658524-sizzix-bigz-die-classique-by-prima-marketing-inc-22256-p[ekm]250x250[ekm]

Within ten minutes this is what I came up with…


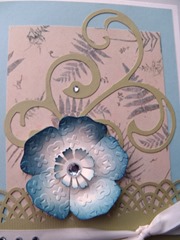
The backing paper has a hint of green and blue in it so I matched the colour green to card for the border (made using a Martha Stewart deep border punch) and the Classique scroll. I used an embosssing folder to add texture to the flower which I tinted with the ‘Stormy sky’ Distress ink pad.


I used a small paper punch for the middle as I wanted a direct contrast to the Flora shape. Add ribbon and a few sparkles and there we go. Once I’ve put an insert inside, this will be another card for the charity box.

Have a great weekend everyone, hope you get some crafting time in!

Chris xxx

Monday 8 July 2013

A little bird told me…

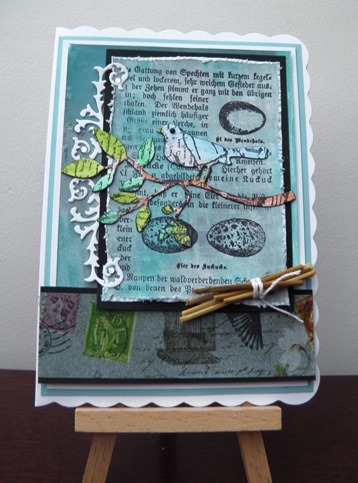
Marianne Designs make beautiful dies and they have several bird on a branch dies which I adore. This is the larger one...

lr0138-marianne-design-creatables-bird-large-branch-4320-p[ekm]250x138[ekm]

I hadn’t used him for a while and wanted to make a card for a friend of mine who is an avid garden ‘Twitcher’. This is what I made…


You can use any stamp or patterned paper for the backgrounds. The ‘twigs’ are actually millet stalks kindly donated by my birds, lol.


After I cut the bird and branch out I painted him with watercolours and then stamped over it but you can colour him as you want. The side scrolls are the debris from one of my other dies. When you’re using your dies, especially the border and geometric dies, do look for interesting scroll and other shapes from the unwanted parts. I keep mine in a pot – very handy!

Have a good week everyone and thanks for visiting. Please leave a comment if you have the time,

Chris xxx

Friday 5 July 2013

Another JoFY mini

Yes, I'm smitten with them. I'm usually taken towards vintage and distressed as a style but Jo's contemporary style has me smitten. Today the stamp is Mini 17...


Colour them with ProMarkers or whatever colour pens or paints you have - so simple!

If you have any 4" x 4" square card blanks, they make fabulous little easel cards.


This one is part of something I'm making - more soon.

Chris xxx

Tuesday 2 July 2013

The JoFY minis

If you're looking to extend your stamp collection then go no further than Jo Firth-Young's quirky little 'minis'. Today I've chosen this one - Mini 20...


The above picture shows the layout of the stamp but I've masked mine to get them on the same level...


and if you want to ring the changes you can add dots around them as I have.
 

Beautiful stamps for your nearest and dearest or for any card celebrating love - Valentine, engagement, wedding, anniversary or just to say 'I love you'. Frankly, I'm looking for ANY excuse to use these at the moment, I adore them!

Have a great week everyone!

Chris xxx