Showing posts with label Lynne Perrella. Show all posts

Tuesday, 14 June 2016

June

For my calendar page this month I chose to play with Distress Crayons and stencils. There's something really satisfying about crayons - is it because it reminds us of being a child?! Anyway the joy of using crayons still persists!
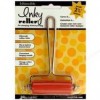
I started by scraping some blue paint on the page. I used an old gift card (and then a brayer for the later layers) but you can use whatever you prefer.
Then I added a layer of white
And then a layer of green
I kept adding layers until I was happy with the finished result (remember to dry layers in between otherwise you can damage the paper beneath)
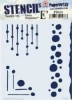
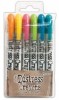
Now for the really fun bit! I placed my stencil on the page and drew inside with the distress crayon. Then, with the stencil in place, I rubbed the crayon with my finger so it blended and took on the form of the stencil. You get a thicker line at the edge in places which adds a natural highlight so I kept those bits in! I did falling drops at the top of the page and green stripes at the bottom.
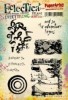
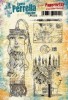
I needed a little added interest to the background so I added some stamping in coordinating Distress Inks
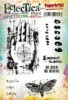
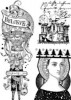
All that was left was to add some white highlights to the Distress Marker stencilled marks, the sentiment and the main image. The main image was stamped on to an off cut from a tag (I really like the creamy colour - I normally cover that up with layers of paint!) Using the edge of my gift card I added some gold and dark grey lines.
Thank you, as always, for popping by


Friday, 22 January 2016

January Journal Page

The  cold New Year in the UK has made quite an impression on me already! I am a sunny kind of person (my children think I photosynthesise in sunlight!) so the cold gloomy days are not my favourite! In honour of this cold start to the year I made a journal page. I intend to make a page a month so this is January’s! Let’s see if I stick to that “resolution”!!!
I started by brayering blue paint onto the page. Don’t worry about making this look perfect – the imperfections are what make the page work! Use as many blues as you like – it all adds to the depth of colour! Then I added white paint over the top. I didn’t clean my brayer as I don’t mind a bit of overlapping paint!
Then, using a snowflake stencil, I sprayed blue ink onto the page. I didn’t tape the stencils down as I like the ‘danger’ of seeing if the ink bleeds underneath! On this occasion it didn’t really but often it does and, for me, that all adds to the organic make up of the page!
Then I stamped the balloon man onto the page and again onto card. I also stamped the label onto card. The balloon and the man were painted with watered down paint and then cut out. The fussy bits (like the balloon’s strings) were already on the page so I just added the cut out pieces to the page. I wanted the swirl on the balloon to stand out even more so I re-stamped that on card, cut it out and adhered it to the balloon. The label was cut out and inked with Brown Distress Ink. When it was all in place I added the year and the month.
Hope that the cold January isn't affecting you too much! Thank you for popping by! 

Saturday, 10 October 2015

#bestie

Hello! I often take a stamp set and ink it, and then find I can't stop using it! This month I thought I'd how you two ways with this fabulous Tim Holtz set!
I am often struck by some images and find myself using them over again and I like to mix them with ones you might not expect so this very 'grown up' image from PaperArtsy was crying out to be given a twist! So, this is a little photo heavy but this is how I made the tag (obviously you could make a card etc but I do like tags as they're very versatile!)
I started by adding sage paint to the tag with a brayer. This is a lovely soft colour and is a current favourite at the moment!
To add a little contrast I then used a white paint
I love layering backgrounds. I like how your eye takes all the elements in but then you still seem to see more! I wanted to add a little, subtle visual interest so added some arrows.
Then I wanted to add a different layer to the tag so I added some large Distress Ink dots
The joy of Distress Ink is that you can get a whole new look if you spritz water on top so I softened the dots, giving the water a minute or two to 'bleach' the Distress Ink before drying the tag. In this photo you can see that the Distress Ink appears to be behind the arrows even though the arrows were added first. It's clever stuff isn't it?!
I knew which images I wanted to use but it's always good to line them up to make sure they'll fit! Eagle eyed people will spot that I'd added a stripy stamp to the edges of the tag!
I stamped the main image twice, cutting the lady out and colouring her (I used watered down paint but you could use Distress Markers or your favourite colouring pens/pencils) I also cut out one  of the speech bubbles and coloured that. All of the images had a little Distress Ink at the edges.
The final touch was to add some final stamping in the background and some painty line (I dip the edge of a old credit card in paint) before adding the "#bestie" sentiment.
Thank you as always for popping by and supporting us. Next time I have used these stamps to make something for a boy!