Showing posts with label distress embossing powder. Show all posts

Monday, 26 May 2014

Seaside card

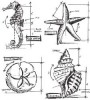
Hi Everyone, Brenda here with a card using the new Tim Holtz Nautical Blueprint stamps - if you love seaside themes these could be a great addition to your supplies.


I started by creating a background using distress inks and the wrinkle free technique which gave me a lovely mottled watery look.


I then put the card through the bubble embossing folder but I only embossed the sides one at a time rather than the whole card in the EF.


I stamped the dollar urchin and used some distress embossing powders and then touches of distress paints and distress inks to achieve the textured colourful look.


I also stamped and painted the conch shell, again using distress inks and paints, but because the colour was too strong for the look I wanted I over-painted with white linen ink.


So I began to gather the bits together having a rough idea in my head how I wanted to lay the pieces out. I find I don't always use everything and I sometimes add other bits later on.


This is the backing mount with white text stamped with picket fence distress paint. 


I decided towards the end to add the letters to form the word sea using Tim's alpha parts painted with distress paints and rubbed back to give that distressed look. I also used the hashtags stamps on a cut off part of a tag.


Maybe you will find some time to have a play with stamps and inks this week, if you do have fun.

hugs Brenda xx


Products

Wednesday, 14 May 2014

Be an Individual

Hello everyone, Astrid here with an 8 x 8" wall plaque, inspired by Tim Holtz. I really wanted to play with some of my new stamp sets, and this seemed the perfect project for it.
I started with a sheet from the new 8 x 8 Tim Holtz Paperie Menagerie mini stash, and because I wanted the background to my piece to be quite bland, I started by covering it with a thin coat of gesso and then stamped around the edges with stamps from the Mercantile and Papillion sets by Tim Holtz to frame the page a bit.
Time to start working on the tags. For the first one I started by stamping one of the stamps from the Classic 19 set in Versamark ink and then embossed it with clear embossing powder. I then blended a mix of Antique Linen, Stormy Sky and Frayed Burlap Distress inks with my blending tool and added some further stamping with stamps from the Distress Damask set in Coffee Archival Ink. I also added some strips of the Journeyman Tissue Tape for a bit more interest to one corner.
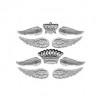
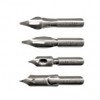
To finish this first one I added an Ideaology Pen Nib, a wing from the Regal Adornments and a flower, created with the Bigz Pinecone die.
The background to tag number two was created with the help of Distress Stains, using the same three colours.
I spritz some water to let the colours marble and while still wet added a little Picket Fence Distress Paint and spritzt with water again the let that mix into the other colours. I then blended some Frayed Burlap and Walnut Stain Distress Inks around the edges.
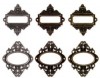
To embellish my tag I stamped some stamps from the Mercantile set, straight onto the tag and also on to a piece of a Journaling Ticket. I added a piece of film strip and some remnant rubs and finally finished with an Ornate Plate and a small strip from the Industrious Stickers, Frames and Trims pack. Some stenciling with the Latticework Layering Stencil and a Sentiment from the Going Somewhere set, stamped in Black archival, finished it all off.
I altered the Ornate Plate with some Tumbled Glass Distress Paint and some Vintage Photo Distress Embossing Powder, and cut a vintage photograph from one of the Menagerie papers to go behind the opening.


Now for the finishing touches: I darkened the edges of my 8 x 8 background with Coffee Archival Ink, glued it onto a piece of 8 x 8 mount-board from my stash and put pieces of Elements Tissue Tape around all four sides.
I added some decorative brads to the top of my tags and then glued them onto the background, one slightly overlapping the other.
Here are some closeups still:
As you can see, I also added a sentiment to the first tag still, this one comes from the Way with Words set.
Well, hope you like my wall plaque and thank you so much for dropping by here.