Tuesday 28 July 2015

Saying thanks ...

Well trace here and it is my turn over at Country View Crafts again today - and today is a simple card ...made in a variety of colours ...using one of the new blueprints... these cards were made to say you to my children's teachers but could easily be used for all sorts of occasions by changing the sentiment ..


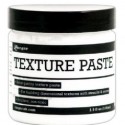
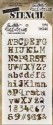
I started by apply some texture paste through on of Tim Holtz stencil, this one was typo.. I ten to apply in three places , two on one side and one on the other . I then left this to dry.


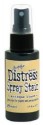
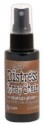
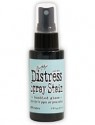
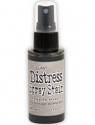
I then spritzed the surface with water and spritzed with a variety if distress stains. I then set aside to dry . I made 10 of these cards in total in a variety of colours ..and they are quite quick to make a batch of ..making a quick but effective background for all sorts of images.


Now I used the new distress sprayer to add a more mottled feel by squeezing the trigger fully in / or part way creates varied sized droplets of water. leave these to sit on the inky card for a few seconds and then heat dry. larger droplets can be dabbed off if required .


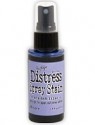
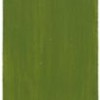
here is one of the other colours I made using soft blue and antique linen.. I then added the background to the card and trimmed to size..


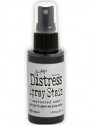
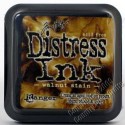
Now edge using walnut stain distress ink, which really brings the background together ...using a blending tool


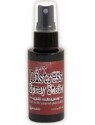
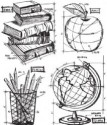
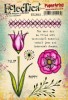
I stamped the book image and added colour by scribbling distress markers onto my craft sheet and then applying to the image using my water brush.. I then heat dried and edeged the image with walnut stain distress ink.


Finaly spritzing with water as we did with the background and heat drying.


To complete the card I added some dyed seam binding tied in a bow and thank you hashtag sentiment, stamped in jet black archival


I love the scrumpled look of the seam binding...


And I seem to love each and every set of blueprints..versatile for all sorts of colours ...


And the texture paste through the stencil adds some texture to the background, whilst still making it a fairly simple make ..


And here are some of the other colours, chosen by my 3 children for their various teachers ..


so hope you like my makes for today ..

keep those fingers inky!
trace x 


Sunday 26 July 2015

Summer Canvas Workshop photos

Hi Everyone I hope it is a good Sunday wherever you are.

Here are some of the photos from our Summer Canvas workshop held last Thursday. There were 19 amazing participants and I would like to show you some photos from the day. You'll need to grab a cuppa as there are quite a few lol.


The day started quiet and calm with everything prepped and ready. You can see how spacious and light the hall is in Flitwick, there is loads of room for us to move around.


We soon got into  getting the texture laid down in the first few layers using gesso, old dictionary paper, die-cuts, texture paste and stamping .....


...... and before long everyone was in full swing making their own unique multimedia design.


Coffee and tea with biscuits and cakes is on tap all day .......


.... and there is usually some light hearted jesting - well it does look like a bit of fun doesn't it?????


It was lovely to catch up with old friends who have been to these workshops before and to welcome new people to our group.


Oh look it's our Nikki again from the CVC Design Team with Cathryn, Nikki is always up for a laugh and never shy of having her photo taken ......


... and Jane and Chris seem to be enjoying themselves too.


Along the row were Hazel and Sheena who remained hard at work all day learning new techniques and being very creative .....


... as were Gillian and Heather .....


.... and Anne and Kate.


Jacqui seems to be taking a step back and pondering on what she wants to do next with Sue and Margaret beside her.


 Lynda and Diane look as though they are preparing their leaves and getting ready to add their embellishments to the canvas background.....


.... so too are Kathy, Ann and Carol.


Susan was on hand to lend a helping hand and brought along goodies for people to buy.


You know people are really into the creating process when they stand up and of course looking at how others are getting on as well.


More standing and getting their teeth into whatever stage they were working on...


.... and time to start assembling everything together.


 Sheena had finished hers and wanted to get on the motorway and couldn't stay for our group photo but don't you just love the variations of colour she achieved?


From left to right back row - Hazel, Nikki, Jane, Cathryn, Me, Gillian, Kate, Ann, Anne, Jacqui, Margaret and Sue and on the fron row - Lynda, Chris, Carol, Kathy, Diane and Heather.

Thank you ladies for such an enjoyable day, I was super impressed by the finished canvases and would have loved to take them all home myself.

Here is my original -


The next workshop will be on the 12th September where I will introduce more new DecoArt media paints techniques and we will use them to make a configurations book, I hope you will be able to join us.

Happy Sunday and have a great week ahead.

hugs Brenda xxx

Friday 24 July 2015

New flowers

For those of you who, like me, adore PaperArtsy, it's been an exciting month as we've seen the launch of their new products. I was lucky enough to be part of Lin's reveal (more on that here). These new stamps are just a joy to work with and so I thought I'd share a project from scratch with you.
I started by using my brayer and adding blue paint to a tag. I'm never really interested in getting perfect coverage so the gaps are deliberate!
Then I added white paint over the top. The background is starting to come together now and suddenly those gaps don't seem quite so bad!
Using yellow paint I added a little stencilled detail. Just pick sections of your stencil and use it randomly over the tag - this is the background so it really won't be sen too much!
My next stage is to check that the idea in my head will actually fit on the tag! So I placed the stamps I'll use on the tag to double check and... they fit!
I used a palette knife a scraped a thin layer of white paint on some old book pages (I use this technique a lot!) and then stamped the flower heads. I then painted them. The stalks were stamped on to white tissue paper and then painted.
A wonderful attribute of Fresco paints is that some colours are translucent so you can still see the book page underneath.
I couldn't resist using the flower name stamps - they add a botanical bookplate touch! I hope you have enjoyed this post - do let me know! Also, if you have these steps, I'd love to see how you're using them!