Showing posts with label alcohol ink. Show all posts

Thursday, 12 November 2015

Noel

Good morning everyone, Jennie here for my first share of the month. 


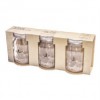
Regular followers will know that I am a great fan of 4x4 cards, so here is a little bit of inspiration for your Christmas box given that Christmas is winging its way nearer and nearer.


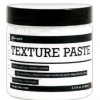
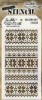
I started by applying Texture Paste through the Holiday Knits Layering Stencil. One of the reasons I love 4 x 4 cards is that these layering stencil's are just under 4" wide - perfect !


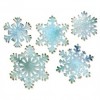
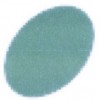
While the paste was drying I die cut the snowflakes in white card and gave them a coating of Picket Fence Distress Paint and gave them a blast with the heat gun. Try and get little bits of paint to puff up for some texture. When completely dry I added  Alcohol Ink - straight from the bottle! Don't bother about getting a full covering - see the next step!


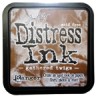
When the alcohol ink had dried I blended Gathered Twigs Distress Ink into the areas which hadn't taken the ink. A great effect and so quick and easy to do. I use this technique a lot and really came by it by chance when I was trying to get some texture and colour onto the snowflakes last Christmas.


Then it is just a case of layering the snowflake on your card. I die cut a Christmas sentiment and gave it the same treatment as the snowflake - a little more difficult as it moves around a bit!


A relatively simple little card which is easily made as a batch but really looks as though it took ages to make !!

Catch me later in the month when I'll have another 4 x 4 card to share with you.

Jennie x


Tuesday, 4 August 2015

Using Tim’s jars…

Morning all!

When I first saw the jars that Tim had released (Idea-ology) I thought “Oooo-err, what can we do with these other than storage?”  Actually, when you think about them, there are quite a few things but my first thoughts (as a Yankee candle lover) went to those of a hanging candle jar to hang from my outdoor, garden umbrella. So, here we go, here’s my ‘Summer candle jar’…

2015_SummerCandleJar35


My steps are as follows:

2015_SummerCandleJar01   2015_SummerCandleJar02

2015_SummerCandleJar03   2015_SummerCandleJar04

2015_SummerCandleJar05   2015_SummerCandleJar06

2015_SummerCandleJar07   2015_SummerCandleJar08

2015_SummerCandleJar09  2015_SummerCandleJar10

2015_SummerCandleJar11   2015_SummerCandleJar12

2015_SummerCandleJar13   2015_SummerCandleJar14

2015_SummerCandleJar15   2015_SummerCandleJar16

2015_SummerCandleJar17   2015_SummerCandleJar18

2015_SummerCandleJar19   2015_SummerCandleJar20

2015_SummerCandleJar21   2015_SummerCandleJar22

2015_SummerCandleJar23   2015_SummerCandleJar24

2015_SummerCandleJar25   2015_SummerCandleJar26

2015_SummerCandleJar27   2015_SummerCandleJar28

2015_SummerCandleJar29   2015_SummerCandleJar30


2015_SummerCandleJar32   2015_SummerCandleJar33

2015_SummerCandleJar34


2015_SummerCandleJar36

2015_SummerCandleJar37


Whether you're a candle lover or not, many of you will appreciate the decoration of your picnic and evening entertaining tables.  Have fun!

Chris xxx