Showing posts with label Sizzix. Show all posts

Thursday, 30 March 2017

Easter cards with Tim Holtz Snowglobe die

Hello Everybody, 
it's Monika again 
with my second post in March.
Like in February I would like to show you another - not wintery - use of Tim Holtz Snowglobe die.
Earlier in my blog I have already made I quite similar Easter card but here I would like to give you a full tutorial about how I made that and of course these:-)


And now here is my instructions:

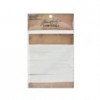
1. Cut out the card base from kraft paper.

2. Choose a coloured cardstock and cut out a one size smaller rectangle.

3. Emboss it with Tim Holtz Flourish embossing folder.

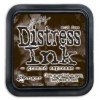
4. Ink the edges with Vintage Photo.


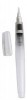
5. With white ink colour the embossed papers. Now here I have to tell you that for this I used a special "thing" which was added to one of my Sizzix embossing folders packages - you can see this white thing in my picture. Do you know what it is? I have no idea but very useful :-))


6. When you finished you can glue your embossed paper to the base card.


7. Cut out the bottom of the snow globe 2 times from heavy weight cardstock. Glue them together.

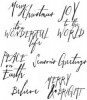
8. Stamp the Happy Easter text in the middle.

9. Ink the edges with Vintage Photo.


10. Cut out the upper part from blue cardstock. 

11. Smear the surface with white acrylic paint and a sponge.


12. When it's dry spritz it with Ranger Distress Spray Stain (Stormy Sky).


13. When it's totally dry tap white acrylic paint on the surface with a sponge. Just tap, don't smear!


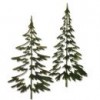
14. Cut out the wildflowers from green cardstock. Ink the edges with Vintage Photo.


15. Tap the flowers with white acrylic paint.


16. Cut out the rabbits from brown cardstock twice. Glue them together and with the sponge you used for whiting the flowers, contour the edges of the rabbits.

17. Cut out the bows from same paper you used for the flourished rectangle.


18. Glue all the elements on the blue snow globe. In the end you can just cut off the overhanging parts of the flowers.


19. Put the card together :-) For the big parts I used double sided adhesive tape.


20. If you wish cut out some tiny butterflies from the same cardstock you used for the flourished part and bow.


21. Add the butterflies and some half pearls to the card.


What I used:


Sizzix Movers&Shapers, Bunny&Bow by Tim Holtz (657486)

Sizzix Sizzlits Die, Butterfly Frenzy by Tim Holtz (659575)


Ranger Distress ink, Vintage Photo

Ranger Distress Paint, Picket Fence

Ranger Archival ink, Potting Soil


etc.


I hope you like it! Happy crafting!

Big hugs


Saturday, 12 December 2015

Sparkling Woodlands Tag - by Alison

Hello all, Alison here with some sparkling fir trees for you.  I don't break out the glitter very often, but if not at Christmas, then when?!  And after a brief skirmish with the bright traditionals, red, gold and green, I'm back in my neutrals comfort zone... in fact pretty much monochromatic.


It's also my first time having a play with Tim Holtz's new Vintage Platinum Glitter Dust... I think it probably won't be the last!


For the background, I swiped Ground Espresso, Pumice Stone and Hickory Smoke inks on to my craft mat and did some wrinkle-free distress technique on to the tag.  It turned out there was more Ground Espresso than the rest, so it all got rather dark rather quickly.  I spattered some Fresco Snowflake over it to lighten things.


Then I thought it would be nice to have some snowfall, so I used the Speckles layering stencil to add some more white paint, and sponged a bit on to the foot of the tag too, to create some snow drifts.  I decided there wasn't quite enough snowfall, so I added a couple of spritzes of DecoArt Media Mister in White Shimmer.


Turns out that was a good idea, as you get a whole lot more shimmer into the bargain!


The trees were cut using the wonderful Woodlands Thinlits, and I painted them with some Ground Espresso Distress Paint so that they would be the right colour under the glitter dust.


I used Sticky Embossing Powder to adhere my Vintage Platinum Glitter Dust, and then rubbed some off again in places so that the trees would have a slightly more distressed "bark" look.  Yeah, right... whoever heard of glittering bark?!


I used a pastel pencil, blended with a water brush, to create some shading under the trees to ground them.


And I stamped the word from the Handwritten Holidays #1 set in Versamark before embossing with dark brown embossing powder.


The whole thing is mounted on some white card, both layers distressed with the Paper Distresser.  And I topped it off with some simple Crinkle Ribbon (slightly grunged with a hint of Ground Espresso) and fine twine.


It was a bit of a nightmare trying to photograph my sparkling trees, hanging the tag in the ivy in strong wind, trying to catch the last rays of the afternoon sun.  But I hope you think it was worth it.


Thanks so much for stopping by today, and I'll see you again soon.

Alison x

Sunday, 16 August 2015

Summer but pastel…

Hello dear Friends,

It’s my turn to post today and I’m sharing an album I’ve made – pastel but most definitely summery, which fits in with the theme that we’re having over at Country View Challenges this month….

2015_CVCFloralAlbum53

Here are my steps:

2015_CVCFloralAlbum01a   2015_CVCFloralAlbum01b

2015_CVCFloralAlbum02   2015_CVCFloralAlbum03

2015_CVCFloralAlbum04    2015_CVCFloralAlbum05

2015_CVCFloralAlbum06a   2015_CVCFloralAlbum06b

2015_CVCFloralAlbum07   2015_CVCFloralAlbum08

2015_CVCFloralAlbum09   2015_CVCFloralAlbum10

2015_CVCFloralAlbum11   2015_CVCFloralAlbum12

2015_CVCFloralAlbum13  2015_CVCFloralAlbum14

2015_CVCFloralAlbum15   2015_CVCFloralAlbum16

2015_CVCFloralAlbum17   2015_CVCFloralAlbum18

2015_CVCFloralAlbum19   2015_CVCFloralAlbum20

2015_CVCFloralAlbum21   2015_CVCFloralAlbum22

2015_CVCFloralAlbum23   2015_CVCFloralAlbum24

2015_CVCFloralAlbum26   2015_CVCFloralAlbum27

2015_CVCFloralAlbum28   2015_CVCFloralAlbum29

2015_CVCFloralAlbum30   2015_CVCFloralAlbum31

2015_CVCFloralAlbum32   2015_CVCFloralAlbum33

2015_CVCFloralAlbum34   2015_CVCFloralAlbum35

2015_CVCFloralAlbum36   2015_CVCFloralAlbum37

2015_CVCFloralAlbum38   2015_CVCFloralAlbum39

2015_CVCFloralAlbum40   2015_CVCFloralAlbum41

2015_CVCFloralAlbum42   2015_CVCFloralAlbum43

2015_CVCFloralAlbum44

2015_CVCFloralAlbum472015_CVCFloralAlbum502015_CVCFloralAlbum512015_CVCFloralAlbum522015_CVCFloralAlbum54


2015_CVCFloralAlbum53

It maybe pastel in colour but it is, most definitely, a summery project.  Whatever photo’ you want to memoriate, an album is always a great way to portray them.

Have a great August,

Chris xxx