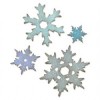
I'm sharing a project with you today both here and over on my blog at Bumblebees and Butterflies. It is a mixed media canvas with layered snowflakes that I created for the Craft Stamper magazine last year, the process steps for the canvas background can be found HERE and the steps for making the snowflakes are below.

Step
by Step
1.
Die
cut all the snowflakes from good quality card and seal them with a coat of
gesso. Emboss them all using the embossing folder that accompanies the layered
snowflake die.

2.
Take
each snowflake one at a time, spritz with water and dab on chosen colour of
paint, add a second colour whilst still wet and heat dry.

3.
Turn
your snowflake over, you will see the colours seeping underneath the edges and being
soaked up by the non-sealed card.

4.
Continue
to add layers of water and colours (and mix colours to create various
combinations), until you are happy with the results.

5.
On
some you could add more interest and lighten the snowflake by rubbing white
paint over it using your finger and keeping very little paint on it.

6.
On
others try adding transparent crackle glaze or gloss varnish, then white or black
antiquing cream and rub the excess off with a damp cloth and finish with some
gems given a quick coat of gesso or paint.

To finish seal the
snowflakes with a coat of ultra matte or gloss varnish, stack some of them
together and perhaps adhere some glitter. Add them to your Fragile Winter mixed
media canvas where the process steps can be found at Bumblebees and Butterflies.
Have fun with your Christmas crafting.
hugs Brenda xxx
Products