Showing posts with label Stampers Anonymous. Show all posts

Friday, 17 May 2019

Blended background using acrylic paints

I love my DecoArt Media Fluid Acrylic paints and I have blended them for this journal panel using blending tool and foam.


I took quinacridone violet, cobalt teal hue and transparent yellow oxide which are all DecoArt Media transparent colours and translucent white which is semi transparent and blended them over a textured gesso background blending with a blending tool and blending foam and rubbing back with dry kitchen paper. When I was happy with the pale colours I then sanded lightly over the surface to reveal some of the white of the gesso below. Using ground espresso distress ink I blended around the edges of the card to give it a more vintage appeal and rubbed a little in the centre too wiping it back with a damp cloth.


These gorgeous transparent butterflies are from Tim Holtz. They are shiny and because I wanted it matte I painted a coat of DecoArt matte medium over it which dulled it down beautifully. I love how the background and particularly the text shows through.


I die-cut some wildflowers and used one of the photobooth vintage photos in my collage along with some bits and pieces I collect to use for putting my collages together. I also love adding natural elements to them.


The quoteid from one of Tim's sets of stamps called 'Nature's Wonder'.
I shall now add this to my 'Nature' journal I am slowly filling up.


hugs Brenda xxx


Available from the shop


Wednesday, 8 February 2017

Shabby Wishes

Hello! and welcome to my first make for this month which is a ... sort of ... Valentine's card!


I wanted to make something a little different in terms of colour and elements - so no red, black or hearts!


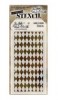
I started with a piece of good quality cardstock as I wanted to dampen it down a bit with gesso and didn't want the paper to disintegrate in the process! Once the gesso had dried I added some crackle paste through a harlequin stencil.


I found all of these items in my bits and pieces box cut for other projects and not used but I did seem to have used the same ink (Vintage Photo Distress Ink ) on them so they did co-ordinate!


I died some ribbon using Vintage Photo but made it really dark as a contrast to the other embellishments.


I layered my background onto some cream cardstock and then a card cut from kraft card. I was annoyed with myself as I had intended to wrap the ribbon around the background paper before sticking it down! so in the end had to resort to cutting a piece and laying it across the doily! 


I then layered more pieces over the top, not using any foam pads but just glueing a small piece of the element which makes it look as thought the piece is floating.


Finally I added the flower, leaf and ribbon and adhered the handwritten word where it touched!


Although I have not used any foam pads there is still quite a good layered finish.

As always thank you for joining me today and I hope you find time for some crafting fun.

Jennie x


Wednesday, 18 January 2017

Forever

Hello and welcome to my second project this month which utilises a few scrap pieces!


It all started when I squeezed out rather too much Nougat Fresco Paint and was looking around for something to paint to use it up when I spied a couple of experimental pieces lying in the scraps box. I would imagine I have used a combination of Seedless Preserves and Picked Raspberry Distress Ink for these inky layers with a stencil but way too bright for me! 


But look at the lovely hues when they are covered with Nougat Fresco Paint - fabulous and much more me!


I added a couple of strips of tissue tape and some very light stamping with Hickory Smoke Distress Ink.


Then a little contrast stamping with Black Archival ink. 


I decided not to introduce any further colours so hunted through the scraps box again and found this stamped butterfly .....


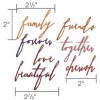
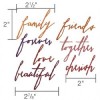
.... and a die cut from one of Tim's handwritten words (always so handy for this kind of card!). Everything then got a bit of a splattering with some watered down gesso.


I then stuck everything on to a 6" x 3" card blank cut from some cream cardstock and edged with gold pen. 

I shall certainly be looking through my scraps box for more brightly coloured experimental pieces as the coating of paint really makes for a lovely muted background.

Thank you for joining me today and have a great week!

Jennie x

Live The Dream


Thursday, 22 December 2016

Special Delivery!


Hello and welcome!
Jennie here today sharing my second project this month.


I decided to go back to basics for a quick Christmas card again using some non-Christmas stamps.


I started with a piece of cream cardstock and stamped it with the Tim Holtz Mesh stamp using Antique Linen Distress Ink.


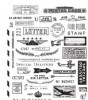
I then overstamped with my absolute favourite stamps. I have used Vintage Photo Distress Ink but stamped off onto a piece of paper first so the stamping is not too dark.


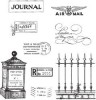
I decided on a couple of simple embellishments. The letter box was fussy cut and layered up with foam pads. The holly leaves were dabbed with Peeled Paint Distress Ink. All very basic!


I then layered everything up onto a card base and added a couple of small flowers. Finally I worked some Stickles on the postbox, flowers and holly leaves to add a bit of dimension and a Christmassy feel.


A fairly quick and simple card but which was much appreciated by the person who received it.

Thank you for joining me today and I'll take this opportunity of wishing you all a happy and peaceful Christmas.

Jennie x