Showing posts with label journal page. Show all posts

Friday, 12 July 2019

Altered book pages for journalling

A friend had some books in her car ready for the charity shop the other day and one was A Country Diary birthday book, certainly not old at all but the illustrations are all of flowers and are hand painted prints so I decided to take it off her hands and have a play at using some of the gorgeous flower designs in some journal pages.
This is the first one stuck into my nature journal.

       
To age the illustration I stamped with some text and gave it a light coat of watery gesso and distressed the torn edges.


I painted some of the Tim Holtz wildflower stems .....


.... and drew round one of Tim's transparent butterflies on watercolour paper, dipped it in some pinky paint washes, glued them together then covered the surface with glue to make it matte. I also added a Tim Holtz crochet die border and a quote.


Altering book pages is a great way to get an initial start to a journal page and then add your embellishments to add more interest and finish it off with a good quote.

I hope you enjoy trying your own pages like this.

Thanks for stopping by.

hugs Brenda xx

Supplies from Country View Crafts
Tim Holtz wildflowers die and crochet die
Tim Holtz stamps Nature's Wonder
Tim Holtz Transparent acetate wings

Monday, 11 March 2019

Vintage journal pages and new Alison Bomber stamps

Hi it's Brenda here today and I'm sharing some vintage journal pages created so that I could specifically use the fabulous new stamps from Alison Bomber. I love using quotes on journal pages and Alison has quite a few sets of different themes - the ones I chose are the new 'Friendship' set - EAB10 from PaperArtsy.


The quotes are varied and beautiful. These were stamped onto media paper and chopped up; I inked the edges with ground espresso distress ink before adhering them to the page.


I started with a layer of white gesso covering the page before adding some collage papers. I then added scrapes of black gesso and more white gesso.


Some subtle stamping creates a little more interest as does some small die-cuts and a couple of tickets.


I finished off with the paper dolls with some cheesecloth and of course the important words that give the pages meaning and a story.


There are some more photos of the process steps over at Bumblebees and Butterflies if you'd like to have a go at something similar.

I'll be back next week to show you photos and the project from my workshop last Saturday held at the Country View headquarters.

Happy crafting.

hugs Brenda xxx

Wednesday, 21 March 2018

Find the beauty ......

I have a little journal panel to share with you today made entirely with DecoArt paints and mediums and some of the brand new Aall & Create stamps.


The background was made by laying down some gesso applied on the back of a palette knife and left to dry before adding in some colours - primary cyan, cerulean blue, titan buff, raw umber and burnt umber, taking time to add some dips of watery washes of these colours and finishing with a brayer and titanium white to bring some brightness back. 


The stamp set has 11 stamps in it, so there's plenty to help make up a composition with the brush which has written around it -
Art washes away from the soul the dust of everyday life.
The stamp above says - Creativity takes courage.


The little arrow and dots make a nice fill in piece and the circles make up a great border.


I love using text so I added some very light random stampings of one of my own small stamps.


I used the quotestamp on paper so that it stood out more and shaded round it after I had finished and sealed it all with matte medium.


To get the finished look I splattered some raw umber and white paint and dried it and took my white posca pen to add some small dots in the circles and a black one to add some squiggly border additions. I sanded the edges and blended in ground espresso distress ink.


Thanks for stopping by.

hugs Brenda xxx

Friday, 18 November 2016

A little secret

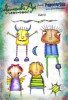
I am really embracing these new Elenazinski stamps and chose to make a journal page with a secret!
In a black journal I started by brayering the page white and also brayering both sides of a piece of black card. I scored a bend about 1cm from the top of the piece of card.
I then added blue and yellow paint (remembering to dry each colour first) to the journal page and both sides of the piece of card. Adhere the card to page. Don't worry about trying to match up the paint so far - that comes next!
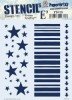
Then I added black painted stars through a stencil. When dry, open the flap you've created with the piece of card, reposition the stencil and stencil the areas under the flap.
When all is dry add borders to the stars using a white pen.
If you look carefully at the figures there are little lines that extend past the drawing. To save cutting all those little details out I stamped the figures onto my page meaning I only had to cut out the solid sections - much easier!
Colour the images in - as they are monsters let your imagination run wild! As my background is very strong I coloured my monsters pretty simply so they'd stand out. Adhere the solid areas to the journal page. I drew over the black lines of the stamps that I used for the clouds, for the monsters to stand on and the legs and eye stalks of the monsters.
And now for the secret...! Under the flap...
I love the secret but I am so proud of the pattern matching under the flap!
Thank you, as always, for popping by


Friday, 4 November 2016

Just remember...

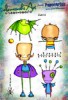
I have fallen in love with the new Elenazinski stamps from PaperArtsy. I love the quirky characters and that you can colour them however you like and add and remove elements to constantly change them. More of that over the next couple of months! I realise that these characters might not be your cup of tea but hopefully, by showing you how I made this page, you can see how you might be able to use them in your art. The current challenge over at Country View Crafts Challenges is Stars so I could enter this if I was allowed!!!
In a black paged journal I started by brayering a layer of white paint, a layer of pink paint and a layer of blue paint - drying in between.
Next I stencilled some stars on the page in white paint, repositioning the stencil as I went along.
I didn't want a full page of stars so left some areas blank to add interest:
Then I stamped the characters I wanted to use on some white card. I used white because I wanted the eyeballs to remain white when I'd coloured the figures in.
If you look carefully at the figures there are little lines that extend past the drawing. To save cutting all those little details out I stamped the figures onto my page meaning I only had to cut out the solid sections - much easier!
The next bit is fun because you can now choose the colours you're going to use. Will you stick to a few colours to keep it harmonious or will you go bonkers and chose clashing colours? All will work!
The final step is to cut the figures out and adhere them to your journal page. I added some torn sections from an old book to 'ground' the figures - it almost looks like they're on clouds amongst the stars doesn't it?! A spider, a few dots of white paint or pen and some black lines and you're finished!
Thank you, as always for popping by,


Thursday, 20 October 2016

Going crazy with colour.....

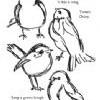
Scribbly Birds Journal - Dylusions Paint
Hi everyone and welcome to my final project for the CVC project blog. I am leaving the team at the end of October after two great years! 

So for my final project I have gone a little crazy with colour in my journal using a combination of Dylusions and Dina Wakley paints. The background was created by painting in patches with a combination of a brush and my fingers - no great plan... just adding the blue / yellow / green in various places. 
I then added some white paint with a credit card and also through a layering stencil (Splotches.) I also added some background stamping in archival ink.
I die cut some scribbles and splats in white card and sponged some  of the same colours on them adding a little black archival to contrast.
I took a piece of thinner white card and lightly brushed with purple and blue paints - intentionally keeping it light and patchy. Once dry and stamped the scribbly birds and fussy cut.
Scribbly Birds Journal - Dylusions Paint
A quote and some doodling around the page edges finished my page!

I hope you like it!
Nikki