Showing posts with label paper dolls. Show all posts

Monday, 22 April 2019

Using Tim Holtz Bookboard Frame and Paper Dolls

Hi it's Brenda with you again today with a board I created during a crafting Skype session with some friends. I love the Tim Holtz frames and paper dolls and they suited the project I ended up making.


There were lots of steps to get to the finish line and each of us chose the next step in turn.


I also used mostly decoart products both paints and mediums. They are my favourite go to things to use when I sit down to make something.


You'll see I also incorporated some of Tim's quote chips. They are so easy to use on bigger projects like this.


I used several metal embellishments that had in my supplies and added some Tim ribbon too.


I found the dress form die-cut was hiding in a box, it is an die also from Tim. I used DecoArt texture sand paste on it before adding some acrylic paints.


|At the end I felt the overall design didn't quite balance so I added a little tissue tape and remnant rubs (the stars) to achieve the composition I desired.


I was so happy with the final results. I hope you like it too.


Thanks for stopping by.

hugs Brenda xxx

Saturday, 14 October 2017

Be Original


Well Trace here today , with another distress oxide and paperdoll creation...full of inky yumminess! So here is the card and all the details follow below:


If you are not able to get the paperdolls , you could still create something similar using a found relatives image cut out or a stamped image in its place...but they are gorgeous things to play with!

I have used many collage items, some dyed seam binding, idea-ology and some of the new Tim Holtz tape...


To create the background I applied broken china, cracked pistachio and vintage photo distress oxide inks onto the craft sheet, I spritzed plenty of water and swiped the card through the inky droplets... heat dry and then re dip and continue to dip and dry until you are happy.


I then applied some distress oxide ink ( vintage photo ) through one of my favourite stencils lattice stencil 019 - in the corners of the card front.


I edged the card in vintage photo distress ink using a mini blending tool.


To create the layered collage piece I placed some of the new snippets together and glued them into place ...having scuffed and inked the edges.


to complete the overall look, I applied some broken china distress oxide ink onto a craft sheet, spritzed with water and then dabbed in the collage pieces to pick up some of the gorgeous blue ink.


below shows the details of the finished card and shows where the collaged pieces have picked up the blue ink..

doing this with the oxide inks helps to tie all those pieces together.. and the oxides have such a gorgeous finish ..


To complete the piece I added some flowers cut using the new thinlits dies - small tattered florals from Tim Holtz, and I cut these from a piece of card coloured using distress oxides ink..

I added some of the gorgeous film strip from idea-ology , adhering using mini attacher staples..I added a paper doll, sanded lightly and inked around the edges with vintage photo distress ink..I also added some rub ons to add more layers of detail


I added more of these tiny flowers and a quote chip- these are fab as they create such great dimension


To the side of the card I added some dyed seam binding, dyed using broken china distress ink..


To give the paper doll dimension I added some foam tape behind the girl and added here on using this 


So there you have my inky and idea-ology filled card...


hope you like it!
trace x

Friday, 4 August 2017

Mixing the old with the new

Hello it's Jane from Jane's Journal here today sharing some of my newest Tim Holtz buys. I am super excited that in September I will be attending his workshop and will be  playing more with his Distress oxides but for my post today I wanted to share a vintage tag I made using his Distress Oxides and the fab paper dolls , mixing them with some of my older products in my stash, particularly Tim's layering stencils .


If you would like to see the inspiration for my tag today I have linked my own blog post up here sharing a day in London seeing the "old" and the "new" in my favourite city in the world. You will see lots of photos of a sunny day out. I make "Moments" for my physical Jane's Journal to remember special occasions in my life. Sometimes I make art journal moments, sometimes I make tags. It was our wedding anniversary and we celebrated over lunch in the Fenchurch restaurant of the Walkie Talkie building. For this "Moment" I decided to make a tag.

I have provided links to the shop in my post and if any of the products I am sharing are out of stock do fill in the email request and Susan will email you as soon as they are back in stock.
I took a size 8 tag (I cut my own with the Framelits set here ) and made a background using the wrinkle free technique and 3 oxides; fired brick spiced marmalade and broken china and as these were the predominant colours I saw on our sunny day out. I kept the blue at the top to represent the blue sky we looked out to from our table.


I stencilled in some sunny rays using the rays stencil and fossalized amber oxide to represent the sunshine streaming in that day.


I used some of Tim's older stamps to stamp a random love letter background using sepia archival ink.  This is to celebrate our anniversary and 36 years of love and fun...yes I married my soul mate and I know I am very lucky.

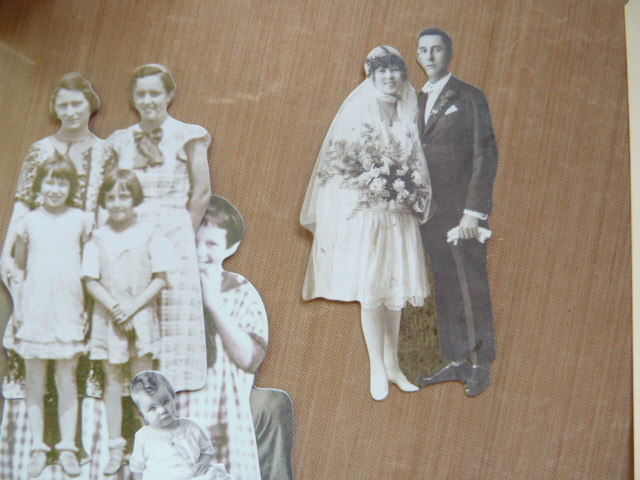
 I also wanted to use one of the great paper dolls. As I looked through the pack I found a vintage bride and groom and I thought it was perfect for my old and new tag

I  die cut an old Sizzix house, bought from the year round CVC sale page (you can find lots of bargains here all year, there are lots of Tim products there too)  a while back and snipped off the bits I didn't need and used some snippets of paper from my stash and a piece of tissue tape to anchor everything together as a mini collage.

I also used the mini heart stencil from set 6 and added some more fired brick oxide to leave "lots of love" on the brides dress and at points on the tag.

 I also added some remnant rubs from the life quotes  set. I thought this saying was perfect.

I finished off with some words from the Ideaology small talk pad and a little red heart from my stash.

Here is my finished tag.
and a few close ups. I love using the Oxides through stencils, they layer up perfectly. 


I really am enjoying playing with the oxides and mixing the old with the new.

A little heads up...Susan is expecting the new colours of Distress Oxides in very soon...I have some on pre-order and cannot wait to play with those too.  Remember that for the UK your orders are also  posted free. These inks really are a game changer in my books, I love crafting with them.

Thanks for stopping by,

Bye for now,

Jane x

Thursday, 16 March 2017

Make A Wish

Well Trace here, like many Tim Holtz fans the distress oxide inks are featuring in my stolen moments of playtime and todays make is using them ...and I am in love with these gorgeous inks , although,  limited time to play means I feel I have only scratched the surface of what they can do ...

So when all my ideology goodies arrived from the lovely Susan ... including my eagerly awaited paper dolls, and boy I was not disappointed they are gorgeous!!  I found  a few stolen moments to play..and here are the results :


I created this card using a distress oxide background and then added some flowers from the new botanical paperie - which is crammed full of gorgeous elements to add to cards and or mixed media, collage and just so many to choose..and of course a paper doll - there are 107 to choose from in all sorts of sizes and they're all gorgeous ...
I also used some of the new tape and one of the quote chips...so here is how ...

In my previous card found here I applied the distress oxides to the craft sheet , but for this card I applied onto the card ( as with regular distress ) using mini blending tools. I then spritzed with lots of water , using the distress spritzer gives you the combination of fine mist and bigger droplets..and heated.


To intensify the colours I re-applied ink over the top and the distress oxides allow for colours to layer over darker colours - truly amazing...and more water makes even more magic happen.. You can carry on until happy with the background .

the colours I used are : spiced marmalade, wilted violet, broken china and vintage photo.


 Now for even more distress magic, because like regular distress they react with water , I placed  down my flourish stencil (032) and then applied water using a blending tool through parts of the stencil using a moist piece of blending foam on the tool


see how it magically removes the water through the stencil leaving a soft impression on the design- I then heat set this .


  I added some design tape from the aristocrat set in the corners for added detail....


  I then added some matte texture paste through the flourish stencil on the corners and left to dry.


  Now it is all about those added details ...I sanded the edges of my paper doll and added a touch of distress (ground espresso - regular distress) I also cut a flower image in half, sanded and inked.


and here is the finished card ...


Here you can see the texture light sanding gives and it allows ink to be easily added around the edges.


 I added some seam binding - which I dyed with regular distress in wilted violet 


And look at the wonderful dimension the quote chip adds - I sanded mine and added a touch of ink.


So there you have my make ...using lots of new goodies and some stolen playtime...
hope you like it ..and I will be back as and when playtime allows .

trace x