Monday 30 December 2013

A little black dress…

Yes, 24 hours to go before a lot of us will be swanning off to New Year’s Eve parties so what better than a little black dress? lol
I started with a manila tag, stained the edges and added a tag from my ephemera box…


I made some word plates, aligning each word to the right so that I could attach to the left with brads…


Then I set about making the embellishments. If you have ever bought Bonios take a look inside the box at the textured effect of the card (it’s lovely thick card, too)…


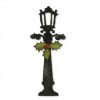
It provides a lovely wood effect for the dress forms so I used it to cut one and then set about making a dress from black card covered with sparkly mesh ribbon. I cut a Spellbinders Christmas tree from inked book paper thickened with card…


I mounted the embellishments and added a small Christmas stamp over the tag before cutting and adding 2 gold jingle bells, one from gold mirri card and 1 from gold canvas textured card, overlaid and stuck with a red bow to finish them. Then I added some soft, thin cotton thread through the label loop…


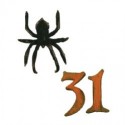
Finally, as the tag is in recognition of New Year’s Eve, I cut and added a black card ‘31’ using Halloween movers & shapers…


Here’s the finished tag…


Goodbye 2013, we’re looking forward to 2014 and all the crafting we can cram in!!

Happy New Year everyone!

Chris xxx

Saturday 28 December 2013

Family heirlooms - hanging frame

I'm taking a day out from seasonal makes and doing something quite different today....

This is a hanging frame which is so adaptable to make that anyone can make it from what they have in their cupboards. It is simple, quick, effective and makes a lovely little gift too!


You can use any of your Grand Nesties for this or, if you don't have any, just cut two squares, ovals or rectangles out of card - the smaller has to be marginally larger than the frame you use. (Cut the larger (base) out of plain card and the smaller from a patterned or script card of contrasting colours to the embossing powders you're going to use.) Next choose your frame shape and cut that out - this one is a Thinlits design, Ornate oval frame by Jen Long-Philipsen at just £9.99!

Choose two Distressed embossing powders to use, one light and one darker (I used Antique linen and Weathered wood). Apply embossing ink to the larger card shape then sprinkle the light powder in patches here and there over it. Don't use too much because you can't remove the excess because the whole card base is inked. Next, fill in the gaps with the darker embossing powder - again, using sparingly. You can always add more later but you can't remove it. Ink and cover the frame with the darker embossing powder. Heat the base and frame and you can add more of the lighter powder to the base at this stage if you want to.

To get the shabby molten gold look around the edges use pva glue to the edges and cover with gold UTEE (a regular gold embossing powder is fine and if you're making a gift for Christmas or a wedding you might want to use a sparkling powder) then heat. You will see the glue bubbles as it gets hot so make sure that you keep fingers well away from the part you're heating.


Place your photo' behind the frame and layer up:


You can add flowers, cogs and gears, or any other type of decoration you like to add interest to the frame. As you can see I used flowers tied with American seam binding which I also glued to the back to make the hanger.

I hope this gives you some ideas for hanging photo frames and they make lovely gifts for grandchildren to their grandparents.

Enjoy your holiday break and thanks for stopping by,

Chris xxx


Wednesday 25 December 2013

Merry Christmas Luminary

MERRY CHRISTMAS EVERYONE


Christmas is most truly Christmas when we celebrate it by giving the light of love to those who need it most.
Ruth Carter Stapleton

I had fun with some Tim Holtz dies and his Merriment papers to create my Christmas Lantern.
Using Tim's Frosted film and one of the transfer techniques that can be found out on the internet, cut some Merriment paper slightly larger than the window of the lantern and stick the right side down on the film, using a lolly stick to make sure it is fully adhered.

Mist the back of the paper to dampen it ............

........ and with your finger gently rub the paper away, misting again if you need to. Eventually you will rub away all the paper leaving a translucent window with the image transferred to it.

Next I used my sticker maker to add glue to the back of the window and adhere it to acetate packaging to give it some substance.

I folded the sides of the lantern as shown on the die packaging and added red-line tape on the tabs and the edges of the inside or each window ready to take the 'stained glass' effects.

I started to put the lantern together.
I covered the lantern with picket fence crackle paint and when it was dry blended some frayed burlap distress ink to the edges, then placed the windows into each space.
The following photos show the lantern made up. This photo shows how the little battery operated candle inside provides a gorgeous glow of warm light.

The rest of the photos have been taken in daylight.
The Caroler and lampost were cut from black shrink plastic and when cool given coats of distress paints using Tim's altered surface technique. The dabber made the white 'frills' on her dress, which I love, such a happy accident.

It was really difficult to shrink the lampost, it kept curling and sticking to itself. I think this one was number four.


Wishing you all a day filled with fun and laughter and time with special people in your life.

hugs {brenda x0x

"Christmas is a day of meaning and traditions, a special day spent in the warm circle of family and friends."
Margaret Thatcher