Monday 30 June 2014

A shabby 21st tag

Ever had a case of the pinks rather than the blues? lol 

Today is definite a 'girlie' day, with this pink and purple shabby tag to celebrate a 21st birthday...

Shabby21st14

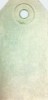
Starting with a manilla tag and some of these GORGEOUS Dylusions inks, I used Tim's wrinkle free distress method to cover it and then plenty of water splats using a pipette:
Shabby21st01 Shabby21st02

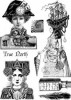
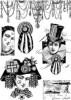
Some white Gesso sponged over and left to dry before stamping with black archival ink:
Shabby21st05 Shabby21st08

A snip of cream American seam binding and a piece of cane have been stained with the inks too:
Shabby21st06 Shabby21st07

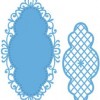
I cut silver mirri card elements with dies and used a metal pattern wheel around the outside to add texture. Black acrylic paint (DP) was rubbed on and wiped off to give a grunged effect and highlights the texture itself. I added a little bow from chiffon shoestring ribbon:
Shabby21st11 Shabby21st12

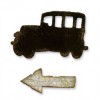
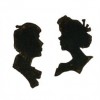
More die cuts - some from cardboard and some from ordinary card - and some 'Typeset' numbers. Each has been edged with black DI or Treasure gold. Finally, lay out all the elements to the tag and glue:
Shabby21st09 Shabby21st13

Top:
Shabby21st15

Bottom:
Shabby21st16

Complete:
Shabby21st14

Tag art has to be one of my favourite genres at the moment, so much fun.

Another project in a few days, this time from Amanda.

Chris xxx

Friday 27 June 2014

Friends for life

A fortnight ago I made a male themed journal page - I thought I'd be fair and make one for the girls! I love the hashtag stamps that Tim Holtz released a few months ago and one jumped out at me and inspired this page! I started by scraping thin layers of yellow and orange paint on to a page with a palette knife. I added a little white to some areas to create a little more interest. You really only need to use thin layers as the paint quickly begins to build up and make interesting areas in the background. On this occasion I covered most of it up but you can make a feature of these happy accidents!
I stamped the background stamp onto the top of the page and at the bottom. I then stamped three bodies and three heads on to some tissue paper. I painted the reverse of each of the images so you get the colour but don't obscure the stamping. I used blue as an accent as it 'pops' off the page against the yellow/orange.
I placed my figures on that page and worked out where I wanted to stamp my feet (from a PaperArtsy set Dolls 4 - I am sure if you ask Susan nicely she'll order it for you!) Then I added my figures using Multi Matte Medium. Once it was all dry I added the white dots to the bottom of the page and the stamped banner. I hope you like my girls' page!

Monday 23 June 2014

Kraft and White


Hi Everyone! I am sharing a card with you today made in (mainly) kraft and white card and papers - a favourite combination of mine and using some of my Marianne Design dies, which I haven't used in a while.

You can't beat a bit of fancy cutting and folding to create a centre fold card with a bit of a wow factor and there is a great tutorial HERE at Split Coast Stampers for a centre step card and the one I used to create this 14 cm x 14 cm card.


Once you have made your card base (I made mine in kraft card stock) it is then a matter of making four panels (two on the front and the two side panels).  I used some Grunge Paste through a mask to create some texture.  I used a text mask but any small pattern would be very effective.


I then used Marianne Designs dies to create the lower part of the collage, cutting some in white and some kraft.  I love these dies as they layer so well, however, they are a little difficult to die cut being so decorative. The trick is to layer some wax paper between the die and your paper and it just pops out quite cleanly and it is easier to poke any remaining pieces with a tool.  Wax paper is available in the shop and comes in a great long roll so no worries about getting through it quickly.

I layered my die cuts over a small tag I cut from some left over papers and a bit of thread - quite simple but it just adds another layer of interest.


To complete the collage I layered some of my handmade flowers using the Tattered Florals die (there is a tutorial on my blog HERE) and also some rolled roses for the side panels (another tutorial HERE) inking the edges instead of distressing them. A little spray of leaves from Tim's Spring Greenery die just finishes these two side panels.

Final additions included a few punched butterflies and a couple of stick pins and - well that was it really. All in all quite a quick card to put together as the colour palette was limited and the centre fold panel is a smaller area to decorate.

Thank you for joining me today!

Jennie x