Hello Everyone and and welcome to my second project this month.
A couple of weeks ago I travelled to New York with two friends which was for me a dream come true!
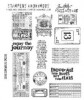
Before I went I decided to make three small travel wallets so that we could each keep all those little tickets you manage to collect whilst travelling. And here they are!
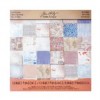
I have used various stamps and stencils but in particular the fabulous new Tim Holtz Correspondence Paper Stack. There are so many wonderful elements which you can cut for embellishments and all in these lovely bright reds and blues.
I started with some cream cardstock measuring 8 1/4" x 5 1/2". I made a score line at 4 1/8" so it folded in half and then trimmed 3/4" off the front. I covered the two uppermost sides with paper from the Correspondence Paper Stack.
I drew the outline of a couple of file tabs and then cut off the excess cardstock.
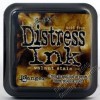
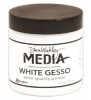
I wanted a more muted tone for the stencilling, so everything got a coat of gesso and of course a little Walnut Stain blended around the edges. (My apologies for the scissors which appear in each of the photographs - the cardstock would not stay folded for a photograph!)
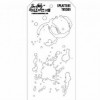
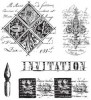
When the gesso was dry I used the Splatters Layering Stencil and Walnut Stain Distress Ink to shabby the wallet up a little and then overstamped with a couple of stamps, again in Walnut Stain Distress Ink.
Don't forget to stamp and stencil on the back!
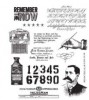
I used some good sticky red tape to close the wallet down each side and then went through the Correspondence Paper Stack cutting out envelopes and labels and anything which caught my eye! All the elements were edged with Walnut Stain Distress Ink.
I used some Idea-ology Label Letters to personalise these wallets for New York. Each wallet is slightly different so we won't get them muddled up!
And finally I stamped the Blueprint Statue of Liberty onto some of the Correspondence paper to again personalise the wallet for our trip.
The wallets are quite small and will probably not hold very much, but I wanted something to take with me as a gift for my friends but which would be small and light and leave as much room as possible in our cases for our purchases which we would no doubt be making!
Thank you for joining me today and I hope this may have given you some ideas for wallets for tickets, but also as a money gift wallet or even a small memory book.
Jennie x


