Saturday 28 February 2015

#together

Hello! Two friends have decided to move in together and so I have made them something to commemorate this momentus occasion! I started by inking an mdf plaque with Broken China Distress  Stain. I added a few coats as it tends to sink in to the substrate. Then I gave a it a quick sand and inked the edges with Gathered Twigs Distress Ink. I added a row of stars (an old Tim Holtz stamp) at the top of the plaque.
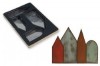
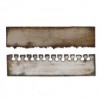
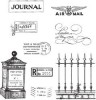
Then I die cut a house and inked it with Wild Honey Distress Stain. I stamped a ruler stamp on the house with Tree Branch Archival Ink. Then I die cut a few strips of book paper using a now discontinued die (I didn't realise that when I made this!) but you could use the Torn Notepaper die which work just as well.I inked the edges with Gathered Twigs Distress Ink. I then applied them by overlapping them so they look like tiles on a roof.
This is the roof once assembled.
As a base for the house to stand on I die cut a strip from the other side of the discontinued die (it would look just the same if you used the notepaper side of the die I mentioned above!) I then painted it white, sanded it and added Gathered Twigs Distress Ink. I then added a hashtag on a piece of card.
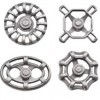
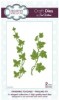
I liked the top of my Santa chunky ATC (sadly now put away in the garage for next year!) that I recreated the leaves and used a faucet knob. Simply cover two leaves in Peeled Paint Distress Stain, stamp the user stamp on top, poke a hole in each and attach the faucet to hold them together. Easy! The whole project was really great to make, though I now need to find an envelope to fit it in... maybe I'll consider that first next time! Thanks for popping by!


Thursday 26 February 2015

Tim Holtz Classics

Hello and good morning!

It’s a simple card today using a set of Tim Holtz Classics stamps that I bought in Susan’s fab, fab January sale!


The photo steps are below as are the products…


Have a great day and thanks for dropping by.

Chris xxx


Tuesday 24 February 2015

Quick cards for him and her

Good morning everyone. I needed to do some quick cards recently including one for a man so I thought I would share these with you today. They have the same basic layout - just use different colours and embellishments. I have used 2 stamp sets - Tim Holtz French Flight (with framelits) and Tim Holtz Simple Sayings and two layering stencils - harlequin and stripes.


For the female version I took Stormy Sky distress ink and added to white card through the harlequin stencil. I stamped my greeting from Simple sayings. I embellished this with butterflies from French Flight which I stamped with versamark and embossed with white powder. I then added some stormy sky to the rest of the card before using the accompanying framelits to cut out.


A little twine and some rhinestones finished this card.


For the male version I took some pale brown card and used gathered twigs distress ink through the stripes layering stencil. I stamped and cut the pointed hand from the same stamp set (French Flight). 


Some string and a few candy dots finished off the card.

I hope these give you some ideas when you need to make some quick cards.
Nikki