Thursday, 4 September 2014

A nautical theme…

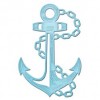
Our sister blog, Country View Challenges, has a fabulous theme this month of N'autical' so I thought I’d make a sea-faring card for you today to demonstrate the beautiful Spellbinders’ Anchor die as well as a few other items…

NauticalBlues09

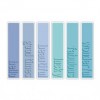
Starting with plain white card cut to the appropriate size, I misted it and sprayed two blue Dylusions inks onto it and moved the card around to blend them. I then used the TST Antique clock mask to water bleach the shape of it:
NauticalBlues01

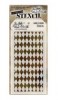
Then came the arrows layering stencil and Picket fence DP before edging with Black soot DI:
NauticalBlues02 NauticalBlues03

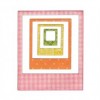
Mounted onto white and then black and added to the card blank, this was the picture canvas:
NauticalBlues04 NauticalBlues05

Words were stamped here and there with black archival ink:
NauticalBlues07

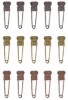
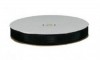
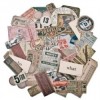
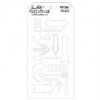
I used the same technique to colour another piece of card and then cut out the anchor using this gorgeous Spellbinders die. The anchor was mounted onto a globe from one of Tim's ephemera packs. The card was finished with a bow of black American seam binding with a charm pinned to it:
NauticalBlues06 NauticalBlues08

Top:
NauticalBlues10

Bottom:
NauticalBlues11

Complete:
NauticalBlues13

I find I'm creating more and more backgrounds myself, from scratch. Yes, of course it's lovely to reach for a paper stack and use it but few of us have designs covering every topic we want to craft about. Stencils, masks and stamps are so very versatile lending themselves to so many uses for various topics. When I bought the arrows stencil I had no idea it would end up being used for a nautical theme, lol.

I hope you enjoyed your visit, thanks for stopping by. There'll be another project on Saturday, from Amanda.

Have a great day!  >:o)

Chris xxx


Tuesday, 2 September 2014

One of a kind...

Today it’s a card for the guys...

OneOfAkind23

Starting with a card blank, a black base (mat) and white card to splodge the paints onto to make the background. I used PaperArtsy Fresco paints in Butternut, Haystack and Toffee:
OneOfAkind01 OneOfAkind17
OneOfAkind02

With splats here and there on my craft mat, I placed the card face down into it wiping it around and then misting it, re-mushing it here and there on the craft mat:
OneOfAkind03

Next I took a piece of kraft card and painted on some white Gesso, roughly the size of the stamps, but ensuring that there are gaps in the Gesso. The stamping was done using black archival ink:
OneOfAkind04 OneOfAkind05

To mount the stamped images I cut photo frames out with a die, framed the images and then added tissue tape. These were edged with Florentine flavoured Treasure Gold:
OneOfAkind06 OneOfAkind10

Once the background paint was dry it was out with the harlequin stencil and the Gesso again. Finally it was edged with Vintage photo DI:
OneOfAkind08 OneOfAkind09

Taking this ShadowPress folder and inking the inside letter outlines produced this effect. The word was torn from the card then stained and edged with the DI to give it an old, stained look:
OneOfAkind11 OneOfAkind13

Gold mirri card and this fab little Spellies D-Lites die added some pizazz and another layer for the stamps to be mounted on. The word was added vertically to change the focal point:
OneOfAkind14 OneOfAkind15

Tim, I love your 'Simple sayings' stamp set and reach for them over and over again - more please! Stamped with Black soot DI, cut with the die, then edged with the brown.... so easy!
OneOfAkind19 OneOfAkind20
OneOfAkind21

The first stamped image was just stuck down with tape but the second was mounted on foam to lift it:
OneOfAkind16 OneOfAkind22

Top left:
OneOfAkind24

Top right:
OneOfAkind25

Bottom left:
OneOfAkind26

Right side:
OneOfAkind28

Complete:
OneOfAkind29

You can use any set of stamps, stencils, dies and sentiments to make any number of variations of this card and make it your own.

Thanks for dropping in to look today, have a good one!

Chris xxx