Friday, 10 April 2015

Wonder and Promise

Good morning everyone, it's Brenda here with a mixed media project for you today.


Inspired by Tim's March tag I used his technique of adding gold embossing powder to texture paste applied through his lattice stencil. Before this I had spritzed the card with water adding distress stains and after the texture was added I spritzed again and smooshed with DecoArt yellow iron oxide media paint.


I had a pirece of card where I had been experimenting with Wendy Vecchi's reinker technique and the colours fitted perfectly, so I diecut it using the large ticket die and added some date stamping, a ledger stamp and some rings of brown archival ink.


This is the gorgeous layered dragonfly which was also spritzed with water and distress stains added to it  and to bring the gold in I 'painted' the veins with neat Treasure Gold.


After gathering some other elements and stick stamping promise onto the banner, I designed a mixed media collage which to me promises some warm lazy days near a pond or our local canal and perhaps a picnic with the grandchildren. We are very lucky to have a very large park which we call The Lodge near us which backs onto the Basingstoke Canal and is perfect for walks on a lovely summer day.


This has been added to my collage and mixed media album.

hugs Brenda xxx


Wednesday, 8 April 2015

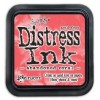
Abandoned Coral - I love you!

Hello everyone, Jennie here today with the first of my projects for this month. 

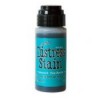
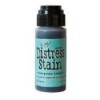
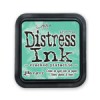
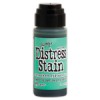
I wonder if like me you were a little overwhelmed by the ……. well "pink" of abandoned coral? I thought it would perhaps not be for me, but then I decided not to be beaten (!) and got out some cheap tags and started inking around with it. Quite by chance I decided to put it with Crushed Pistachio and BINGO !!! I am in love with it!


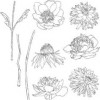
I love inking colours together using the Wrinkle Free Distress Technique - you can find this technique on Tim's video HERE. Basically it is about splurging your colour onto the craft mat, spritzing with water and lifting the colour from the mat onto in my case the tag. When I realised the colours were working well together, I used the wonderful cone flower stamp from the Flower Garden set and embossed it in white on the tag before inking.


I then overstamped here and there with a text stamp and with the Cracked Pistachio. I ended up with four or five tags with varying degrees of colour on them - I am afraid I got so carried away I forgot to take any photographs!


I decided to cut 2" x 2" squares from the tags and layer them on to a 5" x 7" card. The colours are so wonderfully vibrant I decided to keep everything as simple as possible just stamping a sentiment and outlining the squares and the card with a gold pen.

Gorgeous colour!

I now knew who was going to be the recipient of this card and thought a matching tag to go on the present would make a lovely set.


I coloured some seam binding with the Cracked Pistachio Distress Ink allowing plenty to wrap the small present I have in mind and used this lovely friendship sentiment.


It just goes to show that it is always worthwhile experimenting!

I think this might now be my (current!) favourite combination of Distress Inks.

Thank  you for joining me today and have fun with your inks!

Jennie x


Monday, 6 April 2015

April Flowers

Happy Easter and I hope you're having a lovely Easter Monday! It's a holiday day here in the UK - which is often used to get over all the chocolate consumed yesterday! I have used the Easter holidays to have a really good tidy in my Studio. I have found all sorts of things I haven't used in ages (and some never used - oops!) and I thought I'd use the Tim Holtz Artful Arrows die that I 'discovered' as they looked like leaves to me!
I started by covering an mdf plaque with paint:
 Then I used the 'bumping' technique I used here and sanded the plaque to make it a little distressed:
Then I added a painty border and highlighted the stripes with white pen:
I then adhered book paper (from a book rescued from a charity shop) to some Clearly for Art (which can be moulded when heated) but if you don't have any then used good quality card and gently roll the card in your fingers to get the same effect. 
Then I used a little Cut and Dry foam to paint the arrows. For one of the arrows to face the other direction I simply put the paper in my Big Shot the other way up!
Now I confess I got so into the project I forgot to take a photo of the flowers but I did take a photo of the next stage...! I used Glossy accents to adhere the whole project together and I don't have time to sit and wait for it to dry (tea needed to be made!) so I constructed a weight!
This is where my hanging now lives on my wall - my son took the photo so it's a little shaky!
Thank you, as always, for popping by!