Wednesday, 30 April 2014

Stamp ‘n’ stain card

I was looking to do something a little diffrent when I spied a roll of canvas and immediately thought of stamping and using my stains with it. Many of you will know that I love mixing vintage colours and techniques with more contemporary designs and that's what I've done here...

StampNstainCard10

I chose a flower stamp from the Paper Artsy Hot Picks 1109 set (but there are plenty of other florals to choose from in the shop). The canvas is from a roll which you can get at most good art shops. I used black archival ink to stamp the image then let it dry before going further:
StampNstainCard06

To stain the canvas I used 6 Distress stains - Bundled sage (leaves), Tumbled glass and Weathered wood (petals and buds), Scattered straw and Spiced Marmalade (stamen) and Antique linen (background). To stain the flower I used a medium fine water colour brush and you have to dry the canvas after painting on each colour otherwise the colours run together (the canvas will happily take the heat from the Ranger heat gun which is not as ferocious as a general craft heat gun). When the flower was coloured and dry I dabbed the Antique linen all over the background:
StampNstainCard03

I trimmed the canvas then frayed it before inking the edges with Rusty hinge DI. So far:
StampNstainCard04

Having prepared a base of kraft card, inked white card and coordinated blue striped backing paper, I layered them up and glued on the canvas with tape. I added some colour matched washii tape to the left and a floral faux postage stamp:
StampNstainCard05 StampNstainCard07

Die cutting came next - flowers, a flourish, little bird cage, butterfly and a wooden plant pot label from the garden centre:
StampNstainCard08 StampNstainCard09

Left:
StampNstainCard11

Right:
StampNstainCard12

All done:

You don't need canvas to use your stains as paints, ordinary cardstock is fine. If you haven;t tried this already why not get more use out of your stains and have a go?

Thanks for stopping by, more from our fab team in a few days!

Chris xxx


Monday, 28 April 2014

Sew nice

I have quite a few paper pads and I usually buy 12" x 12" ones so you can imagine how much space they all need. Some of these pads I've had going on 15 years and the reason I haven't used them is two-fold, I love to look at them so can't bear to use them and because sometimes the feature of the paper makes it a little too large to make a card. Well, this time I decided to use small dies to create embellishments to bring out the feature of the paper rather than the paper being the background...


I started off by cutting the 12" x 12" in such a way as to make the feature the main focus of the card. The edge of the paper has been inked using DI before I cut a slide mount frame using an old Spellies die to make another focus of the bird and then added some washii tape and lace:
SewNice01

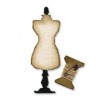
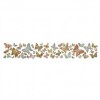
Using the same slide mount die, I used other parts of the paper to make coordinating bases for embellishments (although I ended up using just one extra). Tim's Movers and shapers dies are already ready to hand - dress form and spools. The larger butterflies were cut from Heartfelt Creations dies (but Tim's butterflies are equally as good) and the smaller ones are made from mini punches although you could use Tim's strip die:
SewNice04

Using the slide mounts:

Layering up - left:

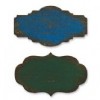
Another Movers and shapers die (label) was used to cut mount board and paper to make the sentiment:

The finished birthday card:

Have a great week everyone!

Chris xxx


Friday, 25 April 2014

Wallflower card 3 - Make a Wish

Hi Brenda here with card three in the Wallflower series and I just love the colours of this one, such subtle duck egg blues and greens.


This is more of a masculine card, no pretty flowers or butterflies today.


Another 6 x 6 from the one piece of 12 x 12 Wallflower paper stash ........


.... and a collection of elements that I started to build to make the design.


The heart and wings are from my own supplies and have been rusted using rusting powder.


A cash key and the letter K is significant as I know who is going to receive this as a birthday card in a couple of months time.


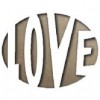
The word love was die-cut  after  using a spellbinders die to cut the label. I used another piece from the Wallflower pad.


I also used one of Tim's new frameworks dies - Courtyard - as a border but ended up covering most of it, you can just see it peeping through.


Have a wonderful weekend.

hugs Brenda xx