Wednesday, 26 August 2015

Tattered florals meets Wendy Vecchi

 Hi everyone, Nikki here from Addicted to Art. I was lucky enough to attend the Wendy Vecchi workshop in London a few weeks ago and felt inspired to create in her style. This was more difficult than I planned with a lack of her products - so this is very much a Tim Holtz products / Wendy Vecchi style tag!
I took a tag and distress inks in peeled paint and broken china. I covered my tag and then flicked water on it. Once dry I took my zig zag layering stencil to create the top and bottom border and then the flourish stencil to add some background to the central portion.

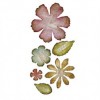
I cut my leaves from garden greens and trimmed to fit and also the tattered florals flowers. The leaves were painted with forest moss distress paint and randomly stamped with black archival.
For the flowers I was attempting Wendy's faux granite technique but only had clear, white and black embossing powder so it isn't really her technique at all! I coloured the grungepaper flowers with plum archival and clear embossing powder and heated. I added more ink and a mixture of clear with sprinkles of black embossing powder and heated again. Finally one more layer of clear. I stamped dots with ranger white pigment ink and let dry.
Finishing touches included adding black around the edges of my die cuts, a little faux stitching around the tag, some remnant rubs and some black seam binding.
Thanks for visiting today
Nikki


Monday, 24 August 2015

One of A Kind

Hello it's Brenda here bringing you a tag using a tutorial I did on my blog a little while ago using the Tim Holtz Microglaze as a resist. To find it and maybe try it out press here.


The original tag looked like this before and after the microglaze treatment. It was a mop up tag taken from a box of leftovers I keep...


... and here it has been blended with distress inks after the microglaze had been applied through a stencil.


Before I made up the tag I added some very light text stamping using walnut stain distress ink.


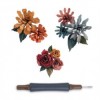
I gathered together the elements I thought would go with the design in my head ...


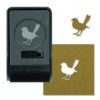
... but you will see I added a couple more when completing it. This is the tiny punched bird from Tim Holtz's range of new punches ....


... and this is one of the tiny tattered flowers.


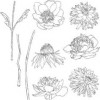
I painted and cut out the flower and stem using the flower garden set of stamps....


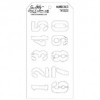
... and you can see the resist background, the number stencil worked really well.


Do you think I am moving to autumn mode already? Looks like it to me but I guess it won't be long.


Have a wonderful weekend and let us know if you try out the microglaze resist technique.

hugs Brenda xxx


Saturday, 22 August 2015

Be like the flower

I hate wasting paint! I try to only use tiny amounts of paint but occasionally I get over excited and squeeze too much out of the bottle and then am in a dilemma with what to do with the excess! So I add the excess to a spare page in a journal and eventually there's enough paint to make into a page!
So this is the background that I made over a few weeks and it was super bright! A bit too bright!
So I added a layer of white paint and then some arrows in the same pink paint. I wanted to keep the background muted so I sanded the page - this not only provides a smooth surface to stamp on but also softens any stencilling.
For the flower I used the rather fabulous new Lin Brown stamps but, knowing I wanted to use the sentiment I found on an internet quote site I knew the sunflower needed to have a face! I stamped a face on tissue paper, painted the reverse and then cut it to fit. It get the swirly leaf stamps to appear behind the stalk I stamped the stalk on a large post-it note (remember to stamp on the non sticky side but make sure you stamp some of the image on the edge that's sticky so it will stick to the page!), cut it out and then place it over the stalk while you stamp over the top - voila!
Thank you, as always for popping by!