Showing posts with label Multi Medium Matte. Show all posts

Thursday, 12 March 2015

Noble Gentlemen


Hello Everyone and welcome! Today I am sharing a small and very quick project using some of my favourite supplies.  I love ATCs - little works of art - which are just perfect for trying out some new techniques. They are great to swap with friends and can even be utilised on Birthday Cards or as Gift Tags.


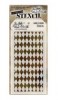
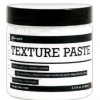
This was the background to my ATCs. I cut some light weight white board with the ATC die cut and blended Faded Jeans, Evergreen Bough and Dusty Concord Distress Inks here and there. Then I stamped the lovely corner blocks die from the Classics #15 set using Faded Jeans. I then used the Harlequin Layering Stencil to add some Crackle Texture. I like this Crackle Texture but the Ranger Texture Paste is just as wonderful. Then I left everything to dry.


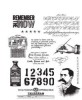
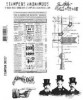
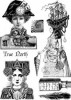
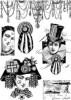
My lovely Gents were stamped on Tissue Paper with Black Arcival Ink. It is not possible to stamp directly over the Texture Paste but by stamping on the tissue you can blend this in and around all the bumps and lumps of the texture you have created.


Once stamped you need to tear very carefully around the shape. Now I find this quite difficult so I use a wet paintbrush to paint around the images which makes the tearing so much simple. A great tip I picked up on Pinterest!

I used Multi Media to adhere the tissue to the inked board, smoothing everything out with a clean paintbrush from the middle to the outside.


I love the way that you can "adjust" where the pieces go. I always think these two are too far apart so I tore the tissue between them and squiggled the chappie on the right in a bit!  Once everything was dry I finished the ATCs with some Remnant Rubs, being very careful with the rubbing over the stamped tissue.


The eagle eyed of you will know that this Gent is normally looking the other way. As the Arcival Ink stamps right through the tissue (and do please do this on a craft mat or piece of paper) I was able to use the reverse and so he looks a little different looking right and not left!

Thank you for joining me today and I hope you also have some fun creating ATCs with some new products and techniques.

Jennie x


Wednesday, 18 February 2015

Napkin Art


Hello Everyone, Jennie here today and I am sharing with you another page for my (Almost) Single Layer Big Ticket Die Book!


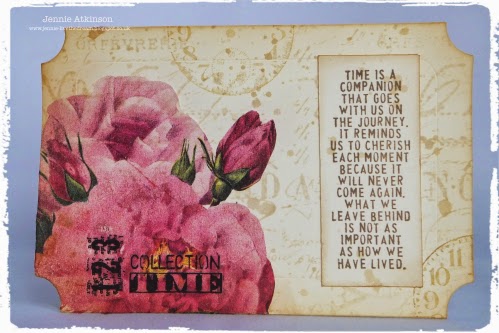
I started this page with a Big Ticket Die cut in cream cardstock and then overstamped with the Papillon background stamp in Antique Linen Distress Ink. (Ooops, the halo is the sun shining in the camera lens - but hey the sun WAS shining!!)

I overstamped with a clock stamp using Brushed Corduroy Distress Ink and added a few splatters of this colour too and also blended some Vintage Photo Distress Ink around the edges of the ticket.


I have collected rather a lot of napkins over the last few years and this is one of my favourites. I find it easier to cut around the napkin when it is in the three layers and the more expensive the napkins the easier it is. You can tear around the edge but I rather like the finish of the cut edge. I then peeled away the two white layers behind, coated the back of the napkin VERY carefully with Multi Medium (Matte) and carefully brushed it on to the ticket with a clean paintbrush. You can also add a little bit more Multi Medium around the edges if it is not sticking.


 I love this sentiment and did intend to stamp it directly onto the page for a single layer, but it looked lost with the busy background, so I ended up stamping it onto a piece of matching cream cardstock and using the same inks to age it in the same way.


When everything was dry I added a couple of Remant Rubs over the napkin.

So again an almost single layer! I think this would look lovely as a centre panel on a birthday card or for the front of a small note book.

Thank you for joining me today and I hope I have inspired you to use some of those napkins which lurk in dining room drawers!

Have a lovely day

Jennie x


Friday, 18 July 2014

Love Forever

I am thinking of redecorating our bedroom, well actually it'll be the first time we have decorated it since we moved in nearly 8 years ago!!! I want to make some simple art for the room but really didn't want to make something big without mocking it up first. This is sometimes called a maquette - though that makes it sound far grander than it is! This is a quick project that looks really effective - aren't they the best kind?!
I took a piece of styrofoam packaging and painted it with white paint to give it a 'key' and then, when dry, wrapped it in Tissue Wrap, gluing it down with Matte Medium. I love Tissue Wrap as it's incredibly versatile and can be used in so many ways. Tip: When using Matte Medium make sure you wash your brush out pretty sharpish after using it as it can harden on the bristles!
I added some Chit Chat words (edged in Vintage Photo Distress Ink) and a die cut grungeboard heart (covered in Fired Brick Distress Stain). I added a 'halo' around the heart with a charcoal pencil. When I come to make this in a full size I think I'll have to be brave and cut a large heart freehand from Grungeboard - eek! Do you make 'practice' pieces before you commit to the real thing? I'd love to see what you make!


Friday, 27 June 2014

Friends for life

A fortnight ago I made a male themed journal page - I thought I'd be fair and make one for the girls! I love the hashtag stamps that Tim Holtz released a few months ago and one jumped out at me and inspired this page! I started by scraping thin layers of yellow and orange paint on to a page with a palette knife. I added a little white to some areas to create a little more interest. You really only need to use thin layers as the paint quickly begins to build up and make interesting areas in the background. On this occasion I covered most of it up but you can make a feature of these happy accidents!
I stamped the background stamp onto the top of the page and at the bottom. I then stamped three bodies and three heads on to some tissue paper. I painted the reverse of each of the images so you get the colour but don't obscure the stamping. I used blue as an accent as it 'pops' off the page against the yellow/orange.
I placed my figures on that page and worked out where I wanted to stamp my feet (from a PaperArtsy set Dolls 4 - I am sure if you ask Susan nicely she'll order it for you!) Then I added my figures using Multi Matte Medium. Once it was all dry I added the white dots to the bottom of the page and the stamped banner. I hope you like my girls' page!