Hello all, it's Alison here with you from
Words and Pictures, and I've been playing with the Dina Wakley Scribbly Birds again.
(Did you see the smaller versions just released this CHA? Very sweet!)
I carefully took process photos at each stage but for some reason my camera didn't save them to the card, so they've vanished. A little worrying - if it's going to start doing that, I'll be constantly worrying that my photos are going to disappear on me... and I'm just going to have to fill you in on what I did without photographic evidence I'm afraid.
I've been playing in an old hardback book again, starting with reinforcing the pages with tissue tape and then giving the spread a coat of gesso.
The next photos are missing, but I added extra tissue tape scraps in random places, applied some Taupe Fresco paint with a credit card across the centre of the pages.
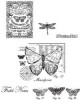
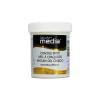
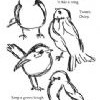
I stamped two of Dina's Scribbly Birds on some separate cardstock and used Fresco paints in a very loose, watery way to paint them. The colours are Chalk, Taupe and French Roast.
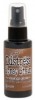
Later I added some Brown Shed and more French Roast for the beaks, and some extra detailing using pastel pencils.
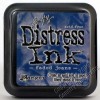
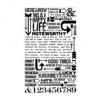
Even later than that, I stamped some vintage script in Pumice Stone Distress Ink around the shaded areas of their bellies for extra interest.
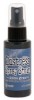
I used a blending tool to apply Stormy Sky Distress Ink across the sky, and spritzed and flicked it for extra texture. And in the end, I added some of the Pumice Stone script stamping in places too, to echo the detailing on the birds' bodies. The (not actual) credit card came out again to apply Snowflake paint across the pages. I also splattered some Vintage Photo Distress Spray just by unscrewing the cap and gently tapping the spray hose over the page.
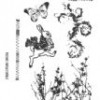
I tried the birds out on my pages, and decided each of them needed somewhere to "live", so I used the tree from Mini Holidays 3 (I've got the slightly larger version from Winter Sketchbook), turned on its side to create horizontal branches for the second bird to perch on. It's stamped in Sepia, but I used French Roast Fresco Paint both to tint the stamped lines and to colour the branches in.
And I stamped the wildflowers from Tim's Spring Sprung set (on sale at the moment, if you're quick) also in Sepia Archival in the other corner. Once I'd glued the birds in place, I used pastel and watercolour pencils to shade around them and embed them in to the page.
And the same pencils created a soft framing effect around the words.
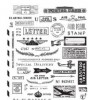
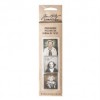
They are Idea-ology Small Talk stickers, of course - an absolute must-have around my way, where words are so important.
So, I hope you like my book page art journalling... I really enjoyed this one, and the Scribbly Birds are fast becoming favourites of mine.
Thanks so much for stopping by today. I'll be back with another project later in the month, and this time I hope the camera will cooperate and let me share some process photos with you. Until then, happy crafting, and I'll see you out there in Craftyblogland.
Alison x